RavenQuest – Leveling Guide for Beginners

Walkthrough Guide
Ву Yukina [Xplore].
Leveling up in RavenQuest is one of the most exciting parts of the journey, but it can also be a bit overwhelming when you’re just starting out.
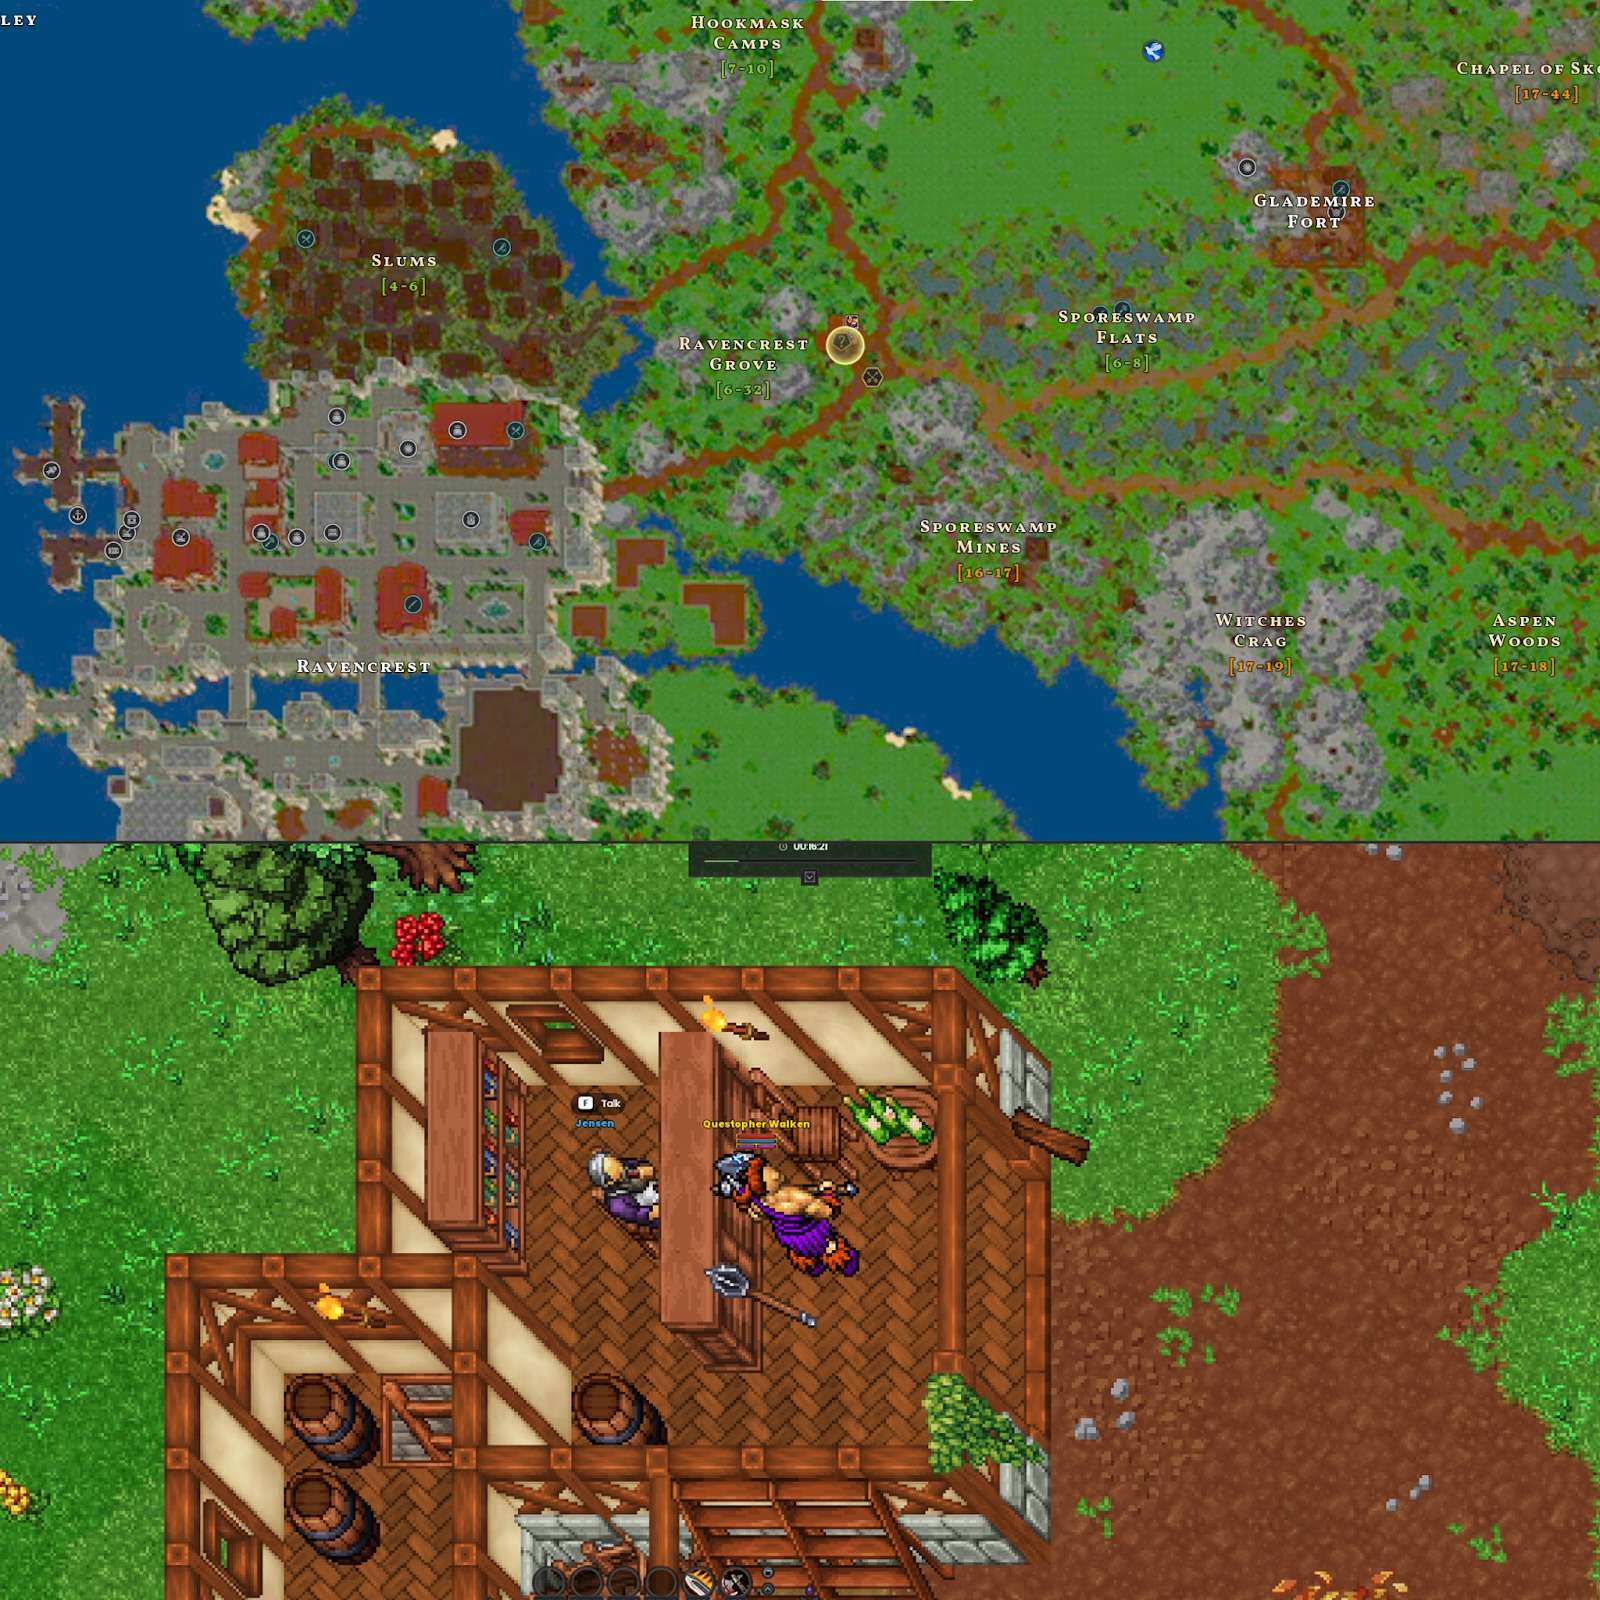
Quest 1: The City of Ravencrest
Talk with Jensen outside the city’s eastern gates.
Steps to Complete:
- Leave the city through the eastern gate.
- Follow the yellow circle indicator on your map to locate Jensen.
- Interact with Jensen to complete the quest.
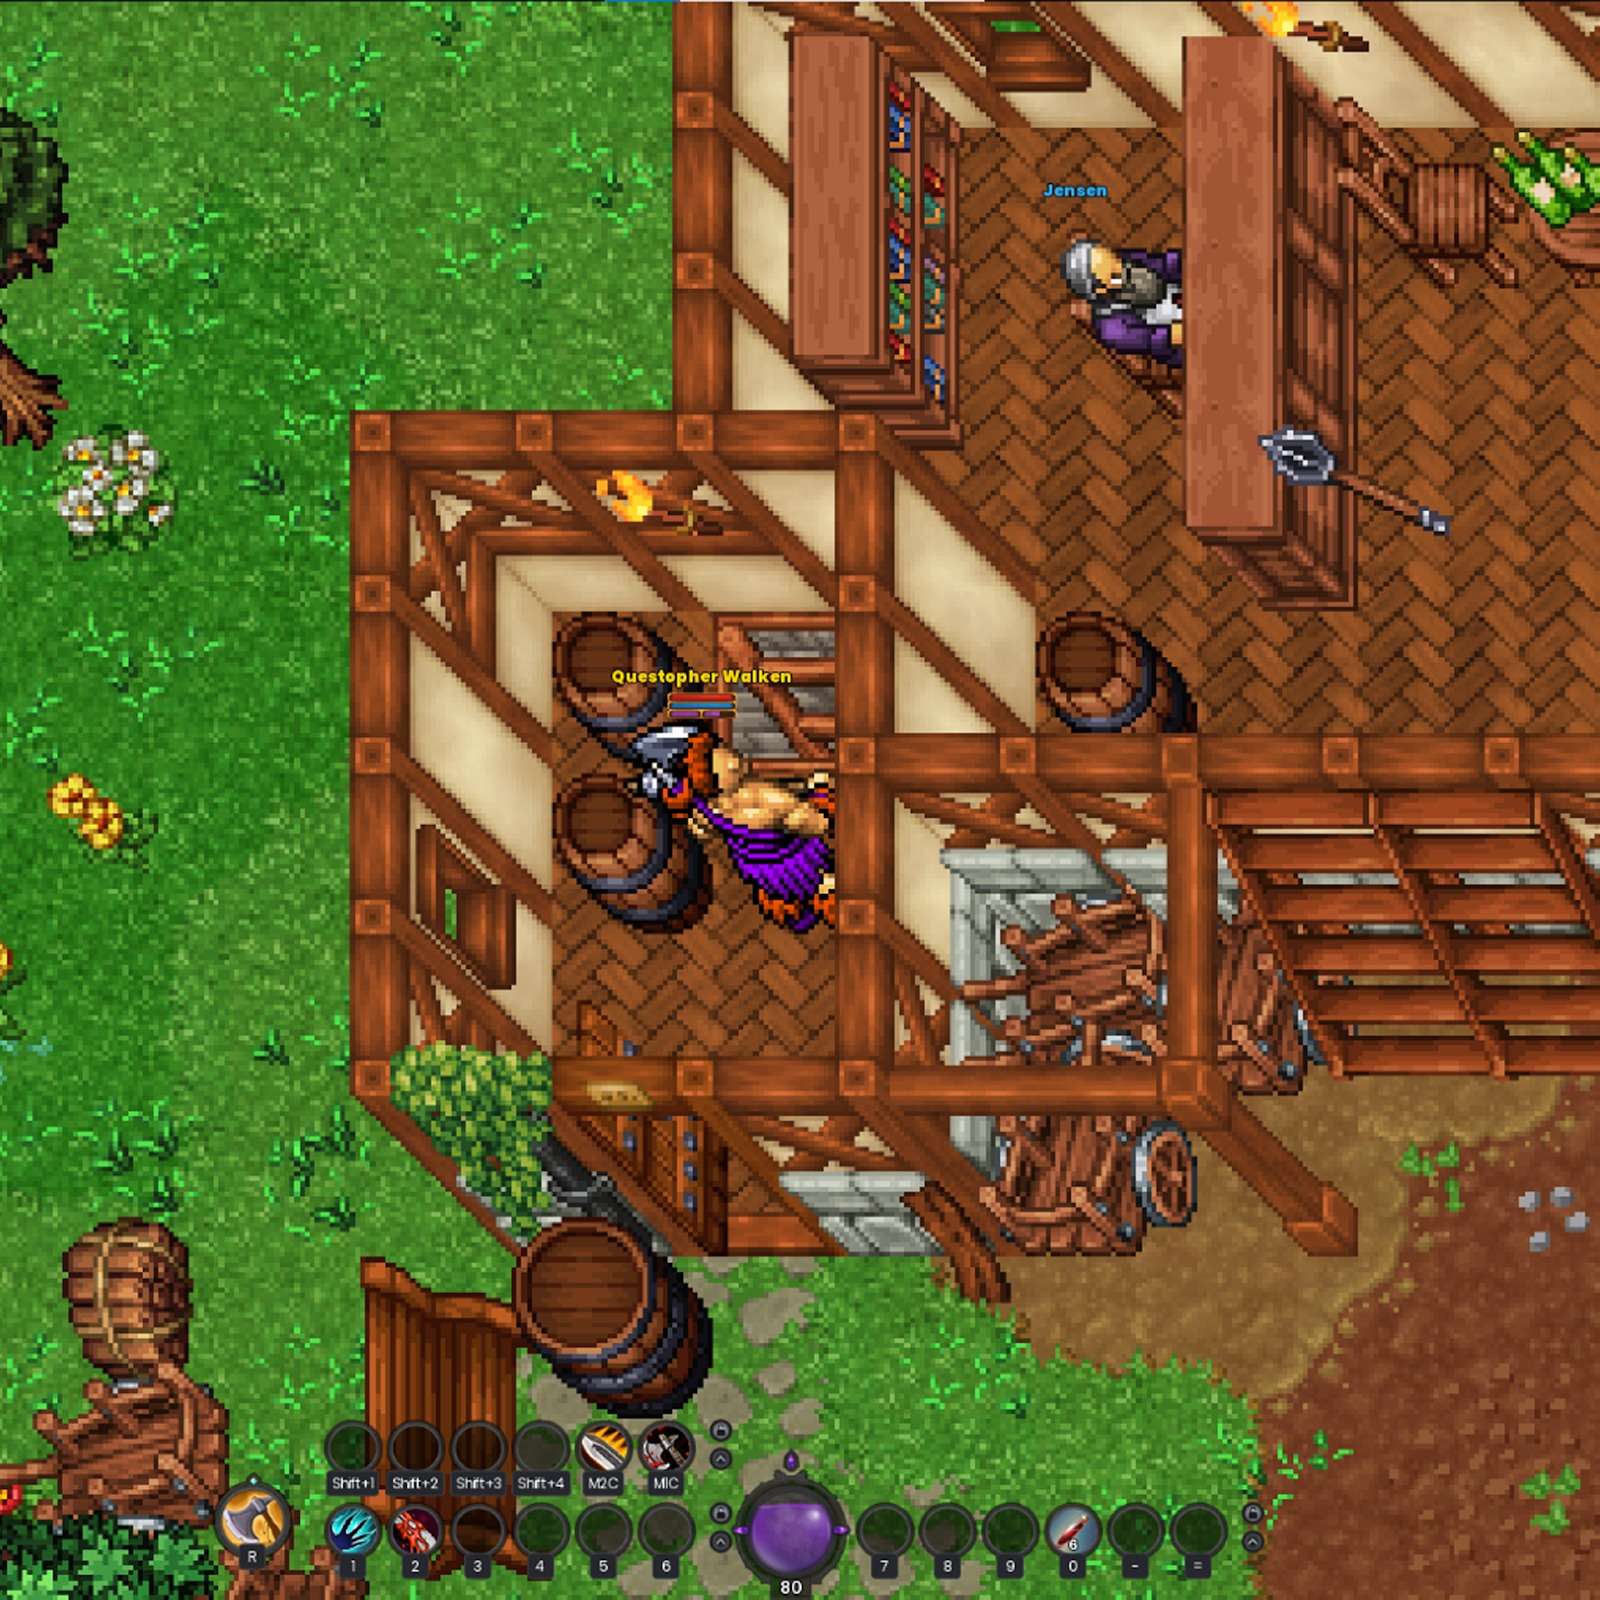
Quest 2: Mixed Bloodlines
Kill 3 Bats in the wine cellar and tunnel beneath Jensen’s house.
Steps to Complete:
- Enter Jensen’s house and locate the cellar entrance.
- Descend into the wine cellar.
- Defeat 3 Bats in the cellar and the connecting tunnel area.
- Once completed, return to advance the questline.
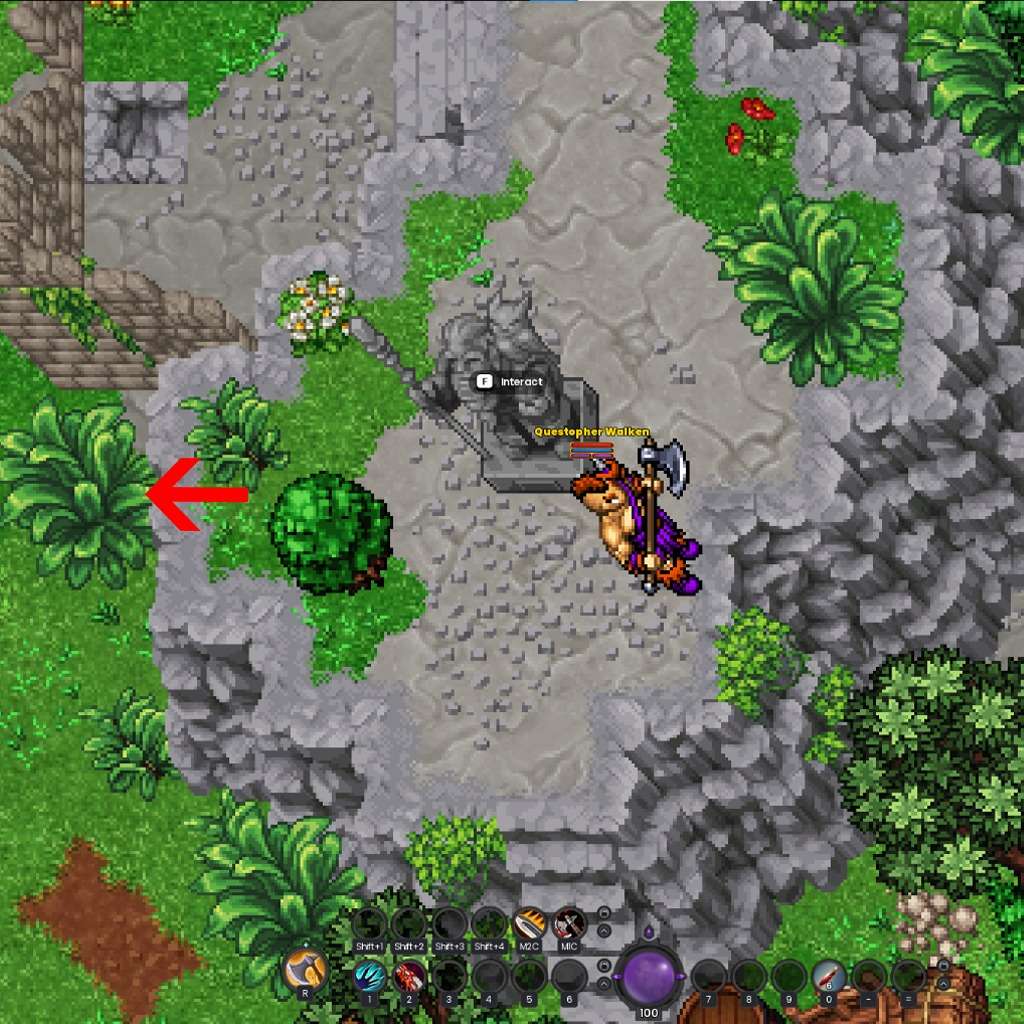
Pour the Bitterbeard Ale on the dwarven statue to pay your respects. (Optional: Find Jensen’s key near the statue, marked with a red arrow in the screenshot).
Steps to Complete:
- Locate the dwarven statue directly behind Jensen’s house on a small hill.
- Approach the statue and interact with it to pour the Bitterbeard Ale.
- Once completed, return to Jensen to finish the quest.
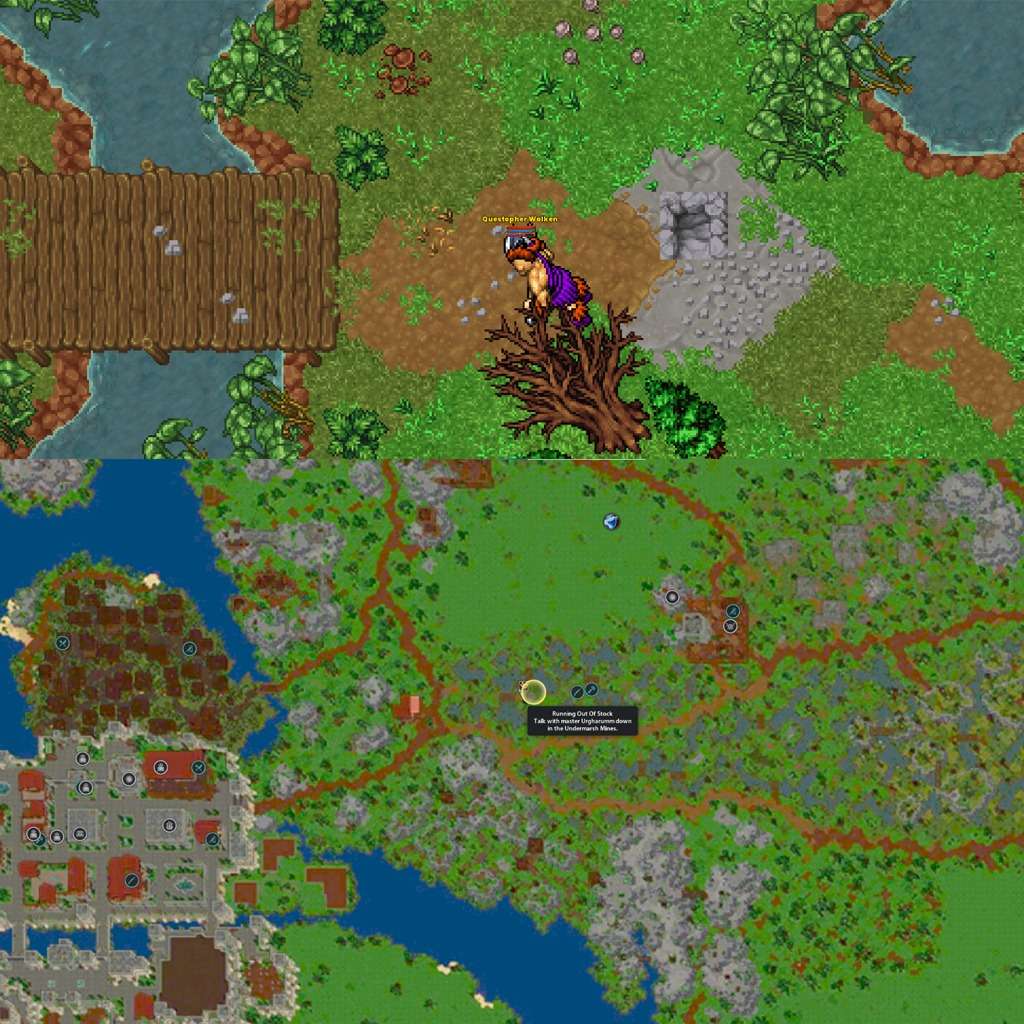
Quest 3: Running Out of Stock
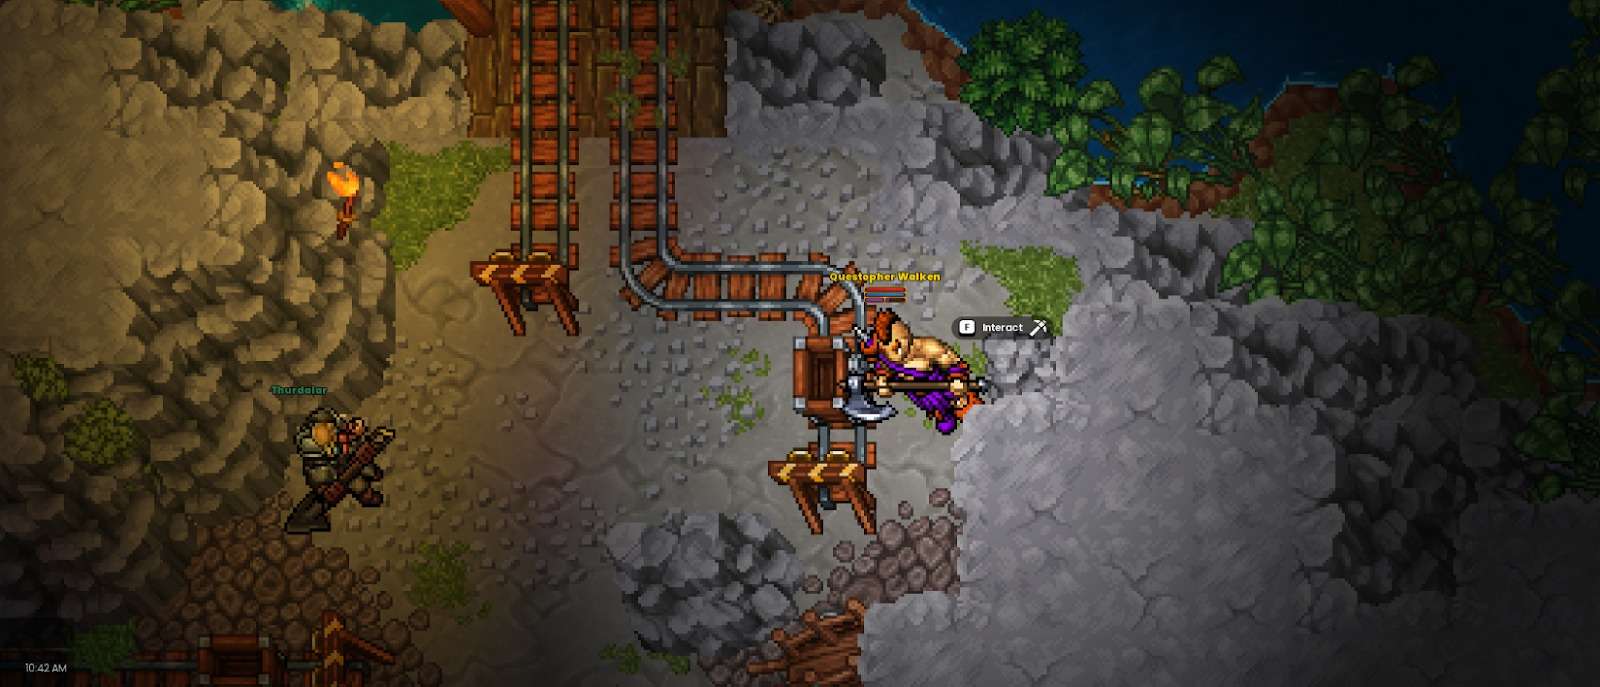
Talk with Master Urgharumm down in the Undermarsh Mines.
Steps to Complete:
- Head to the Undermarsh Mines.
- Locate Master Urgharumm inside the mines and interact with him to progress the quest.
Gather 5 Copper Ores from the nodes inside the mine.
Steps to Complete:
- Explore the area near where the quest led you into the mine.
- Look around for Copper Ore nodes and interact with them to collect the ores.
- Continue until you gather all 5 Copper Ores to complete this step.
Explore the deep caves of the Undermarsh Mines and slay 5 spiders.
Steps to Complete:
- Follow the quest marker to locate the cave entrance leading deeper into the mines.
- Descend into the deeper area of the mines where spiders can be found.
- Defeat 5 spiders in this area to complete the objective.
- After defeating the spiders, head north in the cave and go up a staircase.
- Turn in the quest at the NPC, then return to Master Urgharumm to finalize the quest.
Quest 4: Crafting for a Reward
Talk with Durik, the master artisan of the Undermarsh Mines, and choose your first weapon.
Steps to Complete:
- Interact with Durik, who is right next to you, to open the weapon selection menu.
- Choose your preferred weapon from the list below. Your choice determines your Weapon Skill ability, which will greatly influence your combat style.
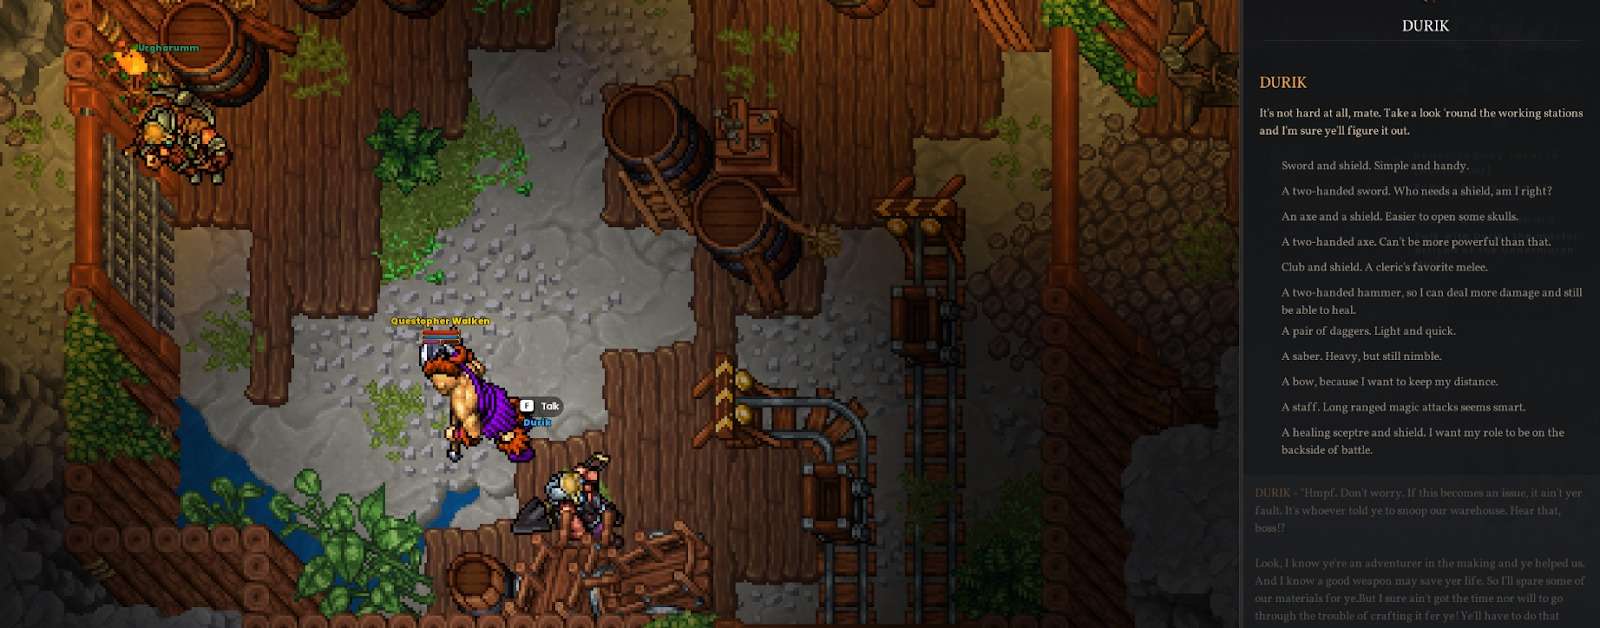
Weapon Options and Abilities
- Axes: Throws an axe at your target, dealing 50% weapon power damage, applying a bleed that deals 0.4% weapon power every 2 seconds for 8 seconds, and slowing it by 20% for 4 seconds.
- Swords: Creates a shield around you, absorbing 300% defense power, and reduces the duration of movement-impairing effects by 20% for 5 seconds.
- Clubs: Deals 150% weapon power to the target and applies a 25% slow for 4 seconds.
- Daggers: Grants 15% critical chance for 8 seconds.
- Great Axes: Deals 150% weapon power damage in a medium area around you.
- Great Swords: Increases the damage of your skills and basic attacks by 12% for 8 seconds, but you take 5% more damage during the same duration.
- Hammers: Deals 200% weapon power in a large cone area in front of you.
- Light Blades (Sabers): Removes any movement-impairing effects (such as slows, stuns, and snares) and reduces their duration by 30% for 5 seconds.
- Scepters: Creates a shield around you or a friendly target, absorbing 250% healing power damage for 6 seconds.
- Staves: Increases the damage of your skills by 10%, at the cost of 15% mana or health for 10 seconds.
- Bows: Grants 30% attack speed for 8 seconds.
Important: Ensure you choose a weapon that aligns with your build and role in the game, whether you aim to tank, deal damage, or heal.
After selecting your weapon, craft it in the same area. Use the Woodworking Bench or Anvil, depending on the weapon type you chose:
- Woodworking Bench: For weapons like bows, staves, and light blades.
- Anvil: For weapons like swords, axes, great axes, hammers, and clubs.
Congratulations! You’ve crafted your first Tier 1 weapon!
Next Objective:
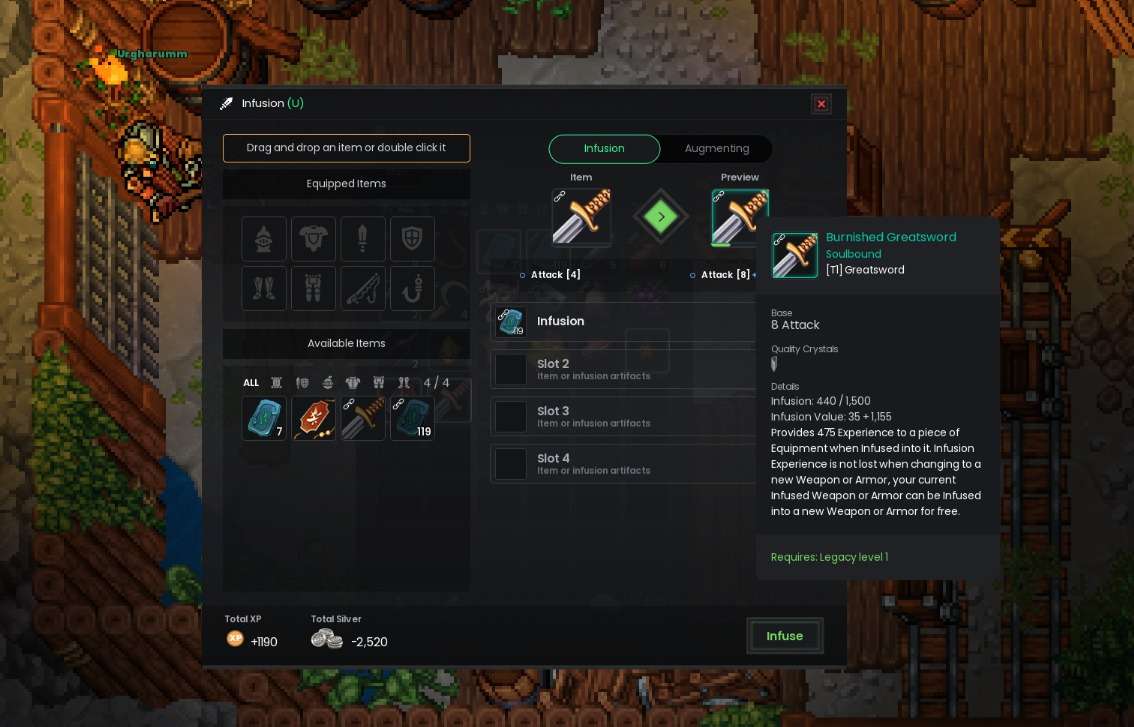
Infuse any piece of equipment.
Infusion is one of the most essential mechanics in RavenQuest, allowing you to make your gear stronger and unlock greater benefits. By infusing items, you’ll increase their stats and effectiveness, ensuring you’re always ready for tougher challenges.
Steps to Complete:
- Open the Infusion Window by U (default).
- Select the piece of equipment you want to infuse.
- Add infusion materials to the infusion slots.
- Spend the required silver to complete the infusion and finish the objective.
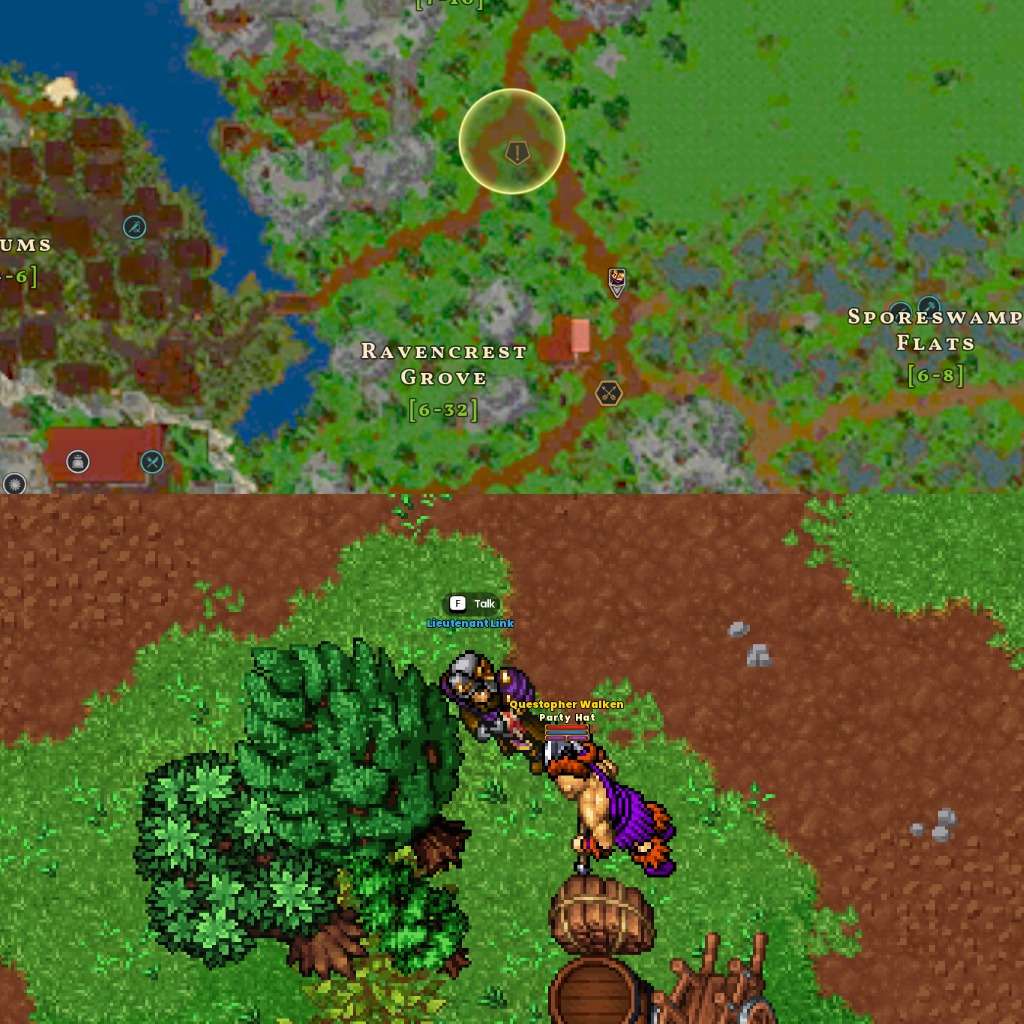
Quest 5: Learning the Ropes II
Speak with Lieutenant Link at the crossroads outside of Ravencrest.
Steps to Complete:
- Head to the crossroads just outside the city. (Marked on your map.)
- Locate Lieutenant Link and interact with him to advance the quest.
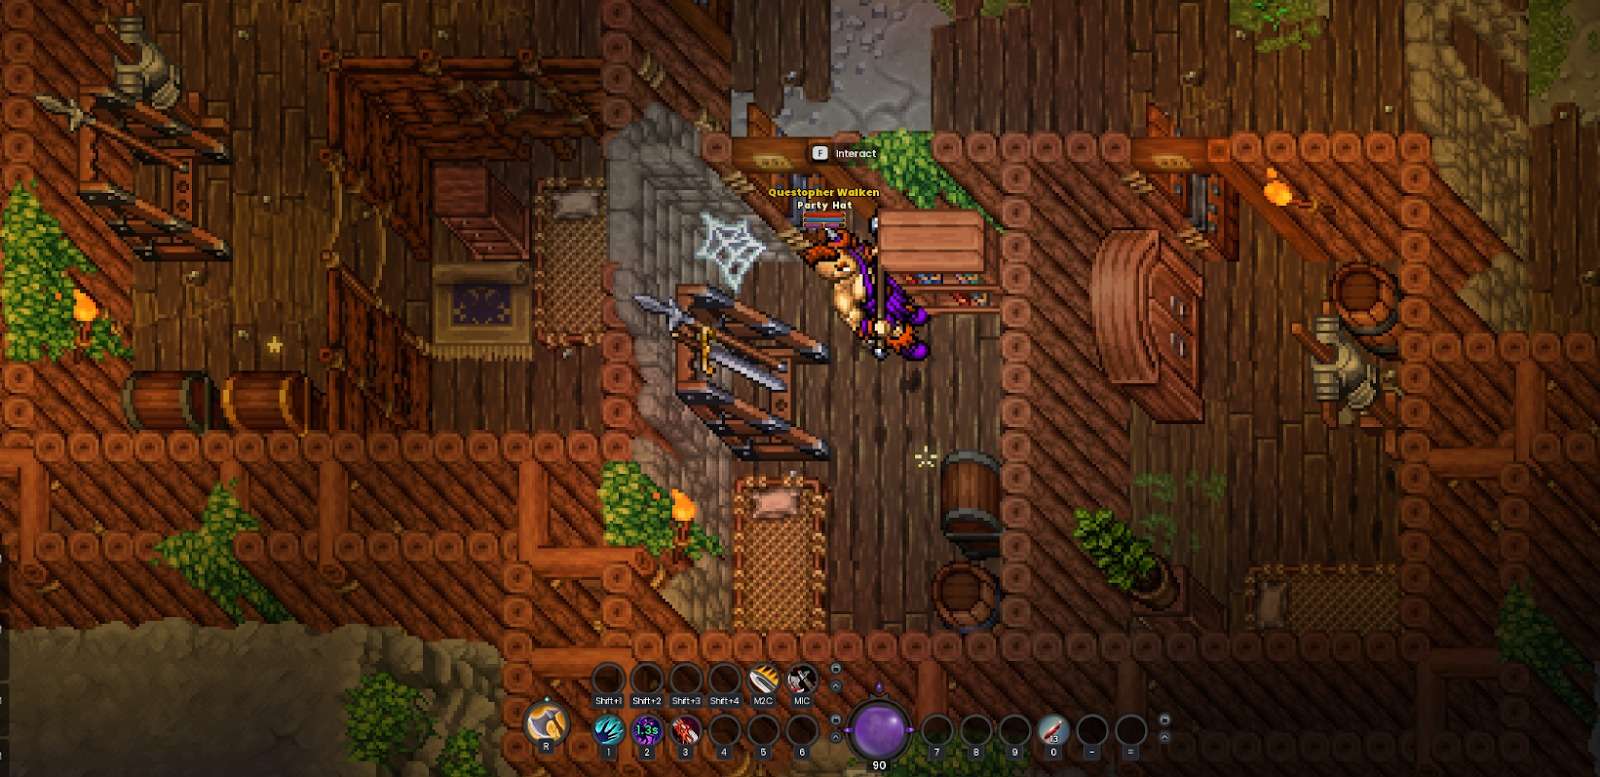
Quest 6: Bandit Breakdown
Kill Captain Krugg in the northwest bandit camp.
Steps to Complete:
- Follow the marker on the map to locate the northwest bandit camp.
- Approach the camp from the north side to find the entrance.
- Once inside, head to the right and go up two staircases.
- Turn left, cross over the area above the main gate, and you’ll find Captain Krugg waiting.
- Defeat Captain Krugg to complete the objective.

Find and obtain Krugg’s Gold Hookmask, located in a chest somewhere under the fort.
Steps to Complete:
- After defeating Captain Krugg, head to the top-right corner of the bandit base to find a stairway going down.
- Once below, you’ll find another stairway immediately; descend further.
- Follow a straight path southward until you reach a third stairway, then go down.
- You’ll see the quest item chest glowing nearby. Interact with it to collect Krugg’s Gold Hookmask.
- Don’t miss the RavenQuest emblem chest in a room nearby, be sure to loot it as well! Turn in the quest at Link.m
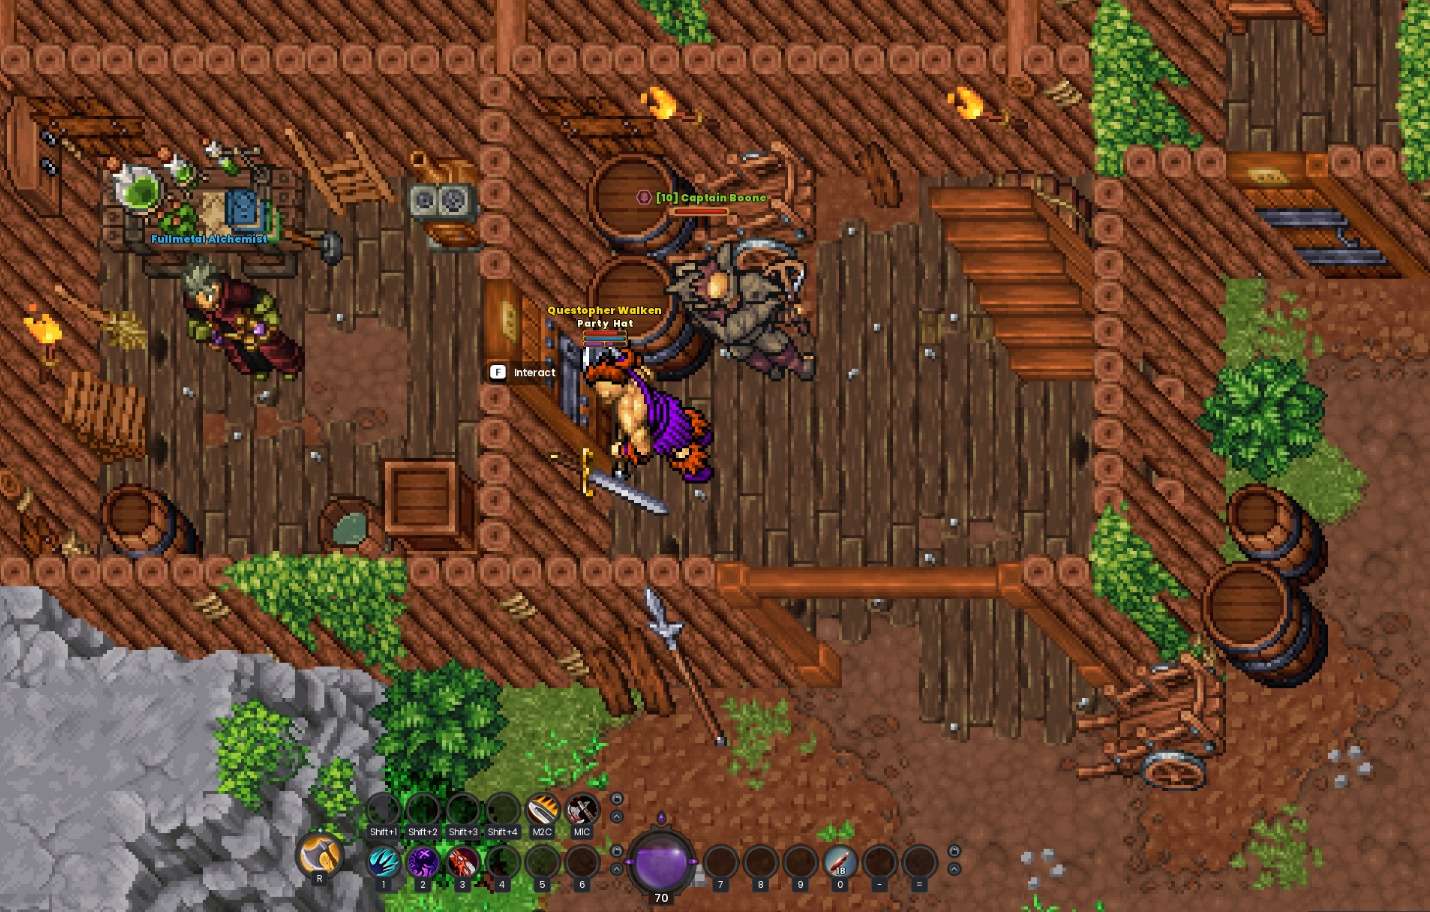
Kill Captain Boone in the northeast bandit camp and obtain his Gold Hookmask. (Optional: Bring the Hookmask Cell Key to Private Ryan so he can escape his cell).
Steps to Complete:
- Travel to the northeast bandit camp.
- Locate and defeat Captain Boone to obtain his Gold Hookmask and Cell Key.
- Use the Cell Key to free the Alchemist locked in a room inside the neighboring house.
- Return to Lieutenant Link at the crossroads to complete the quest.
Upon quest completion, you’ll select your first Tier 1 armor piece materials, head back to ravencrest and craft it.
Important: Select the armor type that best fits your build and role in the game. Whether you’re aiming for high DPS, survivability, or utility, your choice here will set the foundation for your progression!
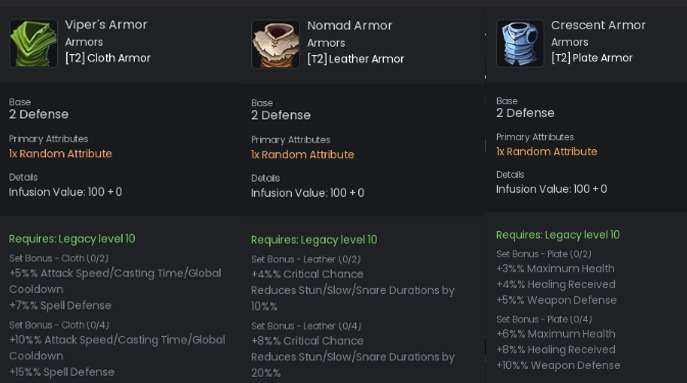
Tier 1: Armor Options
Choose the armor type that best matches your playstyle:
Cloth Armor:
- 2-Piece Set Bonus:
- +5% Attack Speed
- +4% Casting Time/Global Cooldown
- +7% Spell Defense
- 4-Piece Set Bonus:
- +10% Attack Speed
- -10% Casting Time/Global Cooldown
- +15% Spell Defense
Leather Armor:
- 2-Piece Set Bonus:
- +4% Critical Hit Chance
- +10% Reduced Stun/Slow Duration
- 4-Piece Set Bonus:
- +8% Critical Hit Chance
- +20% Reduced Stun/Slow Duration
Plate Armor:
- 2-Piece Set Bonus:
- +3% Maximum Health
- +4% Healing Received
- +5% Weapon Defense
- 4-Piece Set Bonus:
- +6% Maximum Health
- +8% Healing Received
- +10% Weapon Defense
Quest 7: Learning the Ropes III
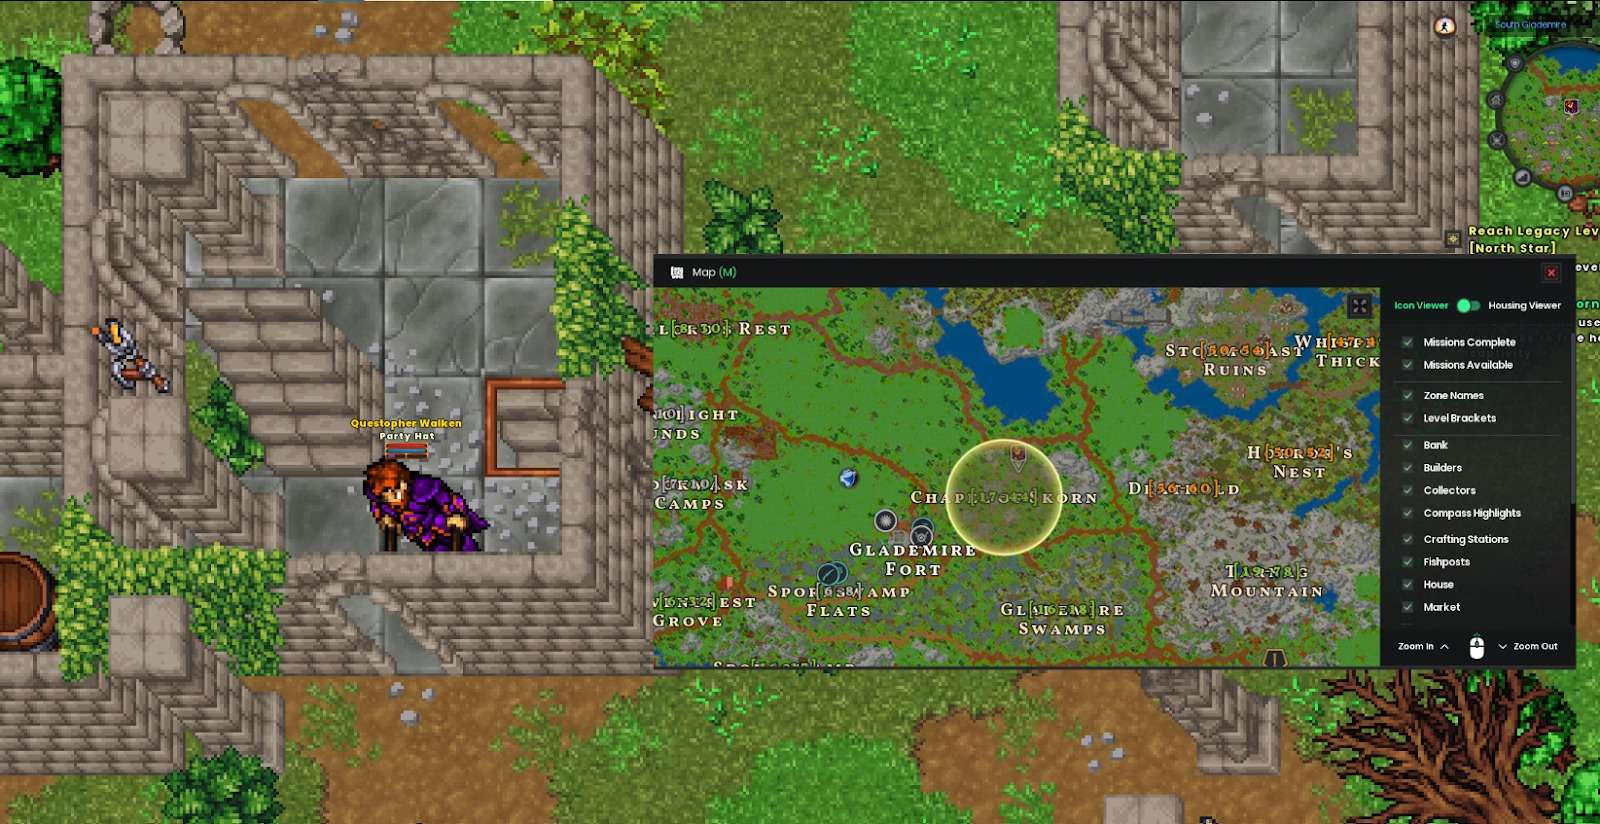
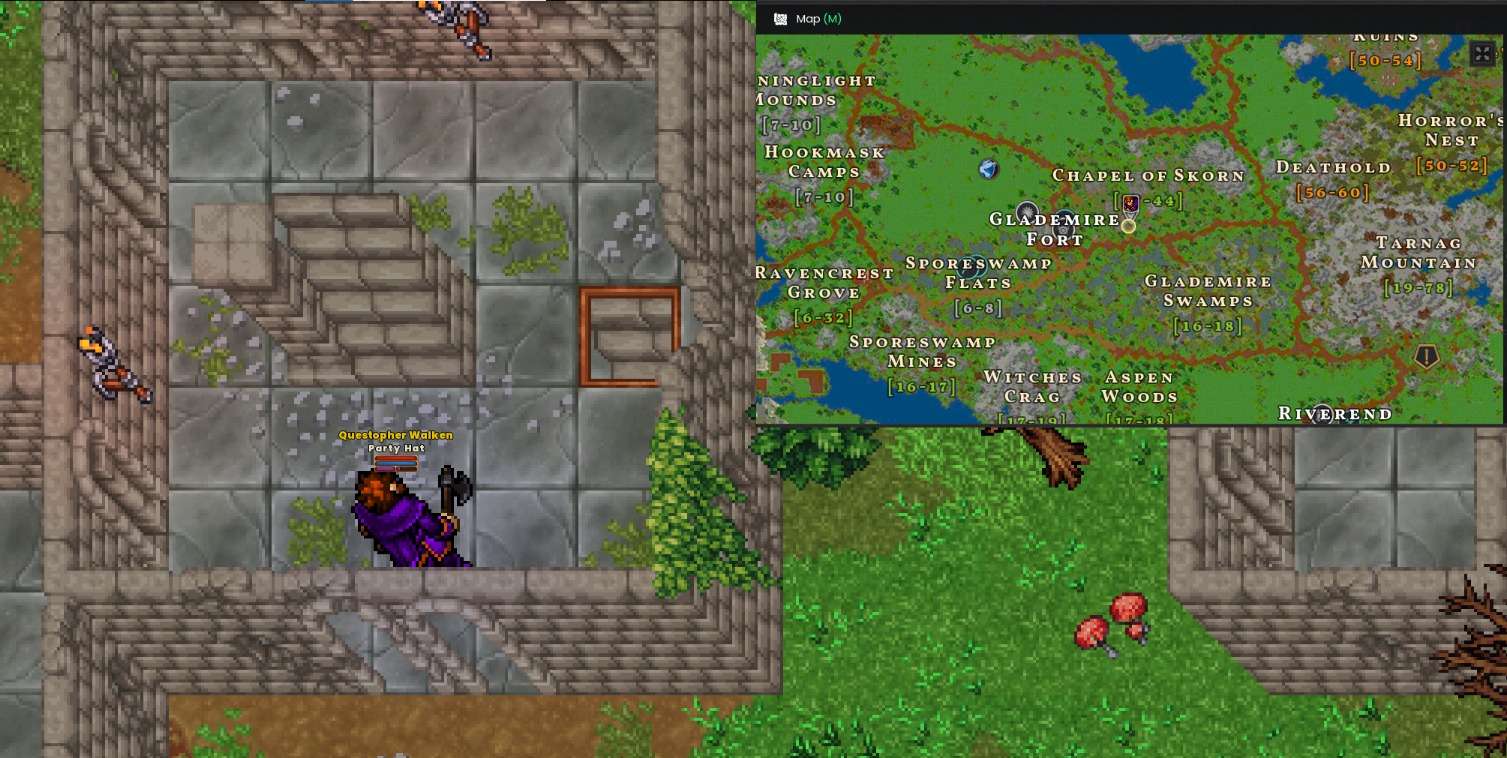
Speak with Maribel, the paladin looking over Glademire’s graveyard.
Steps to Complete:
- Travel to Warlord’s Rest to locate Maribel.
- Find her near Glademire’s graveyard and speak with her to progress the quest.
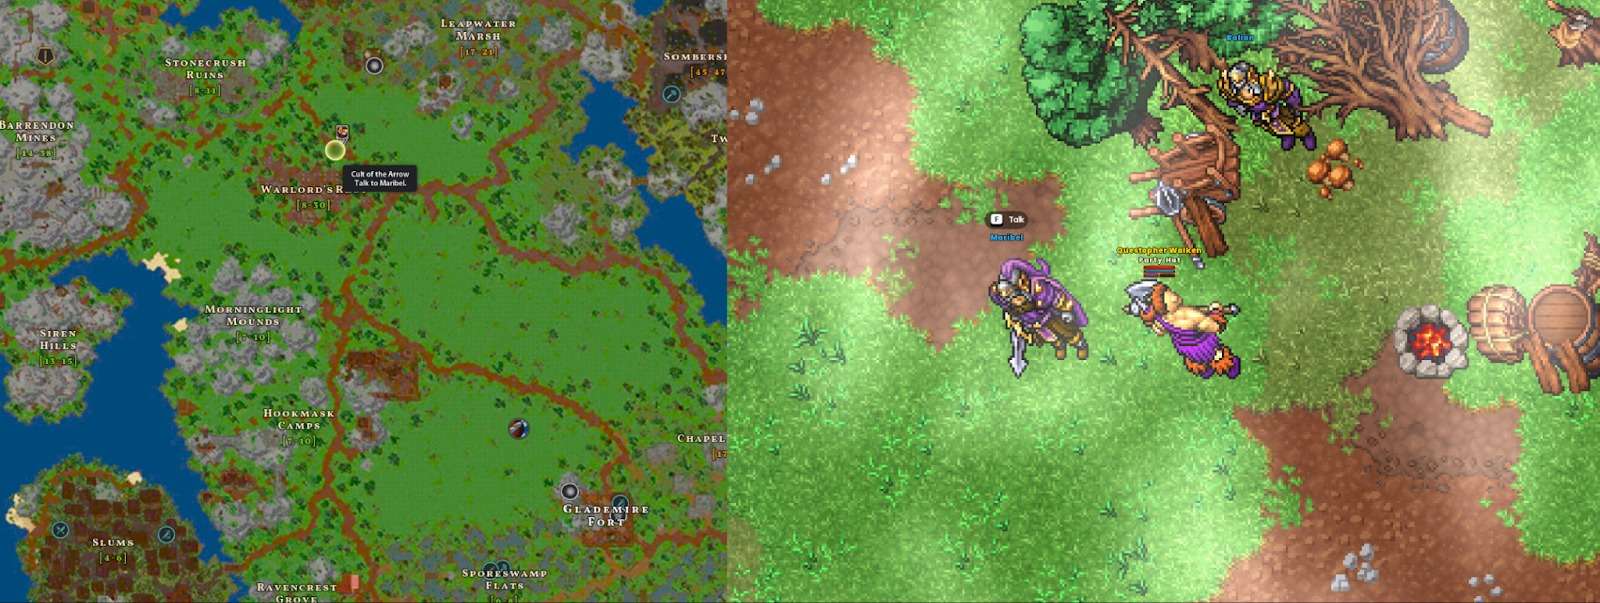
Quest 8: Cult of the Arrow
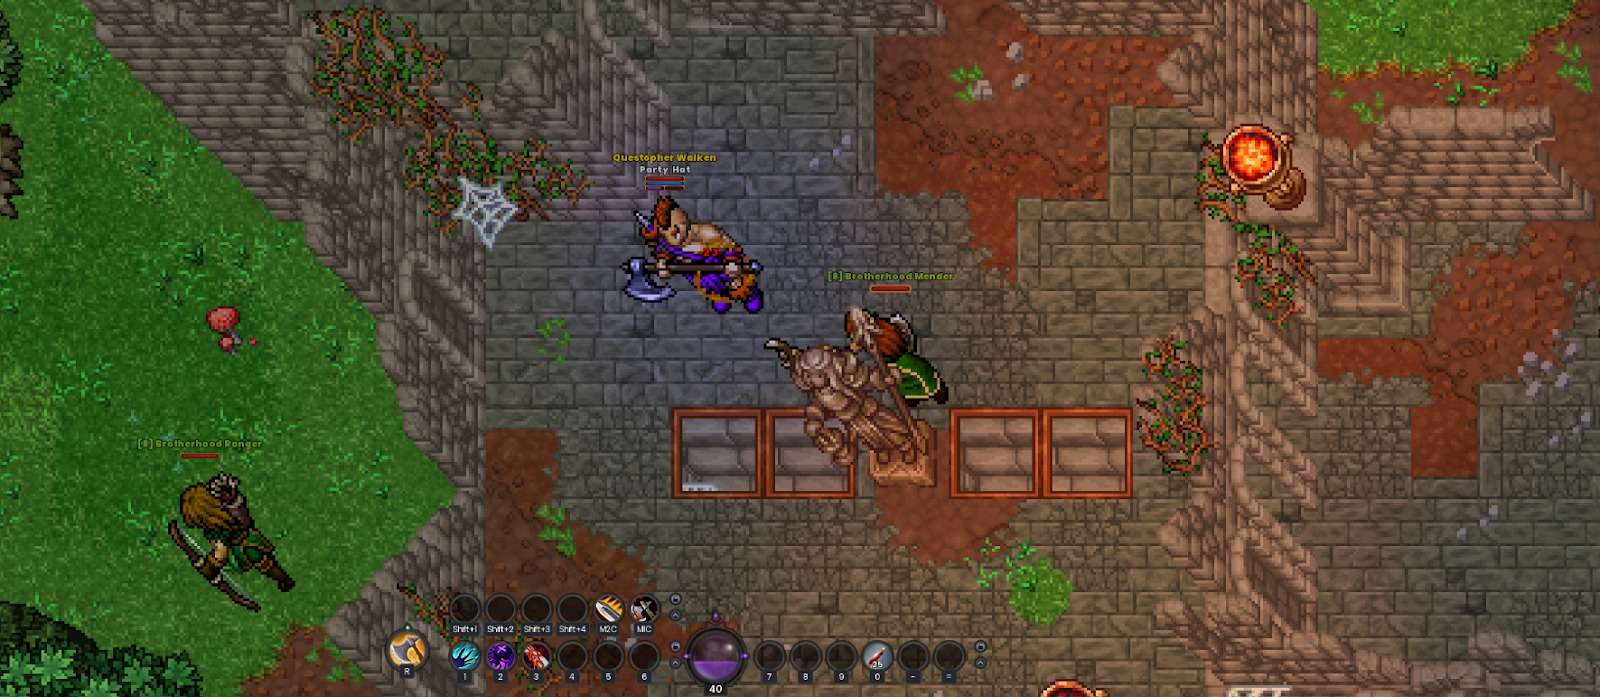
Kill 10 Skeletons spawning in the graveyard.
Steps to Complete:
- The Skeletons are located directly next to Maribel, where you turned in the previous quest.
- Defeat a total of 10 Skeletons in the graveyard to complete the objective.
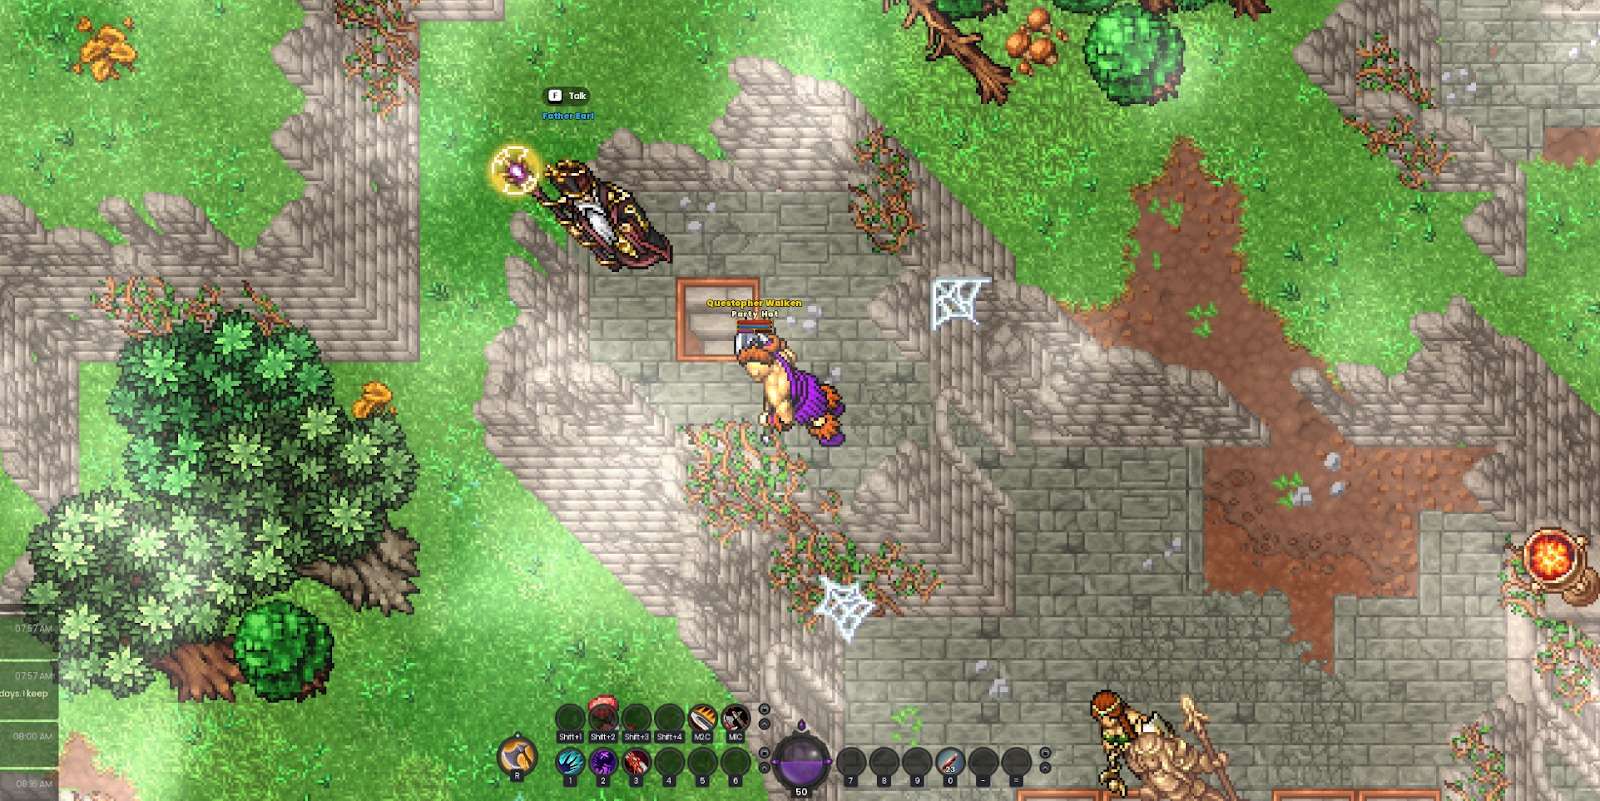
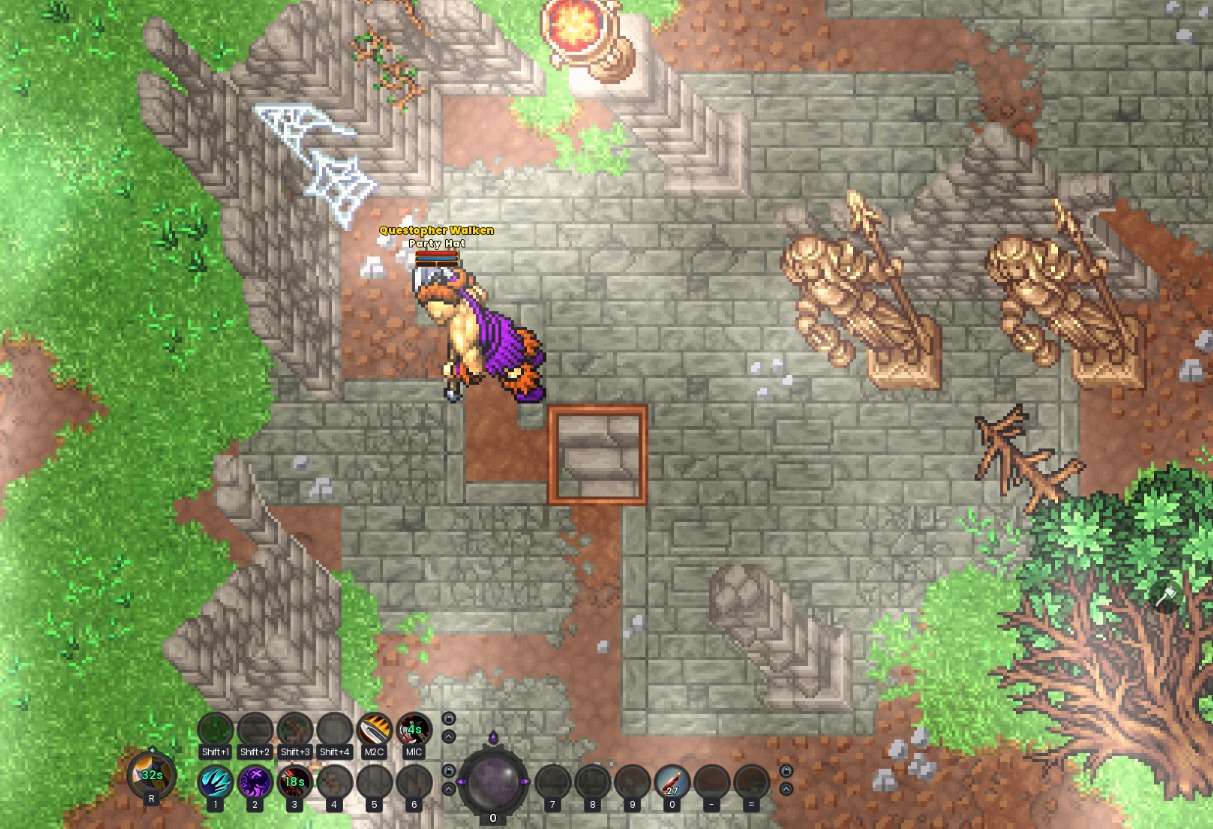
Find Father Earl somewhere within the Stonecrush Ruins.
Steps to Complete:
- Head northwest to the Stonecrush Ruins.
- Locate Father Earl inside a tower on the left side of the ruins.
Kill Skeletons and collect 10 Soul Orbs.
Steps to Complete:
- Stay within the Stonecrush Ruins, as the area is filled with Skeletons.
- Defeat Skeletons until you collect a total of 10 Soul Orbs.
- Once completed, return to Father Earl in the tower.
Sacrifice 10 Soul Orbs at the Unholy Altar.
Steps to Complete:
- On this small area, there are two staircases you need to take the farther one, which has just one staircase leading down.
- Once below, follow the path; you can’t get lost as there are no splits or branching paths.
- Continue along the path until you reach the Unholy Altar.
- Interact with the altar to sacrifice the 10 Soul Orbs.
- After completing the sacrifice, return to Father Earl in the tower to turn in the objective.
Use Earl’s Holy Water to cleanse the underground prayer rooms of corruption.
Steps to Complete:
- Head back underground, but this time take the other staircase directly beneath Father Earl’s location (the one with 4 staircases).
- Follow the path until you reach another staircase and go one level lower.
- On this level, locate and use all 5 wells scattered throughout the prayer rooms.The wells are inside the rooms around the area, so make a full loop to find them all.
- Once you’ve cleansed all the wells, return to Father Earl to turn in the objective.
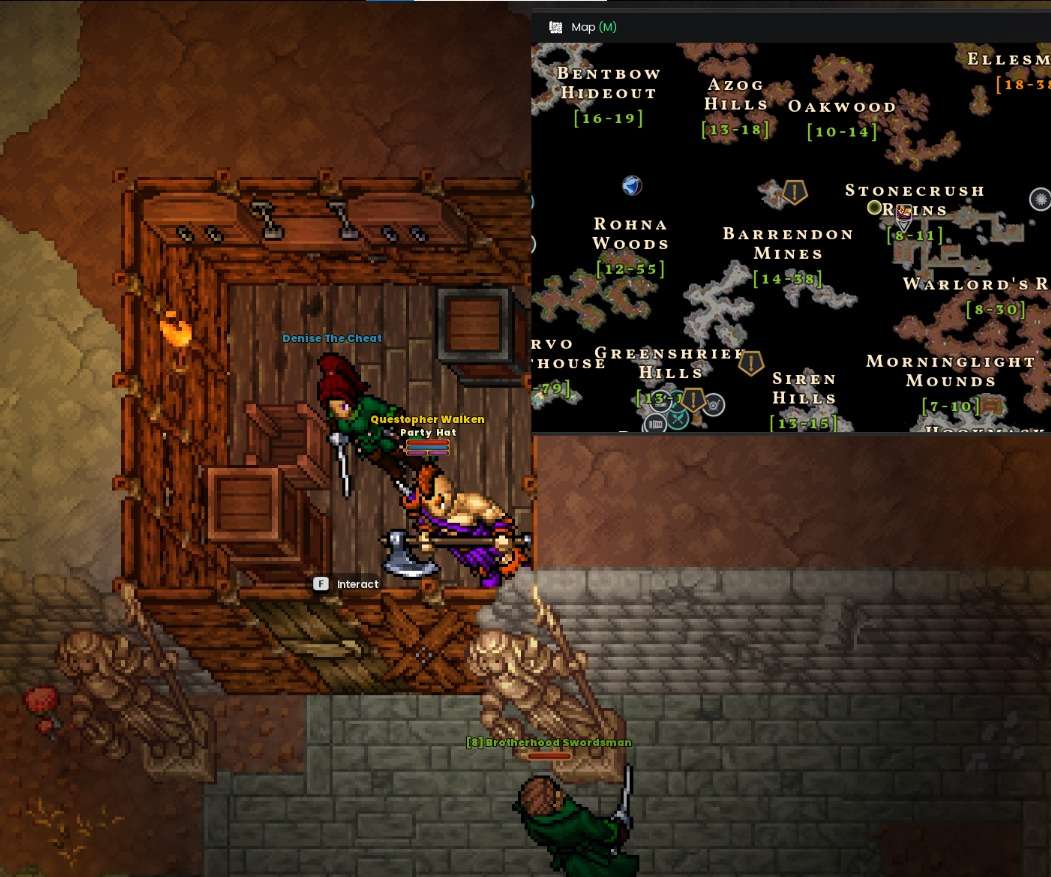
Use the key on the locked dispensary door.
Steps to Complete:
- Go back down the 4-staircase entrance directly below Father Earl.
- In the first room, use the key to unlock the dispensary door.
- Inside, talk to Denise.
- Loot the box behind her to complete the objective.
- Return to Father Earl to turn in the quest.
Find the stairwell leading to the cave, and use the Blessed Herbs in the Eternal Braziers.
Steps to Complete:
- Return to the 4-staircase entrance below Father Earl.
- Go down one more level to the area where you previously used the 5 Holy Waters.
- Upon reaching the room, exit and turn right, then at the next fork, turn right again.
- Descend another staircase to the lower level.
- On this floor, find and use all 4 Eternal Braziers with the Blessed Herbs.

Light the candles around the sacrificial altar located underneath the prison cells.
Steps to Complete:
- Ascend one level up from the cave.
- Once you exit the room, turn left and follow the main path.
- Continue until you see a hallway lined with prison cells on the left.
- Take the staircase in the middle of the hallway to go down.
- Light the candles around the sacrificial altar at the end of the level.
- Defeat the summoned Warlock that appears after lighting the candles.
- Return to Father Earl to complete the objective.

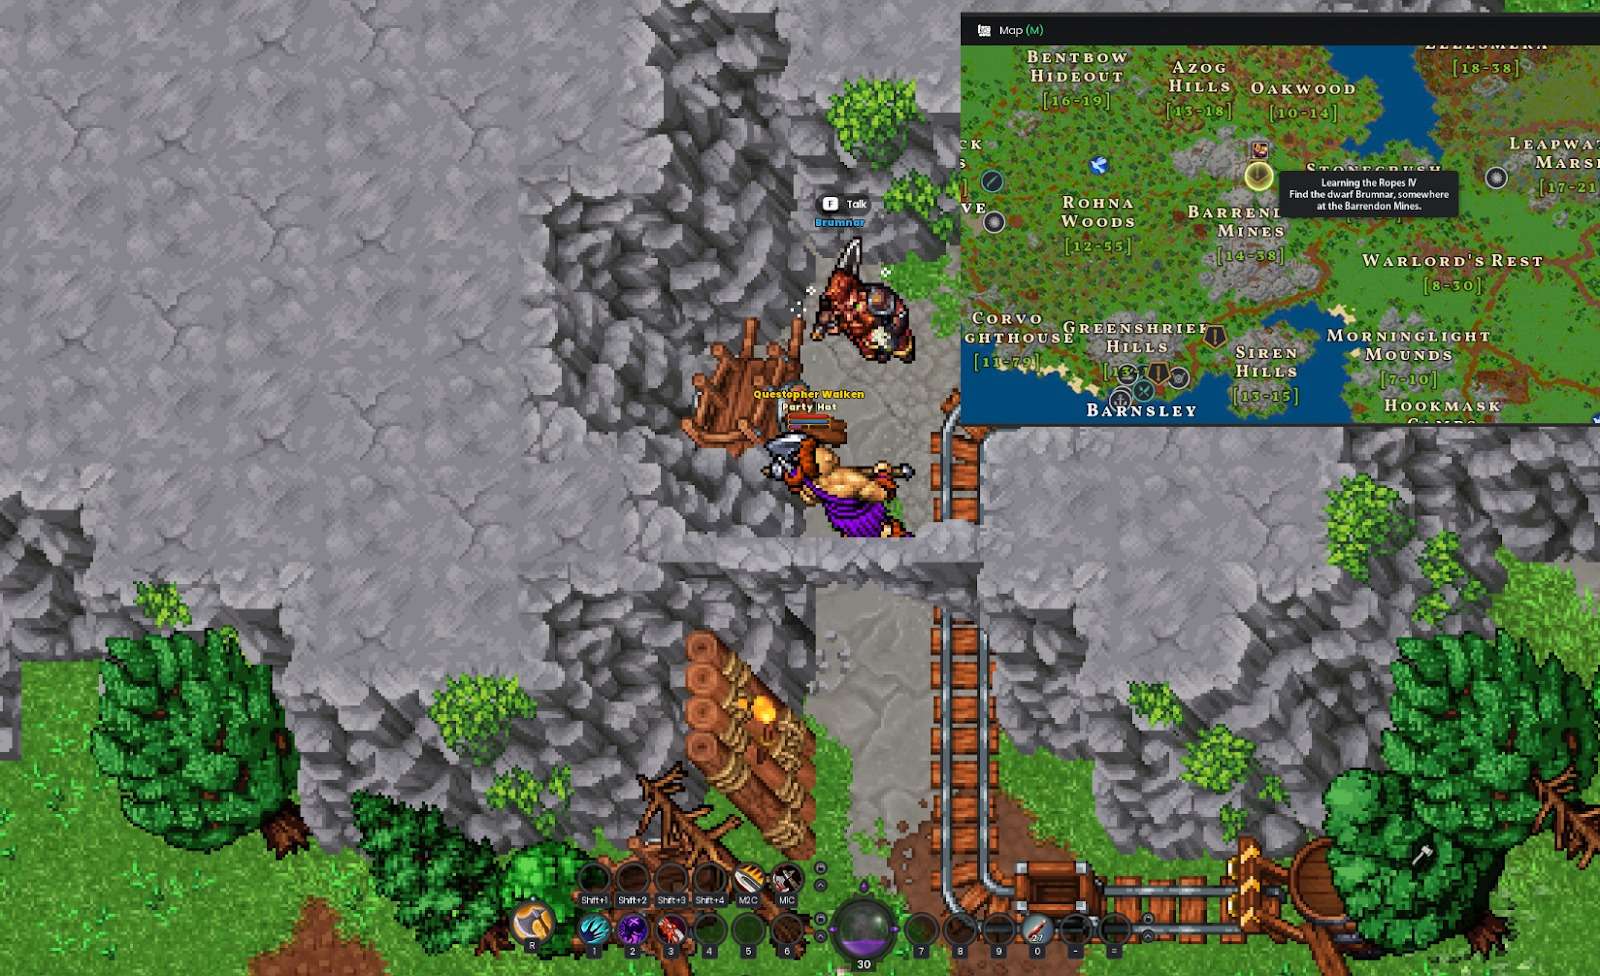
Quest 9: Learning the Ropes IV
Find the dwarf Brumnar, somewhere at the Barrendon Mines.
Steps to Complete:
- Travel to the Barrendon Mines to locate Brumnar.
Quest 10: Mortal Enemies
Kill 12 Hoglets, 7 Warhogs, and 3 Battlehogs.
Steps to Complete:
- Enter the Oakwood Fortress to hunt the required hogs.
- Start on the outermost area of the fortress to find Hoglets.
- Progress deeper into the fortress to locate Warhogs and Battlehogs.
- Once you’ve defeated the specified numbers, return to Brumnar to turn in the quest.
Destroy the Warhogs’ supply carts and burn down the Warhogs’ tents.
Steps to Complete:
- Return to the Oakwood Fortress, heading to the inner section where the Warhogs’ supplies and tents are located.
- Interact with the supply carts and tents to destroy them, everything you need is within the central area, so no need to search far.
- After completing the destruction, return to Brumnar to turn in the quest.
Place Brumnar’s Clan Banner on the hill to prove that the Oakwood Camp has been dominated.
Steps to Complete:
- Return to the Oakwood Fortress, heading to the inner area.
- Find the stairs leading up to a hill in the center of the inner section.
- Use the shining rock at the top of the hill to place Brumnar’s Clan Banner.
- After placing the banner, defeat the Hog Hero that appears.
- Return to Brumnar to complete the quest.
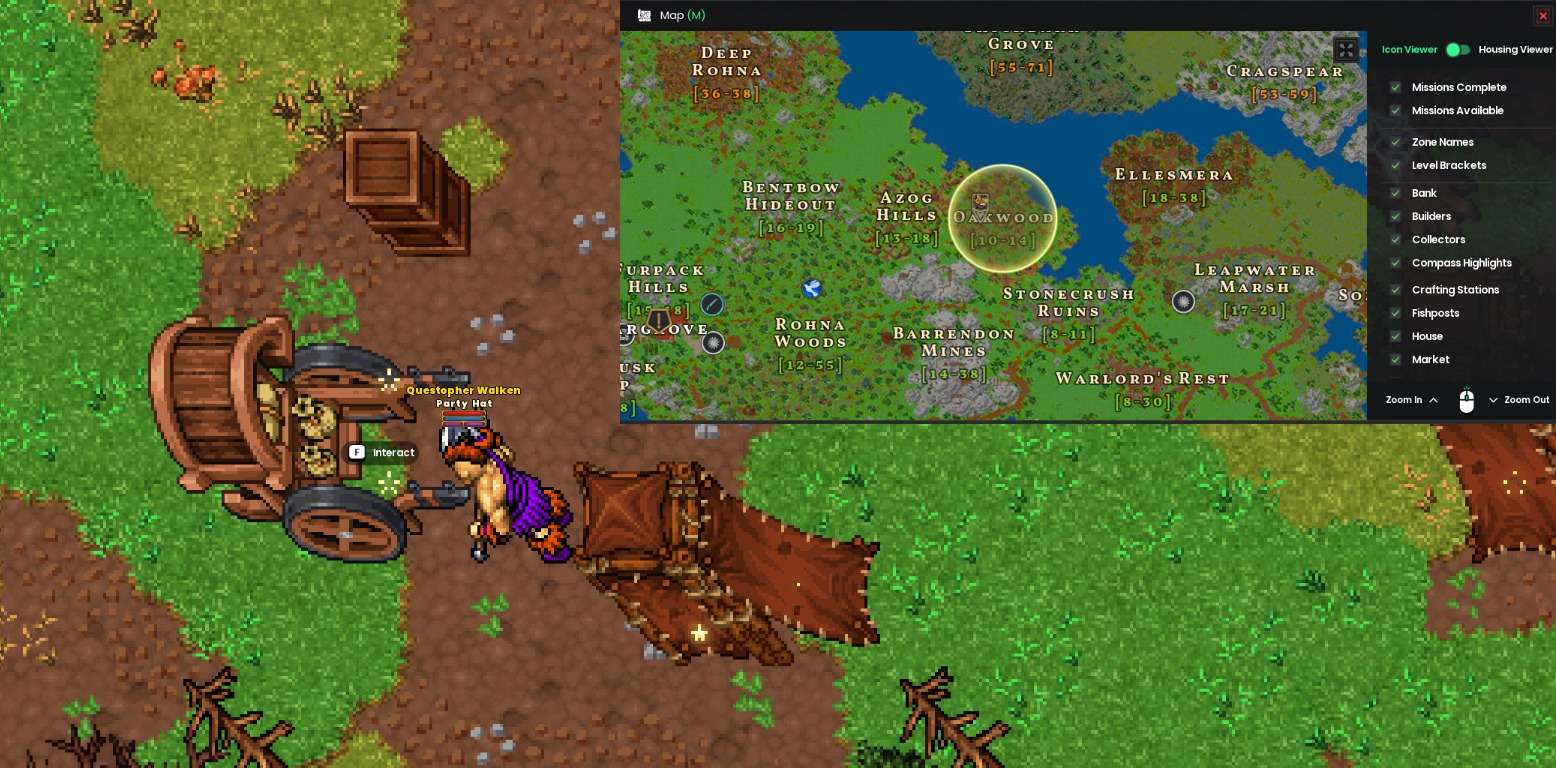
Use the materials given by Brumnar to craft your new helmet in Ravencrest, or find another workstation at Barnsley or Margrove.
Steps to Complete:
- Choose a Tier 1 helmet from the same armor set as your previous choice (Cloth, Leather, or Plate) to gain the set bonus.
- If you selected Cloth or Leather, travel to Margrove to craft your helmet.
- If you selected Plate, head to Barnsley to craft your helmet.
- Once you’re at the correct workstation, use the provided materials to craft your new Tier 1 helmet.
The workstations marked with a light blue icon on the map!
Important: Stick to the same armor set for maximum synergy and bonuses!
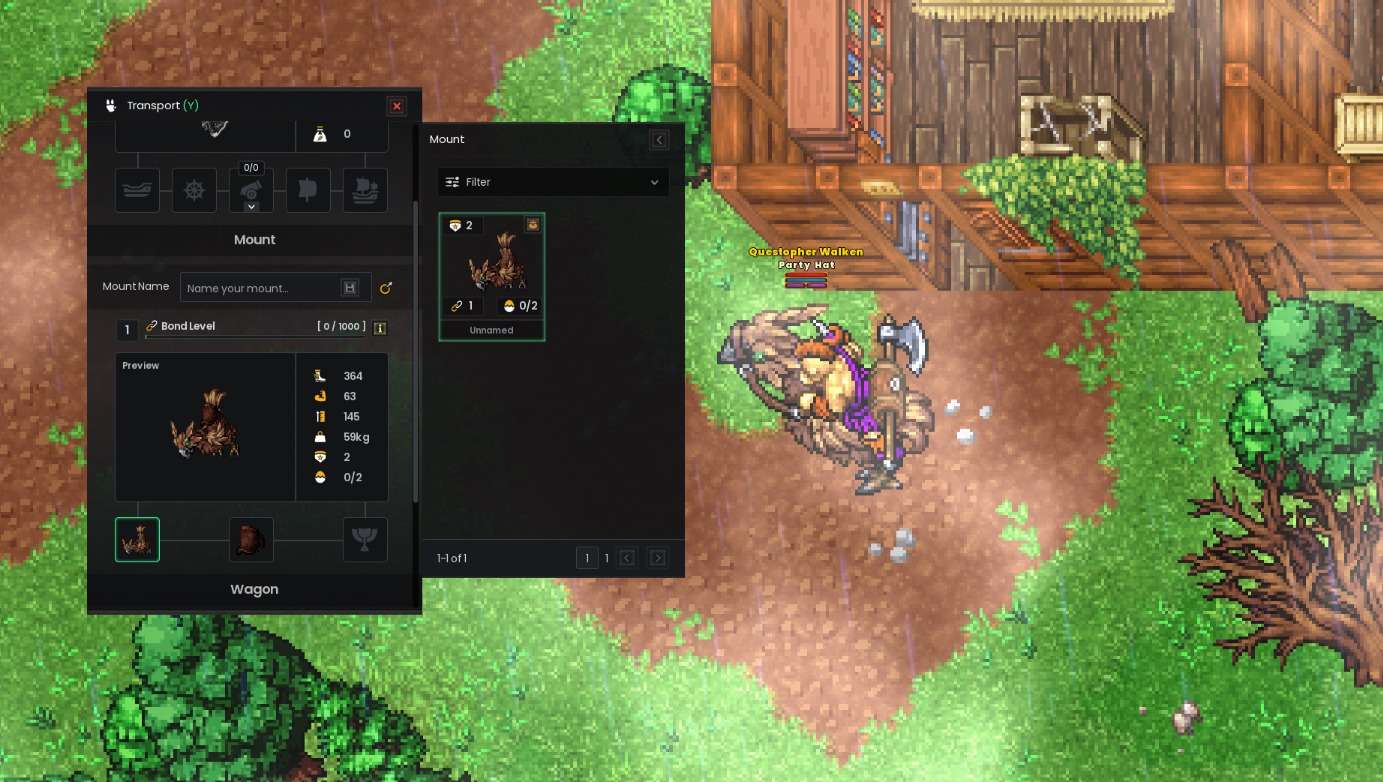
Mount Acquired!
During this quest, you’ve unlocked your first mount! Follow these steps to equip and use it:
Steps to Equip Your Mount:
- Open the Transportation Tab by pressing (Y).
- Click on the first small icon under the Moa category.
- Double-click on your new mount to equip it.
How to Use Your Mount:
- Once equipped, press (Z) to summon and ride your mount.
Congratulations! You’re now ready to traverse the world of RavenQuest much faster with your first mount!
Quest 11: New Horizons I
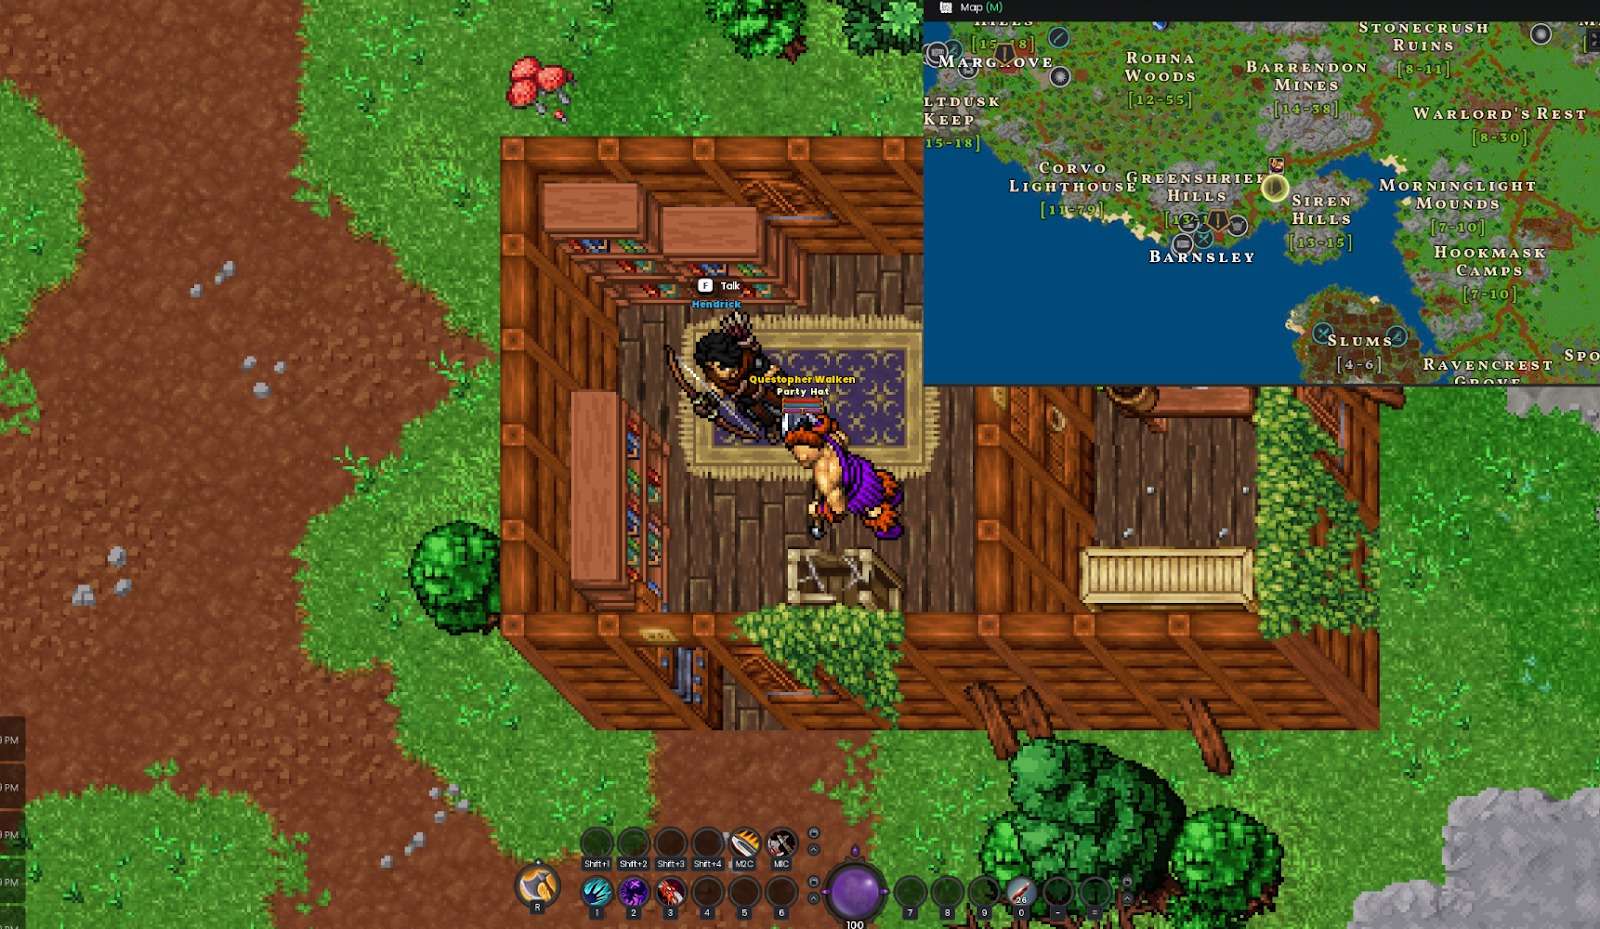
Speak with Hendrick in his hut at Barnsley.
Steps to Complete:
- Travel eastward from Barnsley along the main road; the hut is easy to spot.
- The location is also marked on your map for convenience.
- Enter the hut and speak with Hendrick to progress the quest.
Quest 12: The Perils of Rohna Woods
Search the debris piles on top of Siren Hill for clues of Walder’s location.
Steps to Complete:
- Near Hendrick’s hut, head to the hilltops nearby.
- Look for debris piles scattered among the goblins on the hills.
- Interact with the debris piles to search for clues.
- Once completed, return to Hendrick to turn in the quest.
Kill 10 Goblin Pyros for clues to Walder’s location.
Steps to Complete:
- Head to Greenshiek Hills, located directly north of Barnsley in the mountains.
- Search for Goblin Pyros in the area and defeat a total of 10 to collect the clues.
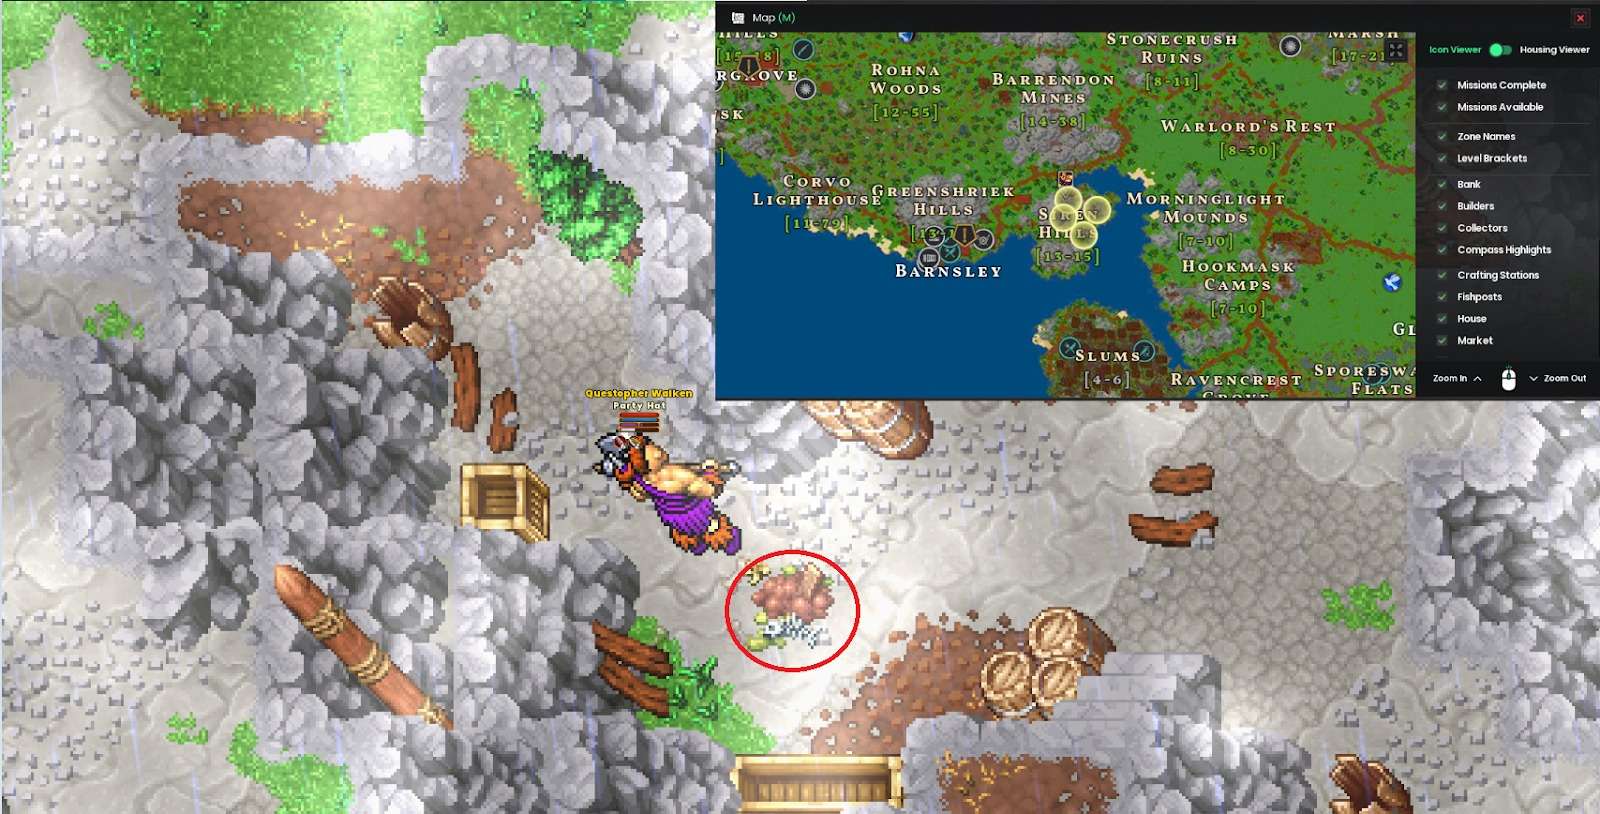
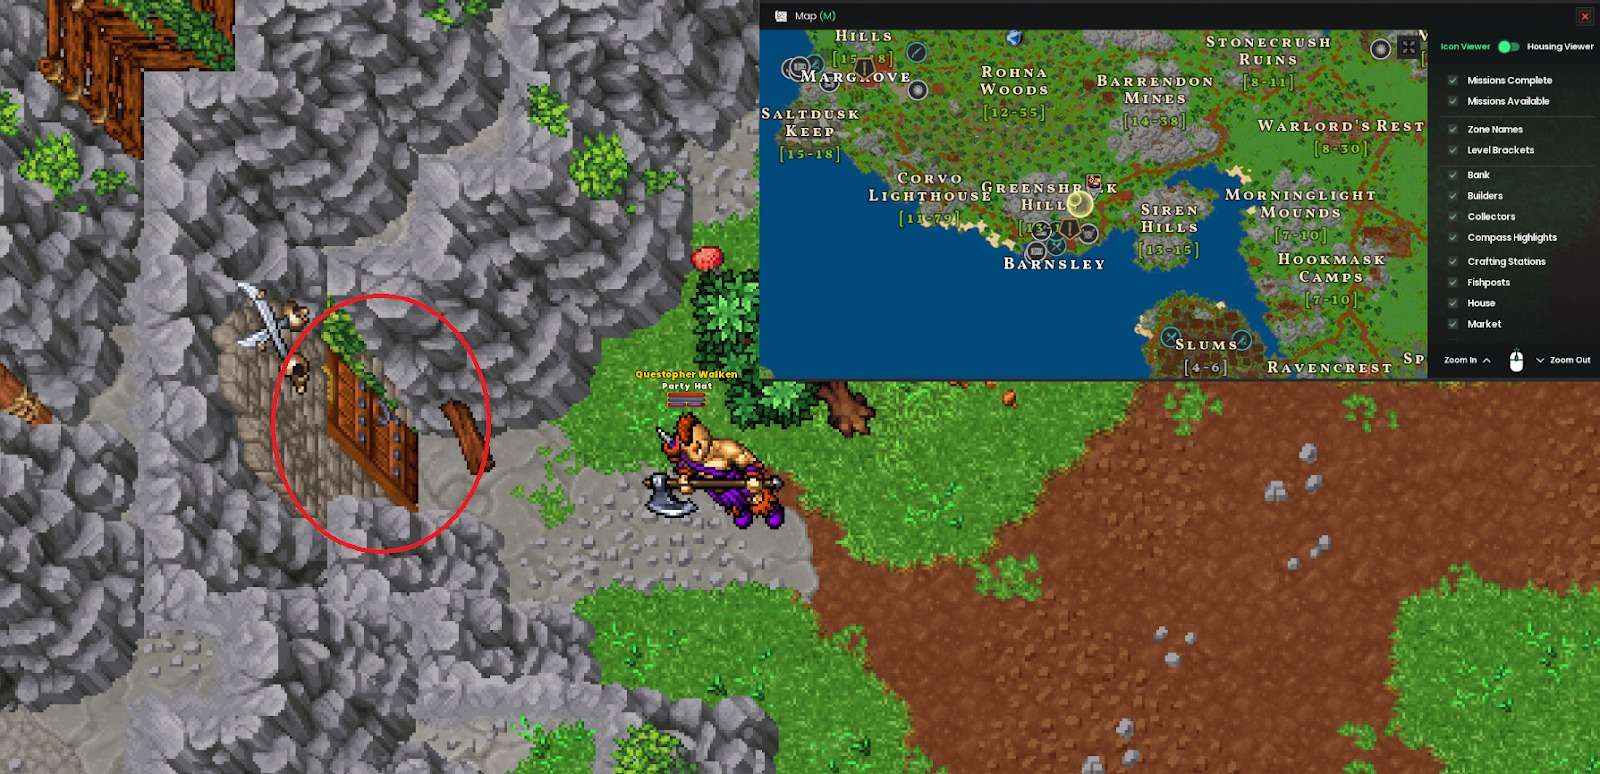
Use the Greenshriek Key to open the locked gate and examine the wagon for clues of Walder’s location.
Steps to Complete:
- Locate the locked door near Hendrick’s hut. (screenshot)
- Head one level down inside and interact with the mining wagon to examine it for clues.
- Once completed, return to Hendrick to turn in the quest.
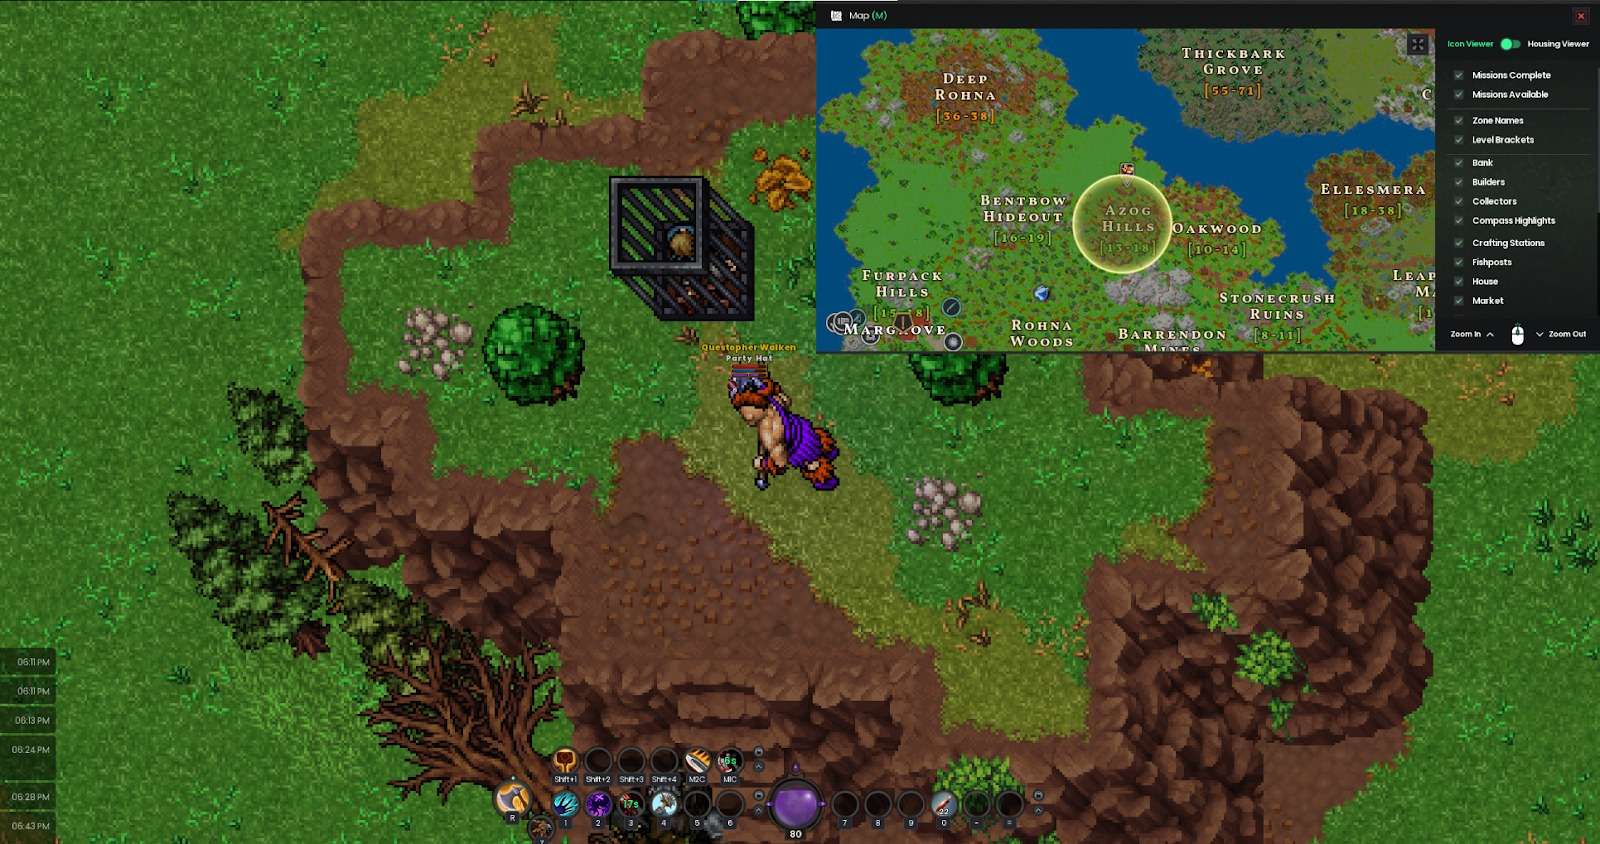
In the Goblin Camp, check the prisoner cages for Walder.
Steps to Complete:
- Head north to Azog Hills to find the Goblin Camp.
- Search the prisoner cages scattered across the camp—many will glow as quest items but will be empty.
- Continue toward the northeast corner of the camp to find the correct cage, which contains a body.
- Interact with the cage to complete the objective.
- Once done, return to Hendrick to turn in the quest.
Quest 13: New Horizons II
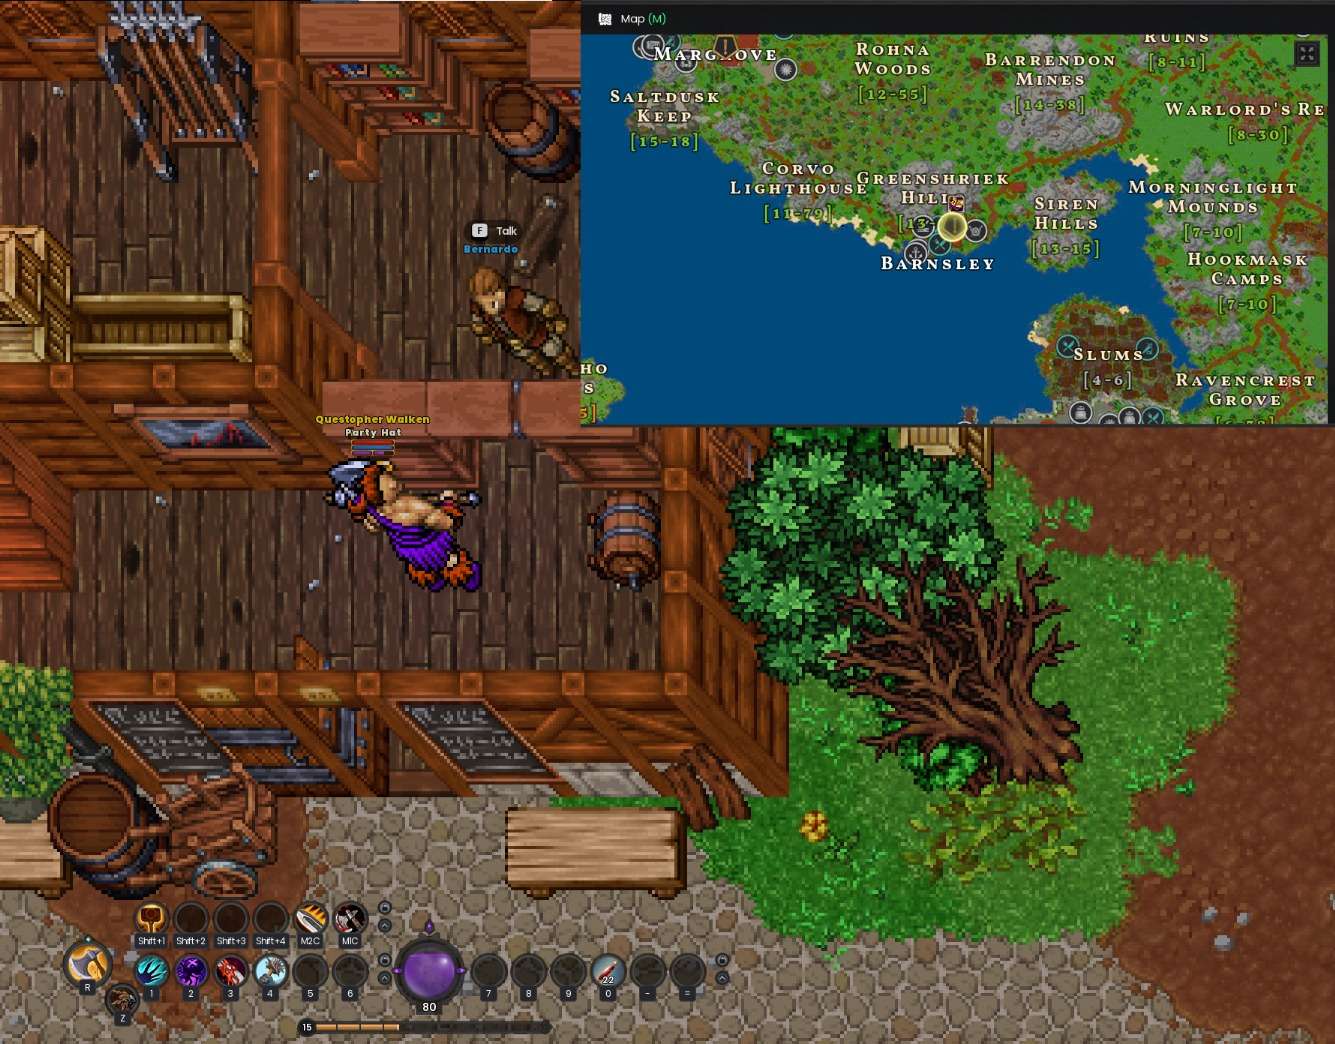
Speak with Bernardo, the mayor of Barnsley Hamlet.
Steps to Complete:
- Head to Barnsley Hamlet and locate Bernardo, the mayor.
- Speak with him to progress the quest.
Note: At this point, you likely reached level 15, which automatically unlocked a new quest in your quest log: Keepers of Balance.
This quest introduces the Rangers Company mechanics and will be addressed later in the guide. For now, focus on completing The Lighthouse Keeper.
Quest 14: The Lighthouse Keeper
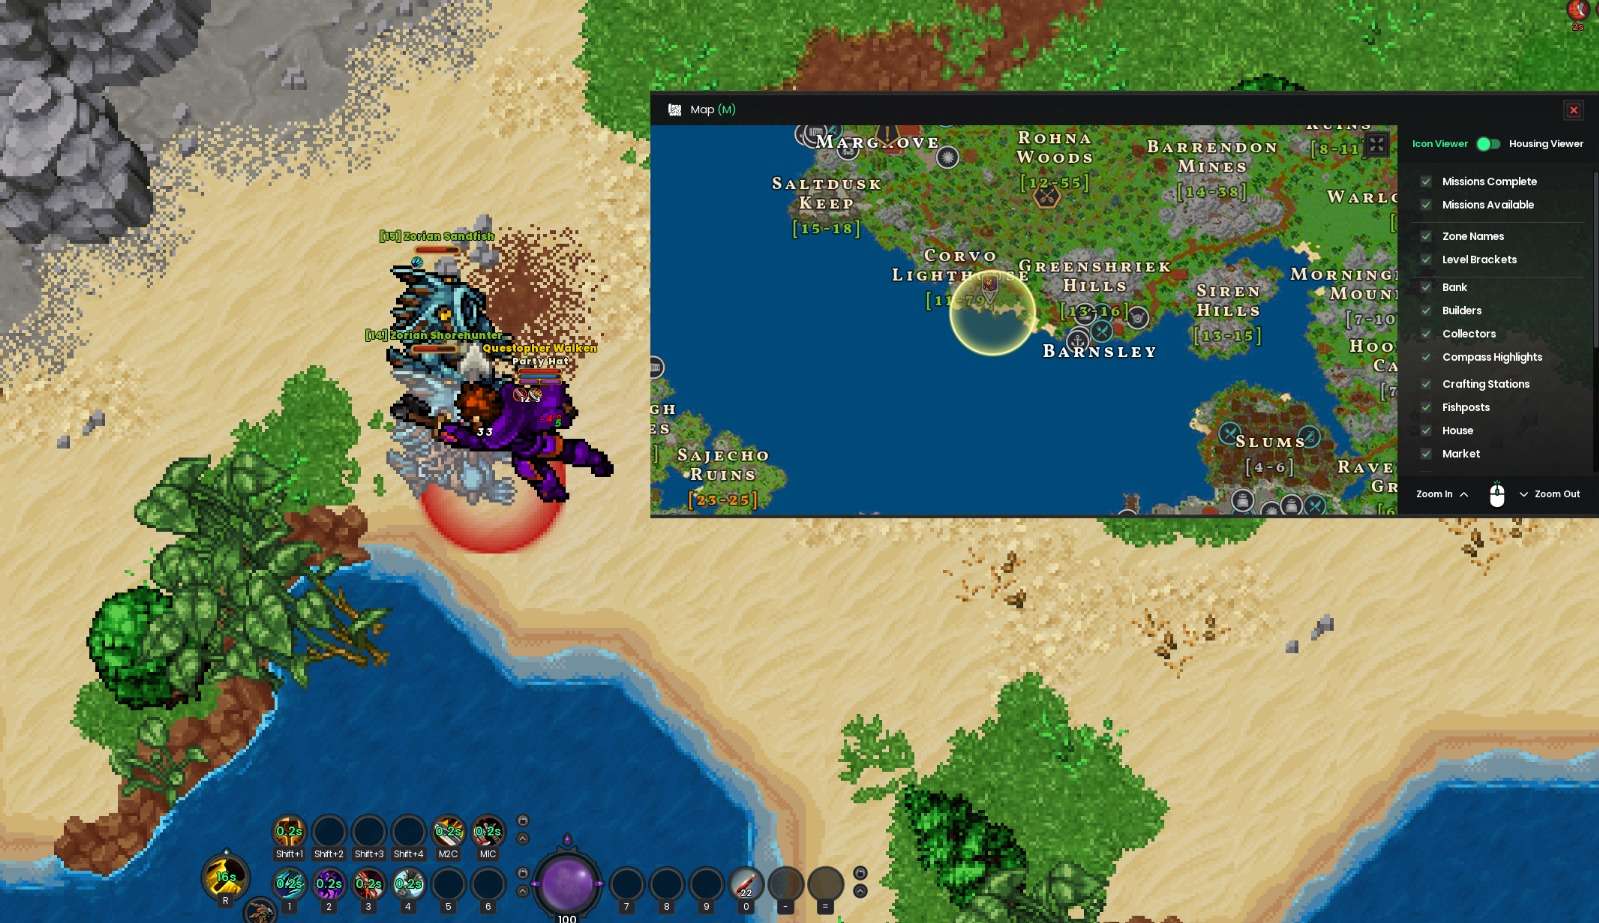
Kill 15 Zorians in the area between Barnsley and the Lighthouse.
Steps to Complete:
- Head to the coastline near Barnsley, close to the Lighthouse.
- Locate and defeat 15 Zorians along the shoreline.
- Once all 15 are defeated, head back to Bernardo again.
Deliver the supplies to the Lighthouse.
Steps to Complete:
- Travel to the Lighthouse located along the coast near Barnsley.
- Once there, search the body found at the Lighthouse to complete the objective.
- Return to Bernardo in Barnsley to turn in the objective.
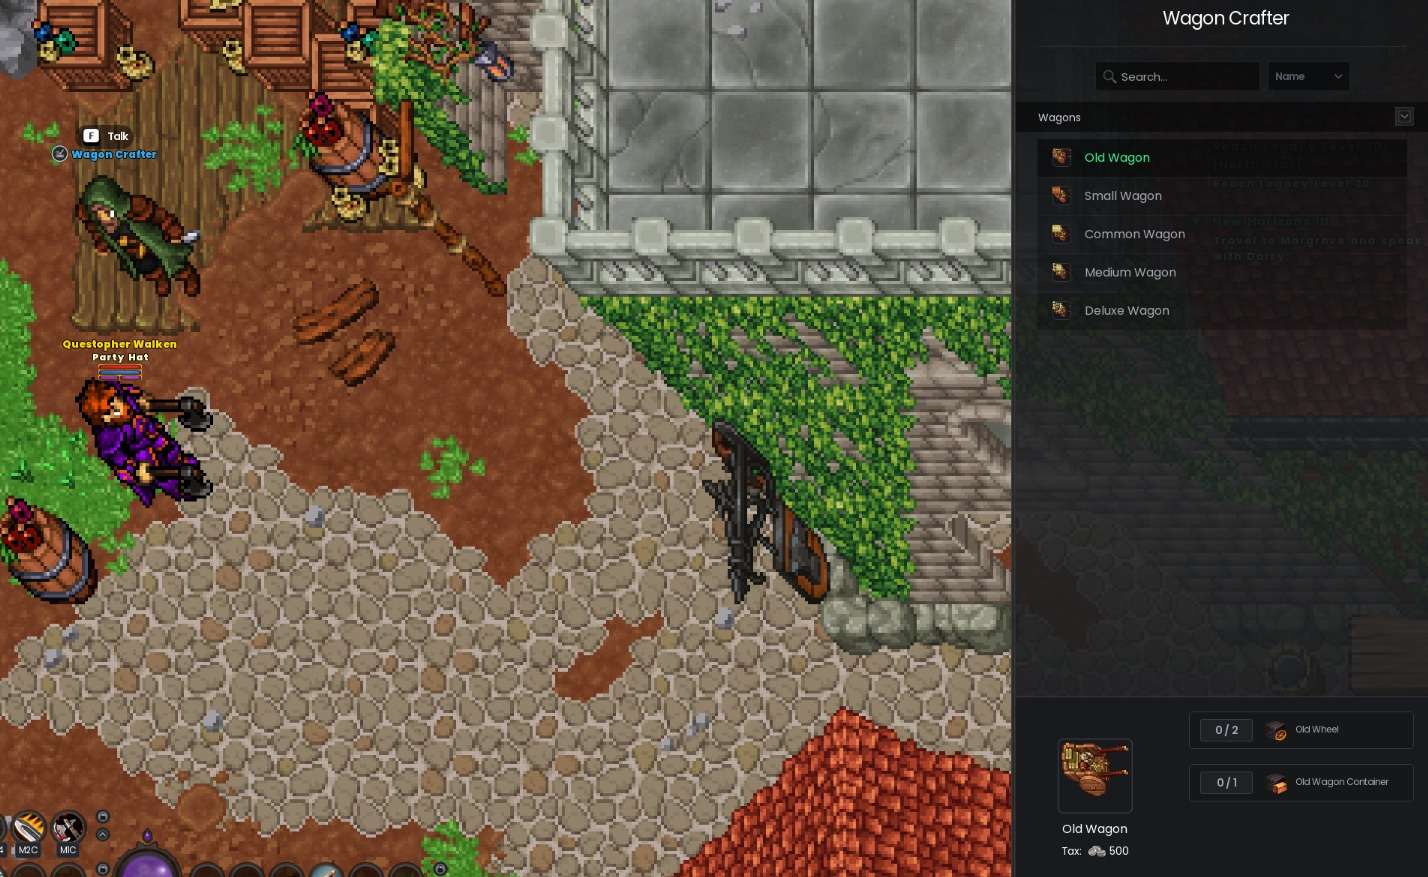
Use the material given by Bernardo to craft an Old Wagon.
Steps to Complete:
- Head to the Wagon Crafter in Barnsley.
- Speak with the Wagon Crafter to access the crafting menu.
- Use the materials provided by Bernardo to craft your Old Wagon.
Quest 15: New Horizons III
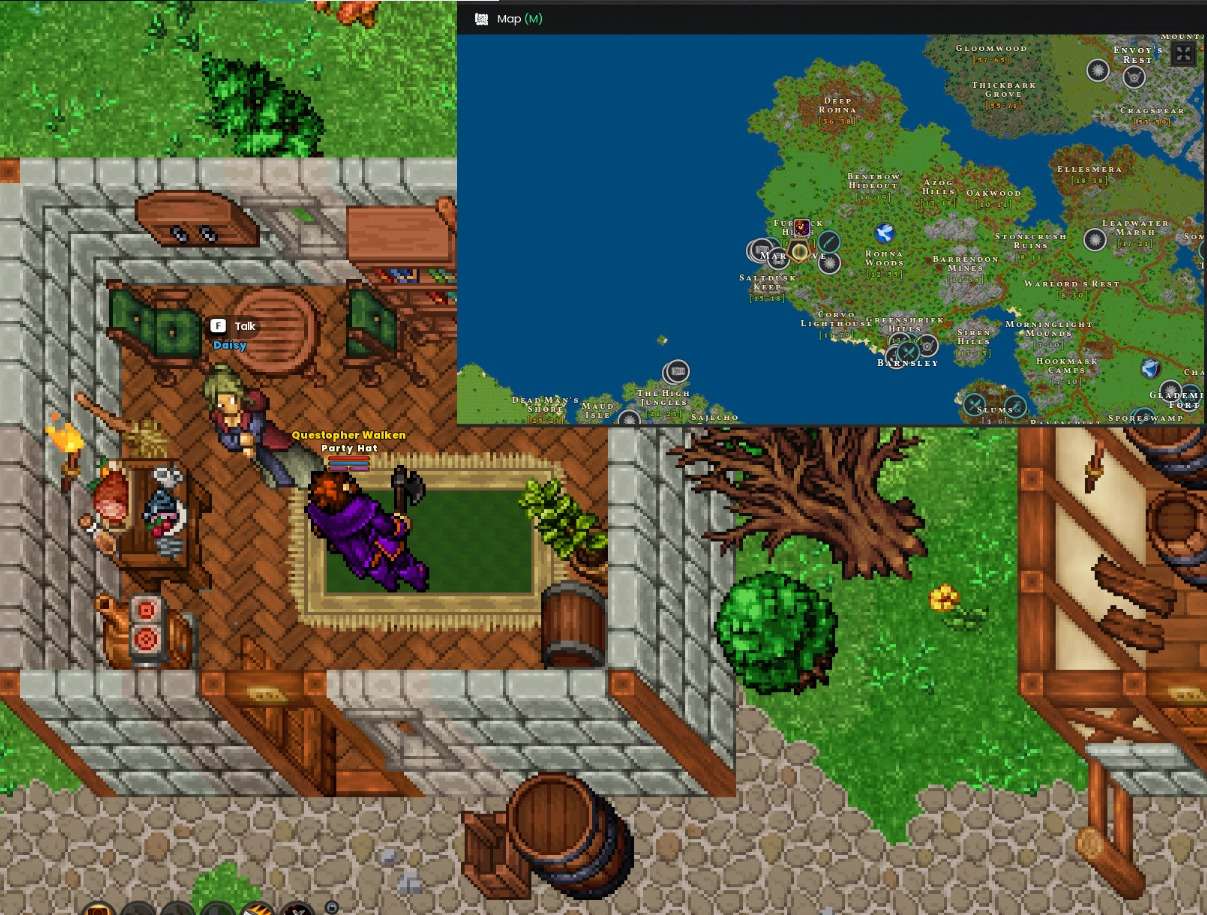
Travel to Margrove and speak with Daisy.
Steps to Complete:
- Head to Margrove, which is marked on your map.
- Locate Daisy in Margrove and speak with her to progress the quest.
Quest 16: Raiding the Raiders
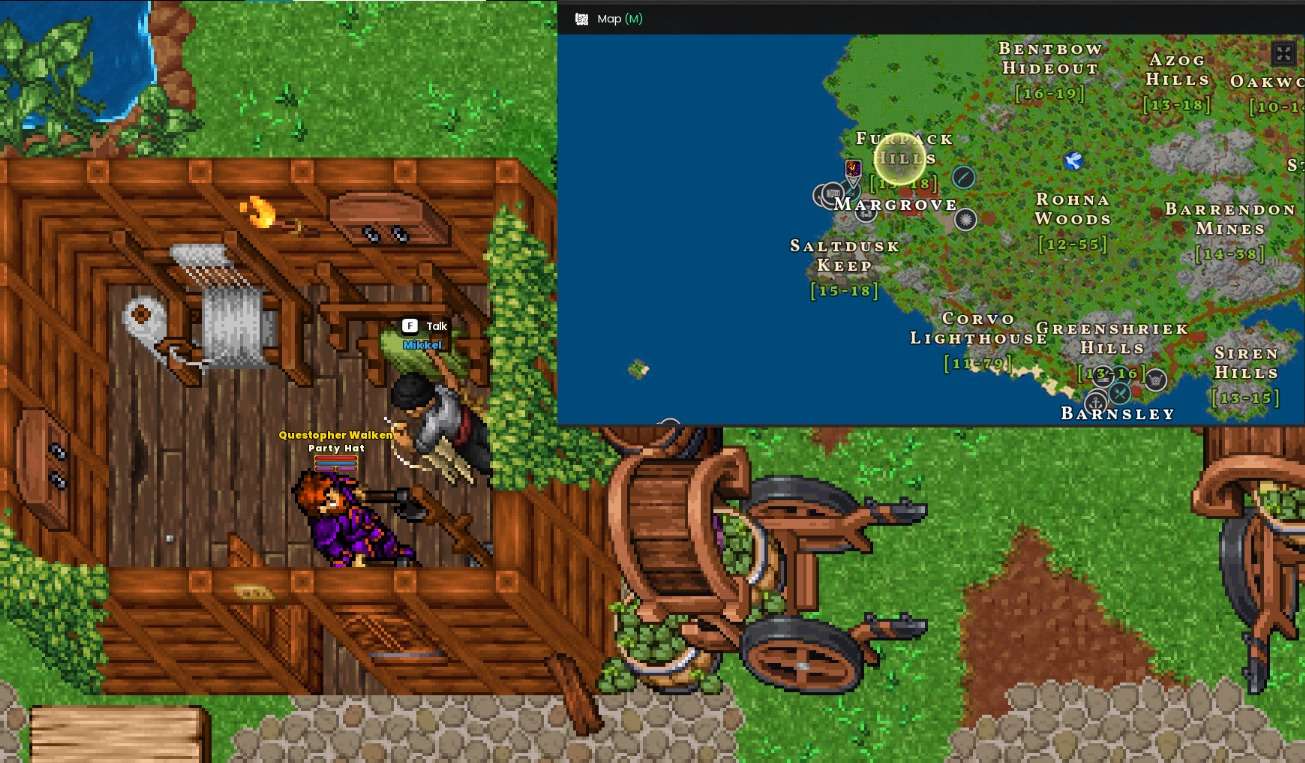
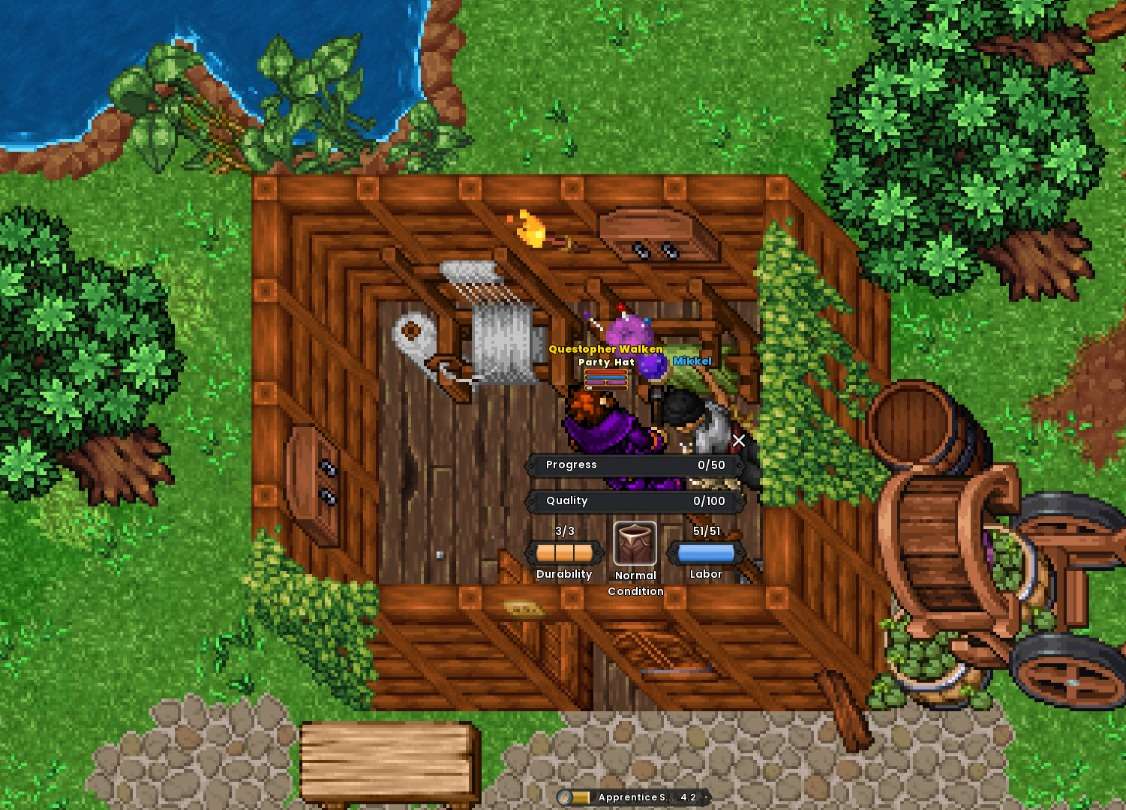
Bring the pieces of cloth to Mikkel, Margrove’s sailmaker and tailor.
Steps to Complete:
- Locate Mikkel, the town’s sailmaker and tailor.
- Deliver the pieces of cloth to Mikkel to complete the objective and progress the quest.
Find Mikkel’s assistant, who was dragged off by wolves into Furpack Hills.
Steps to Complete:
- Head to the Furpack Hills, marked on your map.
- Search the center of the marked area to locate Mikkel’s assistant.
- Once you find the assistant, go back to Mikkel.
While waiting for Mikkel to finish the outfit, go to the Margrove docks and catch one fish.
Steps to Complete:
- Equip your fishing rod and hook.
- Use the fishing spot near Mikkel’s house at the Margrove docks to catch a fish.
- This will introduce you to the basics of the fishing system.
- After catching the fish, return to Mikkel to progress the quest.
- Speak with Daisy next to continue.
Note: At this point, you can choose and craft your third Tier 1 armor piece to complete your set! Use the materials provided to craft it at the appropriate workstation for your armor type.
Convince the guard to let you into the keep.
Steps to Complete:
- After speaking with Daisy, this objective will appear.
- Travel south from Margrove to Saltdusk Keep.
- Speak with the guard at the entrance to convince them to let you inside.

Kill the three Saltdusk Lieutenants: “Razor Jonny,” “Sam the Viper,” and “Two Face Dale.”
Steps to Complete:
- Razor Jonny:
- Upon entering the city, take the upper path and follow it straight to reach Razor Jonny.
- Sam the Viper:
- Enter the largest building in the center of the city.
- Go one level down and find Sam the Viper in a large, open room.
- After defeating him, head north to the next room.
- Two Face Dale:
- Continue north and look for a staircase (3 steps) leading down.
- Once on the lower level, head south, and turn left into the first room.
- Follow the hallway and take the first left to find Two Face Dale.
Use the Saltdusk Cell Key to unlock the cells of Saltdusk Keep.
Steps to Complete:
- Exit Two Face Dale’s room and turn right, heading back toward the direction you came.
- Pass through the large hall and continue straight down the hallway.
- At the first right turn, go down the corridor to find the prison cells.
- Unlock all the cells using the Saltdusk Cell Key and interact with each prisoner to complete the objective.
Kill Sweet Lou, the sadistic leader of the Saltdusk Raiders.
Steps to Complete:
- Exit the cell area and turn right.
- After a few steps, turn right again and open the door leading to the staircase.
- Go one level down to find Sweet Lou.
- Defeat Sweet Lou to complete the objective.
- Return to Daisy in Margrove to finalize the quest.

Quest 17: New Horizons IV
Speak with the sick merchant at the edge of Margrove.
Steps to Complete:
- Head to the edge of Margrove, as marked on your map.
- Locate the sick merchant (outside of the tavern i Margrove) and speak with him to progress the quest.
Quest 18: A Merchant and His Bellyache
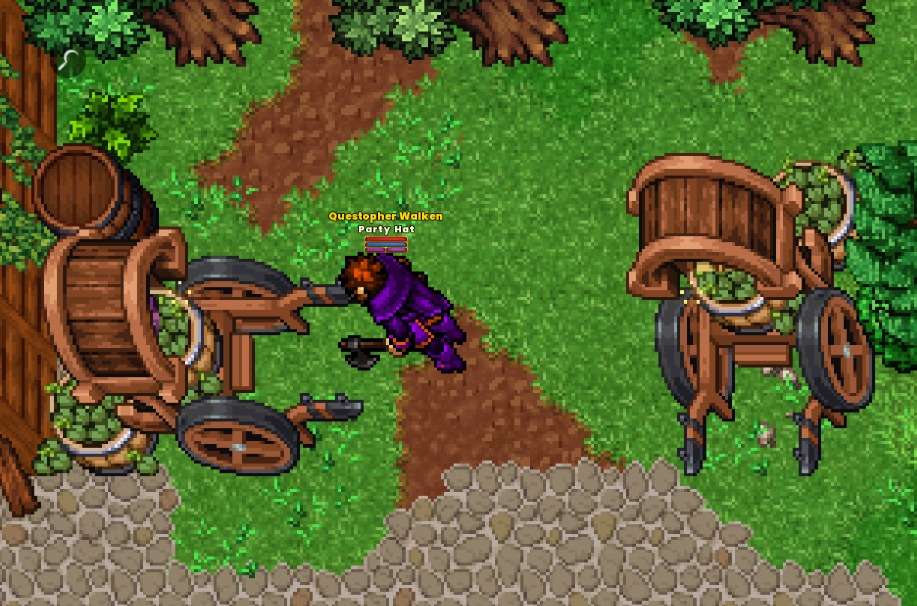
Collect the Pears and Plums from the Margrove farmer’s wagons.
Steps to Complete:
- Locate the farmer’s wagons in Margrove, marked on your map.
- Collect the required Pears and Plums from the wagons.
- Return to Ezra once you’ve collected all the items.
Deliver the Package of Goods to Chief Trader Sage in Glademire Fort.
Steps to Complete:
- Head to Glademire Fort, as marked on your map.
- Deliver the Package of Goods to Chief Trader Sage.

Before continuing with Quest 18, it’s time to take a detour and dive into your first Rangers Company task. The Rangers Company is an essential faction in RavenQuest, offering you Fame, powerful gear, and unique rewards through its bounty board system. Here’s a quick overview to get you started.
Quest Introducing Rangers Company: Keepers of Balance
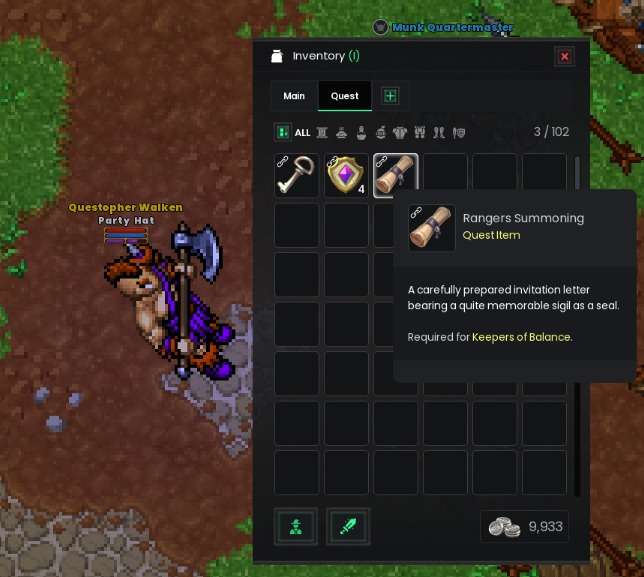
Read the summoning letter that you’ve received.
Steps to Complete:
- Upon reaching level 15, you’ll automatically receive the Ranger’s Summoning Letter in your backpack.
- Open your backpack and navigate to the quest tab to find the letter.
- Locate the item named Ranger’s Summoning and use it to activate the quest.
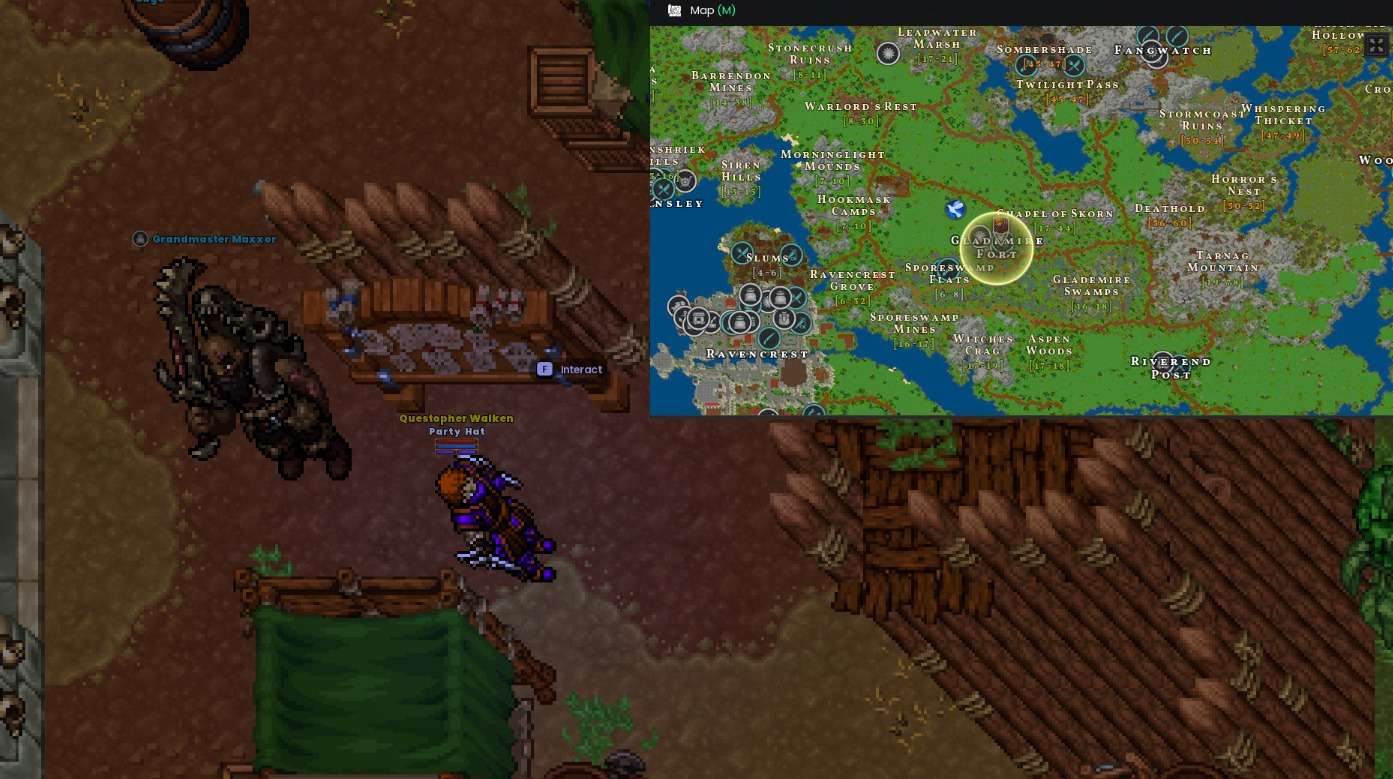
Go to the Rangers Company headquarters in Glademire(you already there if you followed the guide) and look for Grandmaster Maxxor.
Steps to Complete:
- Travel to Glademire Fort to find the Rangers Company headquarters.
- Locate and speak with Grandmaster Maxxor to progress the quest.
Rangers Company: Bounty Board Overview
The Rangers Company Bounty Board is a key mechanic in the game, allowing players to take on various tasks to earn powerful gear and Fame, which helps progress through the Rangers Company ranks. (If you’re in a hurry, pick a small task, as even those can take time at this stage, larger tasks offer bigger rewards!)
How It Works:
- Location: Each Rangers Company outpost has a Bounty Board.
Task Selection:
- Interact with the board to view available tasks.
- Choose tasks that match your level and abilities—be cautious not to pick tasks that are too difficult!
Objectives: Hunting Creatures.
Why It’s Important:
- Fame Progression: Completing tasks increases your Fame.
- Rewards: Higher ranks grant access to better rewards and stronger equipment, improving your character’s power and progression.
Tips from Grandmaster Maxxor:
- Start with tasks at your level to avoid unnecessary challenges.
- The more tasks you complete, the faster you’ll advance through the ranks.
- Higher ranks mean better rewards, so keep pushing forward!
The Bounty Board system is designed to help players grow stronger and gain access to exclusive rewards, making it a critical mechanic to focus on as you progress.
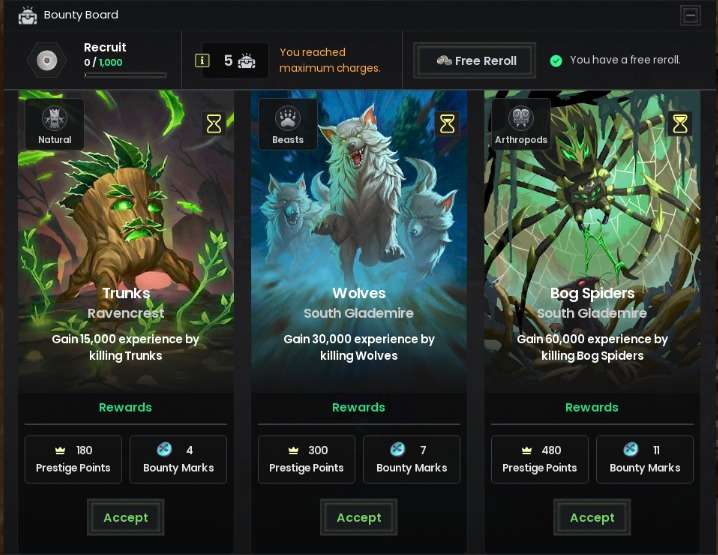
Go to one of the Rangers Company’s outposts and pick a task from its Bounty Board.
Steps to Complete:
- Travel to any Rangers Company outpost (one is just right next to you)
- Interact with the Bounty Board to view the available tasks.
- Select a task that suits your level and abilities to progress.

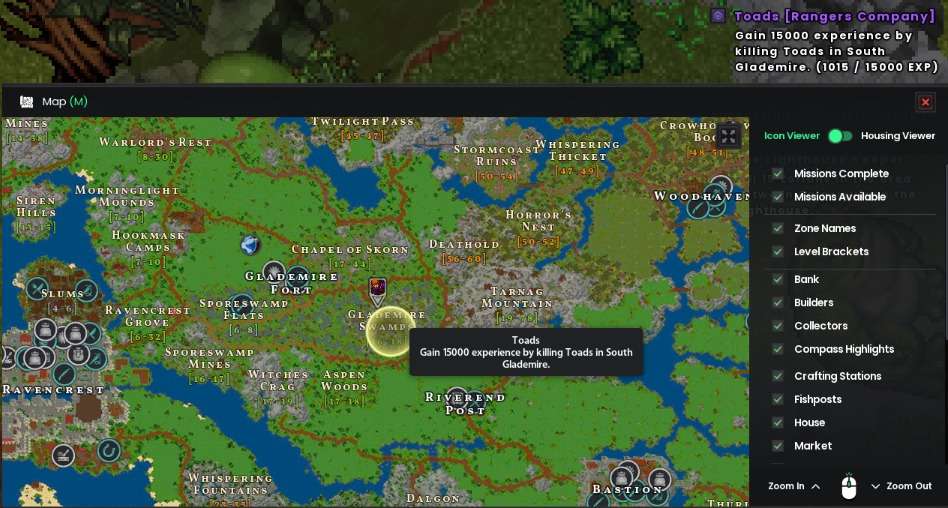
Successfully complete a task for the Rangers Company.
Steps to Complete:
- Open the map to locate the creatures required for the task you selected from the Bounty Board.
- Travel to the marked area and kill the required number of creatures to complete the task.
- Once done, open the Rangers Company interface by pressing (B) to track your progress and confirm task completion.
- Return to Glademire Fort and speak with the Work Quartermaster, located next to the Rangers Company board, to finalize the objective.
Now that the Rangers Company task detour is complete, you are back on track to finishing Quest 18!
Quest 18: A Merchant and His Bellyache
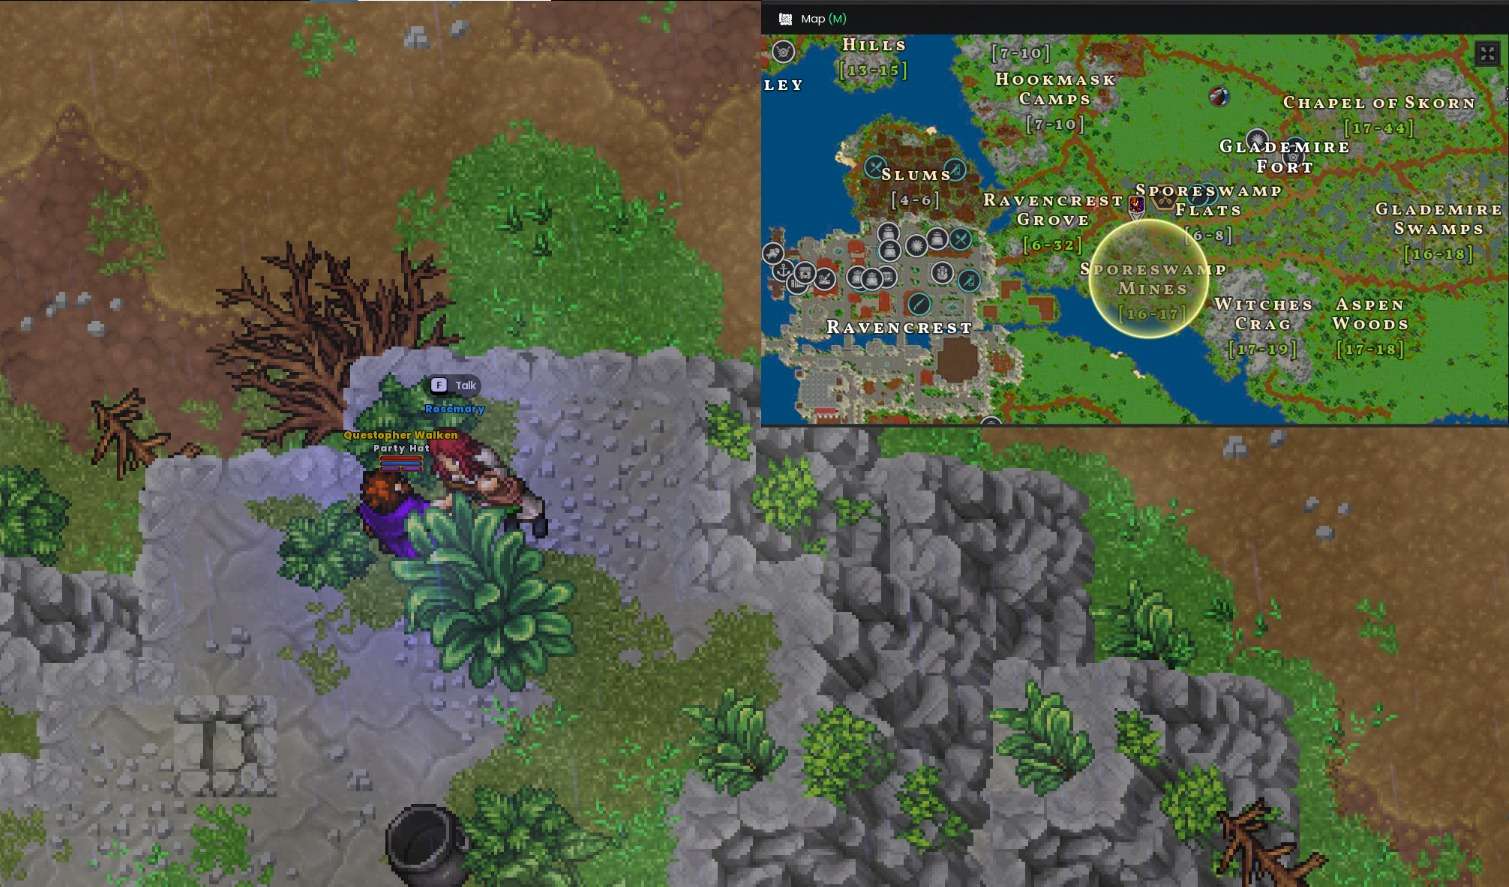
Find and speak with the Lady of the Mire.
Steps to Complete:
- Follow the marked location on your map, which appears as a circle.
- Enter the area at the 3 o’clock position of the circle and head north.
- Continue climbing until you reach the top of a hill where you’ll find Rosemary, the Lady of the Mire.
- Speak with Rosemary to complete the objective.
Kill Haunted Trunks and collect one of each.
Steps to Complete:
- In the marked area, eliminate all Haunted Trunks until you have gathered all the required items.
- Once you have collected all the items, return to Rosemary and hand them over.
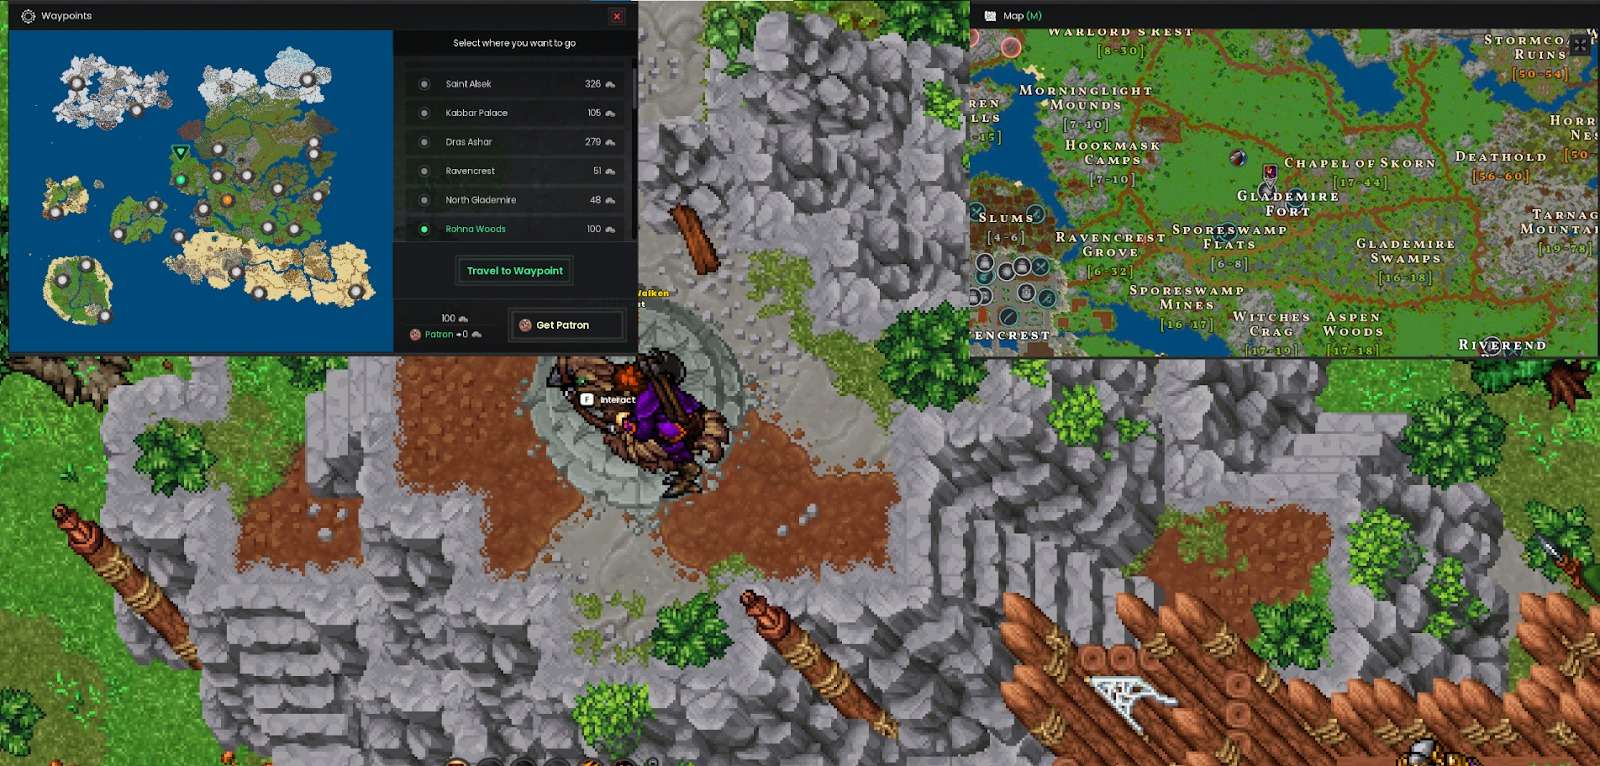
- After completing the task with Rosemary, head back to Glademire Fort and speak with Chief Trader Sage.
- Use the Respawn Shrine to teleport to Rohna Woods, then deliver the quest to Ezra.
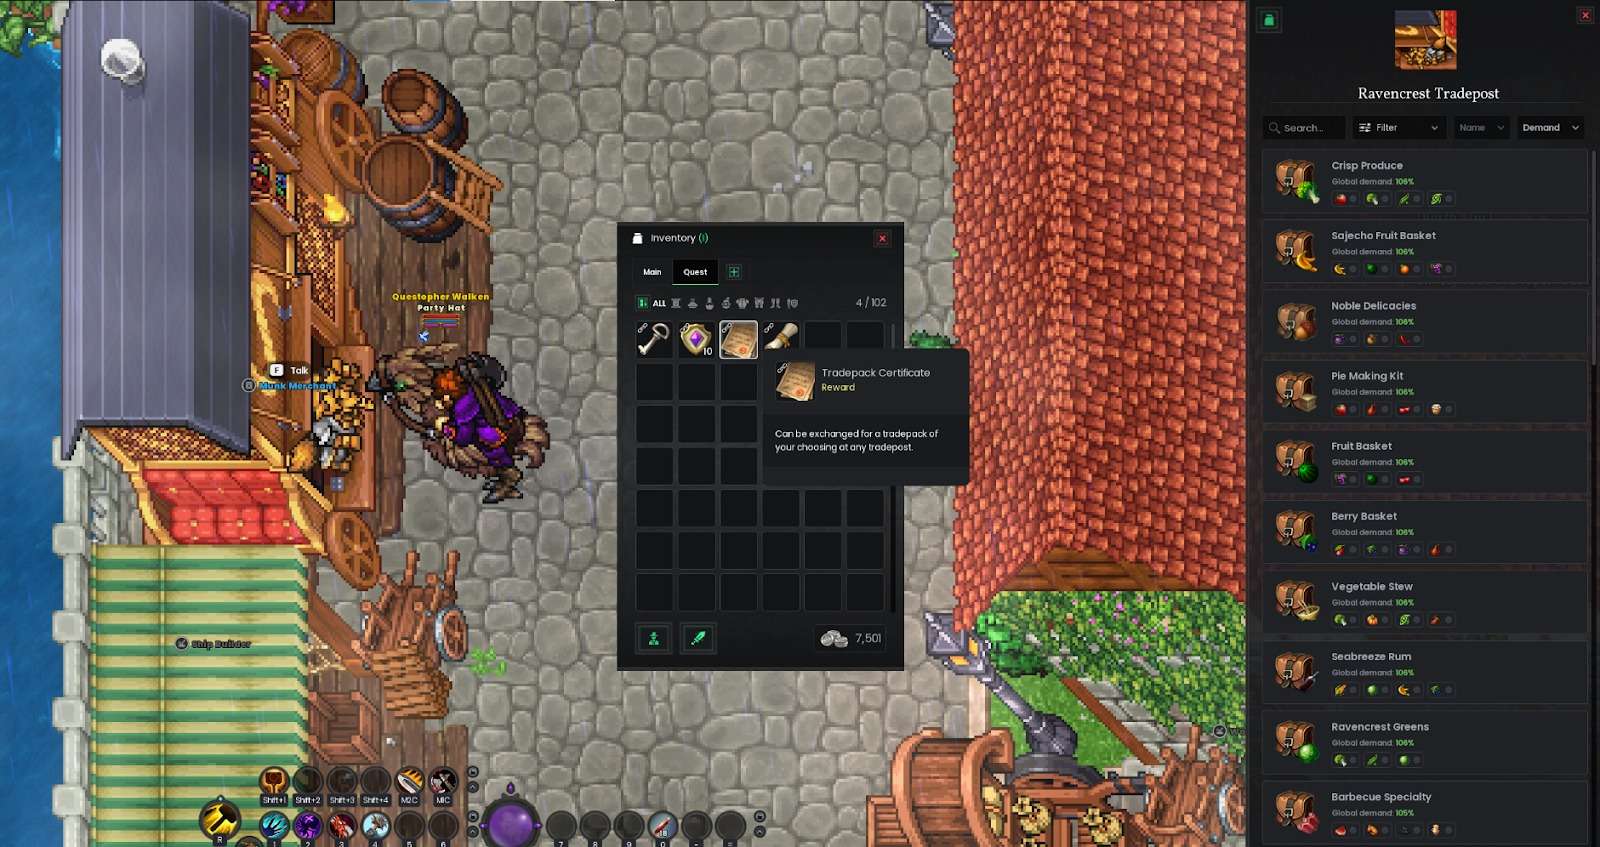
Tradepack Certificates and Their Usage
You just received a Tradepack Certificate as the quest reward from the pervious quest, which can be exchanged for a Tradepack at any Tradepost. These Tradepacks can only be:
- Crafted at Tradeposts: Players must gather materials or use their Tradepack Certificate to create a Tradepack at one Tradepost.
- Sold at a Different Tradepost: Tradepacks must be delivered and sold at another Tradepost in exchange for Silver.
This system ensures players actively engage in RavenQuest’s economy by traveling between Tradeposts and making strategic decisions about where to craft and sell their Tradepacks.
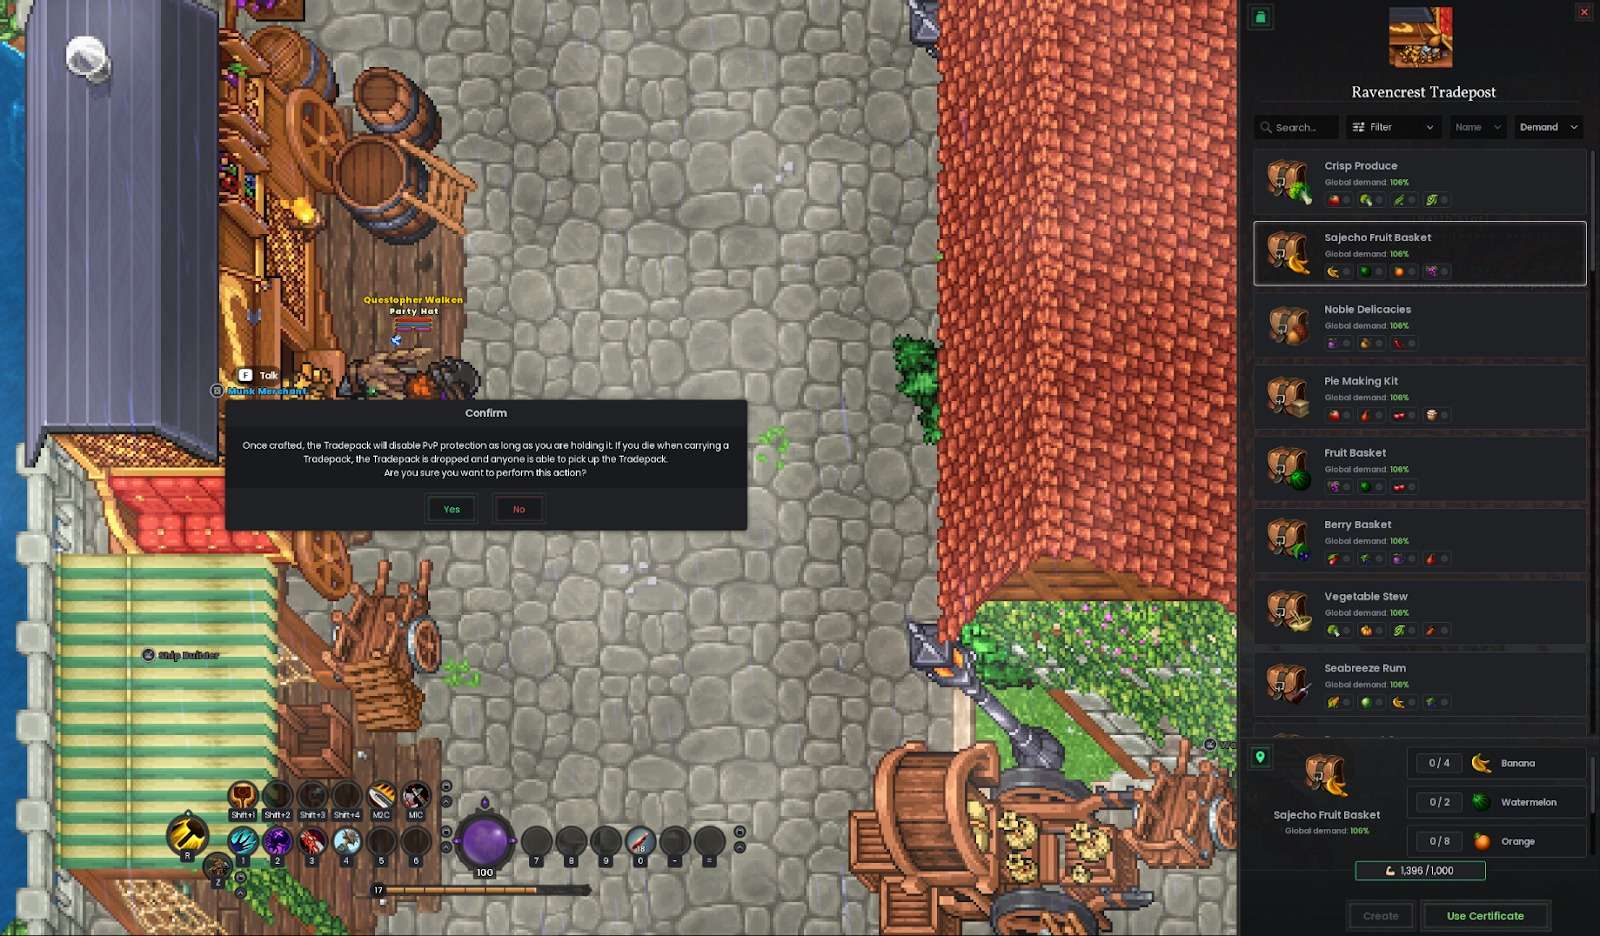
Tradepacks Overview
The Tradepack System is a cornerstone of RavenQuest’s player-driven economy, allowing adventurers to actively influence the game’s market. Here’s a summary of how it works:
Key Features:
- Player-Driven Economy: The Tradepack System operates using a self-balancing supply and demand algorithm, ensuring no external interference in the market. Players gather resources, craft Tradepacks, and control the economy entirely.
- Core Silver Generation: Tradepacks are the main method for generating Silver in the game. Players transport them to Tradeposts to earn Silver and occasionally rare resources.
- Diverse Materials: Tradepacks can be crafted using a variety of materials, including eggs, milk, ore, lumber, or wheat, which can be gathered through exploration or Estates.
Tradeposts and Supply & Demand:
- Tradeposts: Locations around the map where players craft and turn in Tradepacks. These simulate real-world markets with fluctuating supply and demand.
- Dynamic Pricing: High supply reduces the value of a Tradepack, while scarce items and less-frequented Tradeposts offer greater rewards. Players can view demand/supply data for every Tradepost in the game to strategize their deliveries.
Transportation Options:
- Slower Movement: Carrying Tradepacks reduces a player’s movement speed.
- Efficient Transport: Use Wagons, Ships, or Mounts (NFTs) to speed up and secure Tradepack deliveries. Riskier routes with higher demand often yield better rewards.
Strategy:
Players must balance risk vs. reward by deciding whether to take a safer route with lower profits or a more dangerous, high-demand journey for greater rewards. The dynamic nature of the economy keeps the system engaging and competitive.
The Tradepack System is an essential aspect of RavenQuest, offering players meaningful choices and opportunities to shape the in-game economy.
Let’s continue the quest chain.
Quest 19: New Horizons V
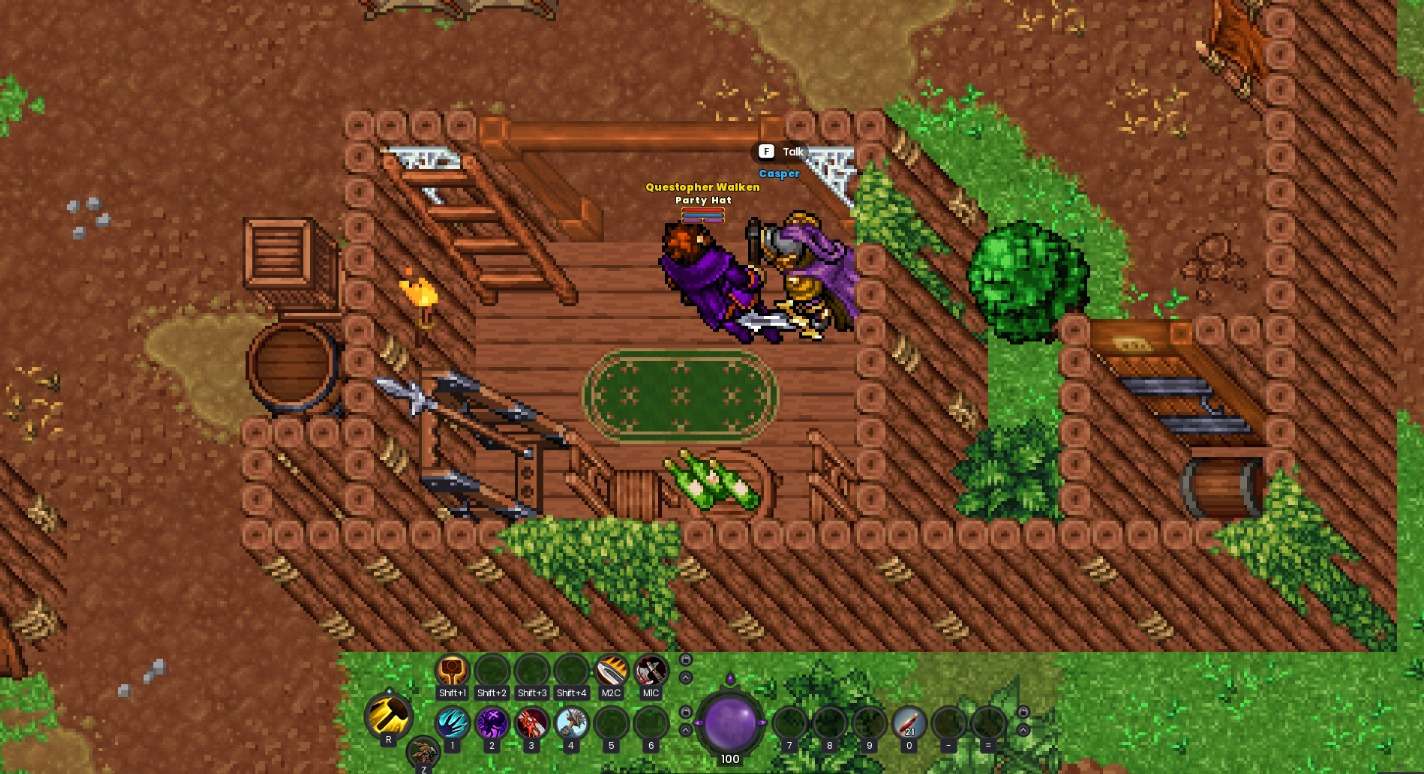
Bring the Sage’s letter of recommendation to the commander of Glademire Fort.
Steps to Complete:
- Use the Respawn Shrine or teleport to South Glademire.
- Locate and speak with Casper, the commander of Glademire Fort, to deliver the letter and complete the quest.
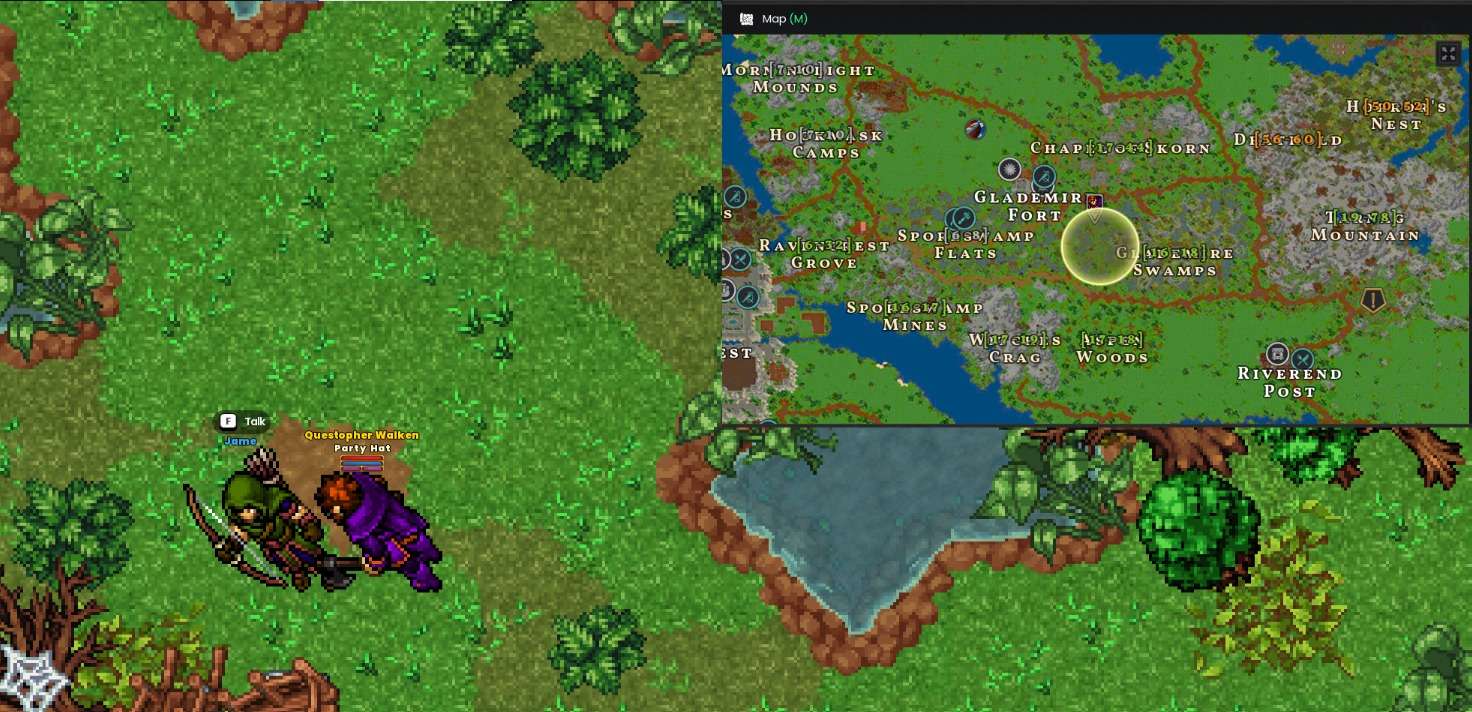
Quest 20: Missing in Action
Find Jame, the scout in charge of the mission.
Steps to Complete:
- Head to the marked area on the map to locate Jame.
- Search for Jame in the mission zone and interact with him to advance the quest.
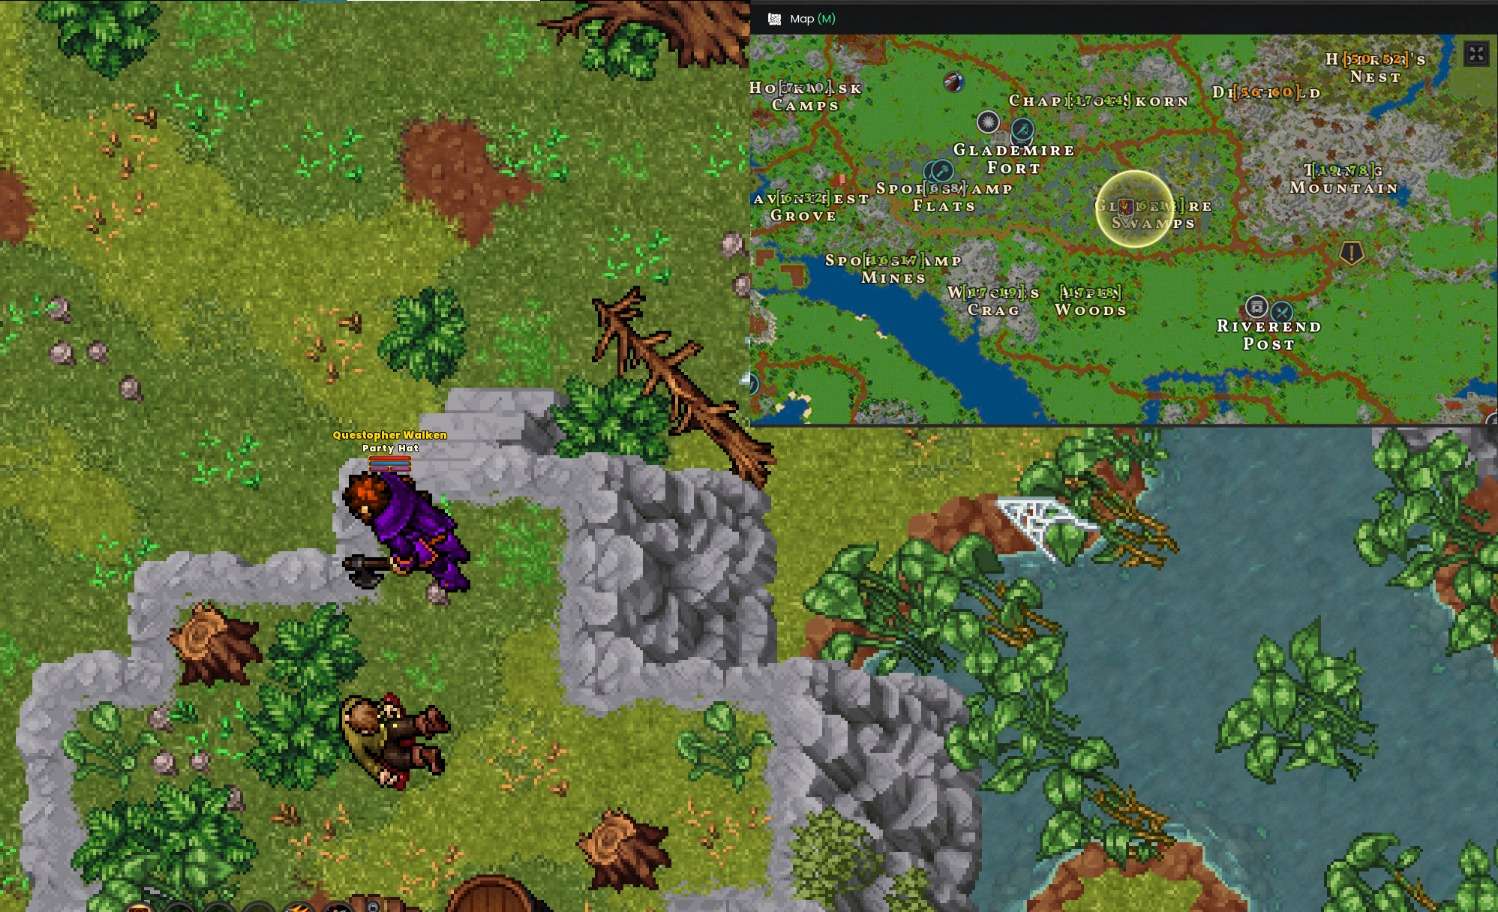
Find Leroy, who was carrying the Antidotes and Bags of Salt.
Steps to Complete:
- Head south-southeast from Jame’s location to a lone hill where Leroy can be found.
- Interact with Leroy’s items to collect the quest objectives.
- Return to Jame to progress further.
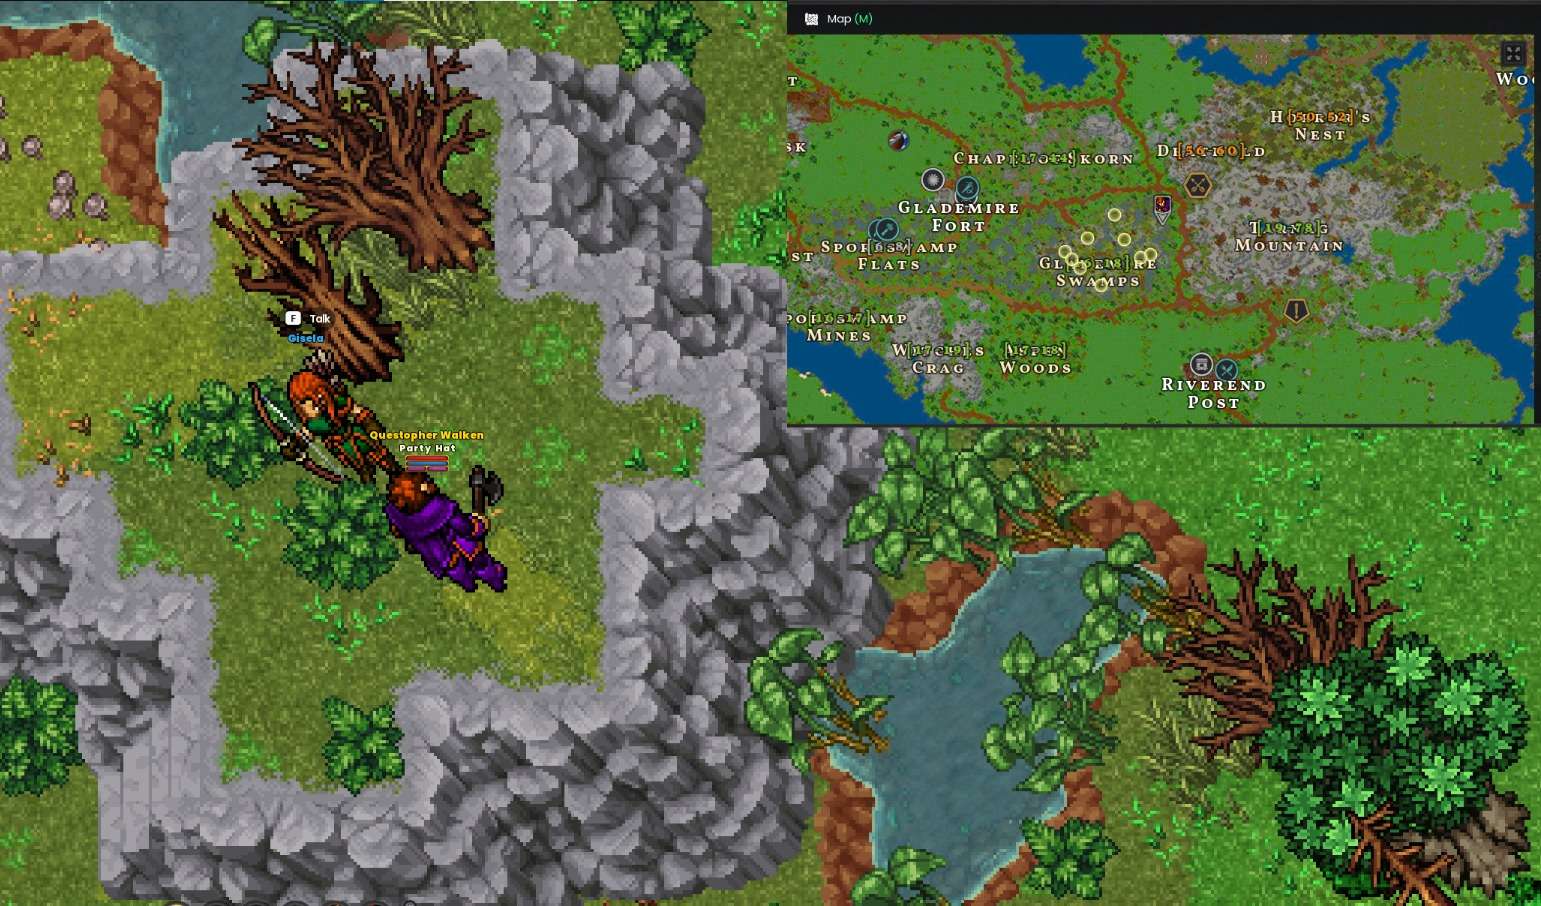
Find out what happened to the third scout, Gisela.
Steps to Complete:
- From Jame’s location, head directly south and take the first right.
- Cross the wooden bridge, then continue over a second bridge.
- Proceed north, moving through the hills, and head to the northeastern corner of the map.
- Locate and speak with Gisela to complete this objective.
Use the Bag of Salt to destroy 7 Tadpole Nests.
Steps to Complete:
- Open your map, where the nests are clearly marked.
- Locate and destroy all 7 Tadpole Nests by using the Bag of Salt on them.
- Once completed, return to Gisela to report back.
- After speaking with Gisela, head back to Casper in Glademire Fort to finalize the quest.

Quest 21: The Adventurer’s Path I
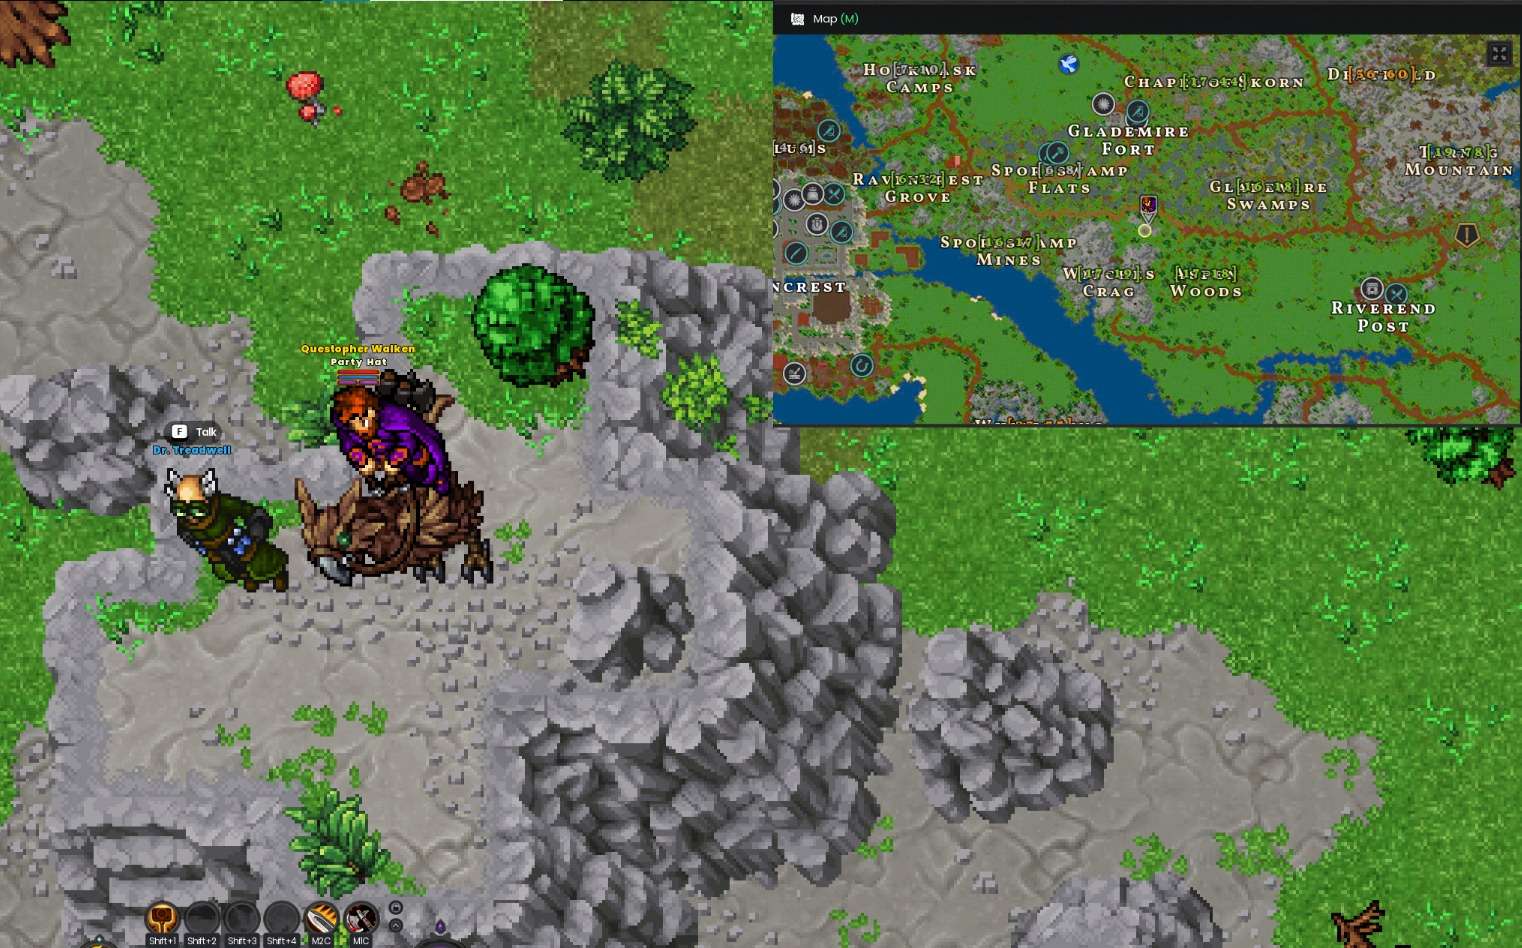
Speak with Commander Casper and then head to the marked location on the map. Find and speak with Dr. Treadwell, located slightly east of the marked area on a hill.
Steps to Complete:
- Speak with Commander Casper in Glademire Fort to receive the next task.
- Open your map and locate the marked area for Dr. Treadwell.
- Travel to the location and look for Dr. Treadwell on a hill slightly east of the marked point.
- Initiate a conversation with him to proceed.
Quest 22: The Best Antidote
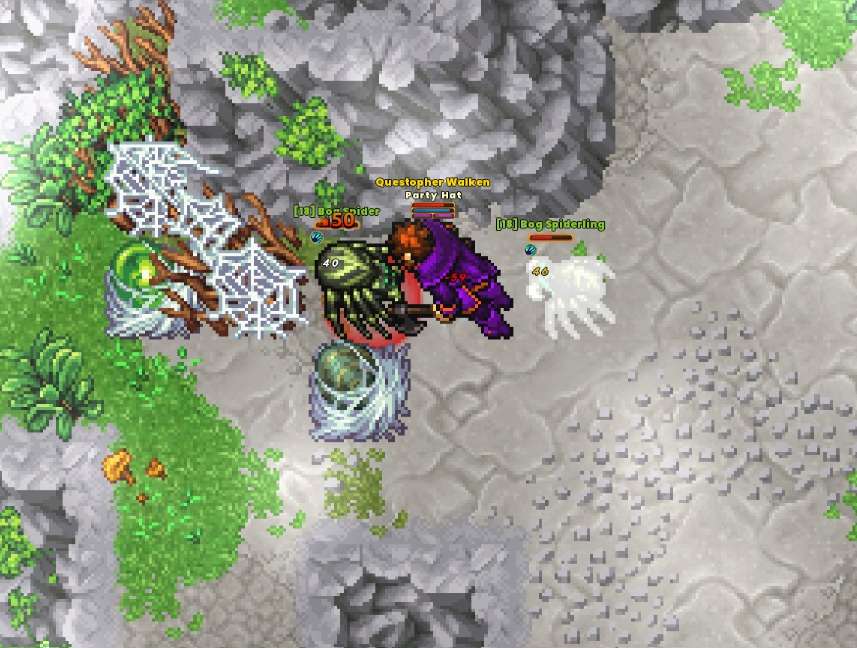
Speak with Dr. Treadwell, then use the Torch to destroy five Bog Spider Nests spread throughout Witches Crag.
Steps to Complete:
- Speak with Dr. Treadwell, found on the hill east of the marked area.
- Receive the Torch from him as part of the quest.
- Travel to Witches Crag and locate the five Bog Spider Nests (marked on your map).
- Use the Torch on each nest to burn them.
- Return to Dr. Treadwell to complete the quest.
Kill the Witches Crag Queen and extract the poison from its body.
Steps to Complete:
- Travel back to the top of Witches Crag.
- Locate and kill the Witches Crag Queen, which resides at the peak.
- Extract the poison from the Queen’s body.
- Return to Dr. Treadwell to complete this part of the quest.
- Afterward, go to Rosemary. (You met her earlier in the quest “A Merchant and His Bellyache”.)
- Go back to Dr. Treadwell and speak with him again.

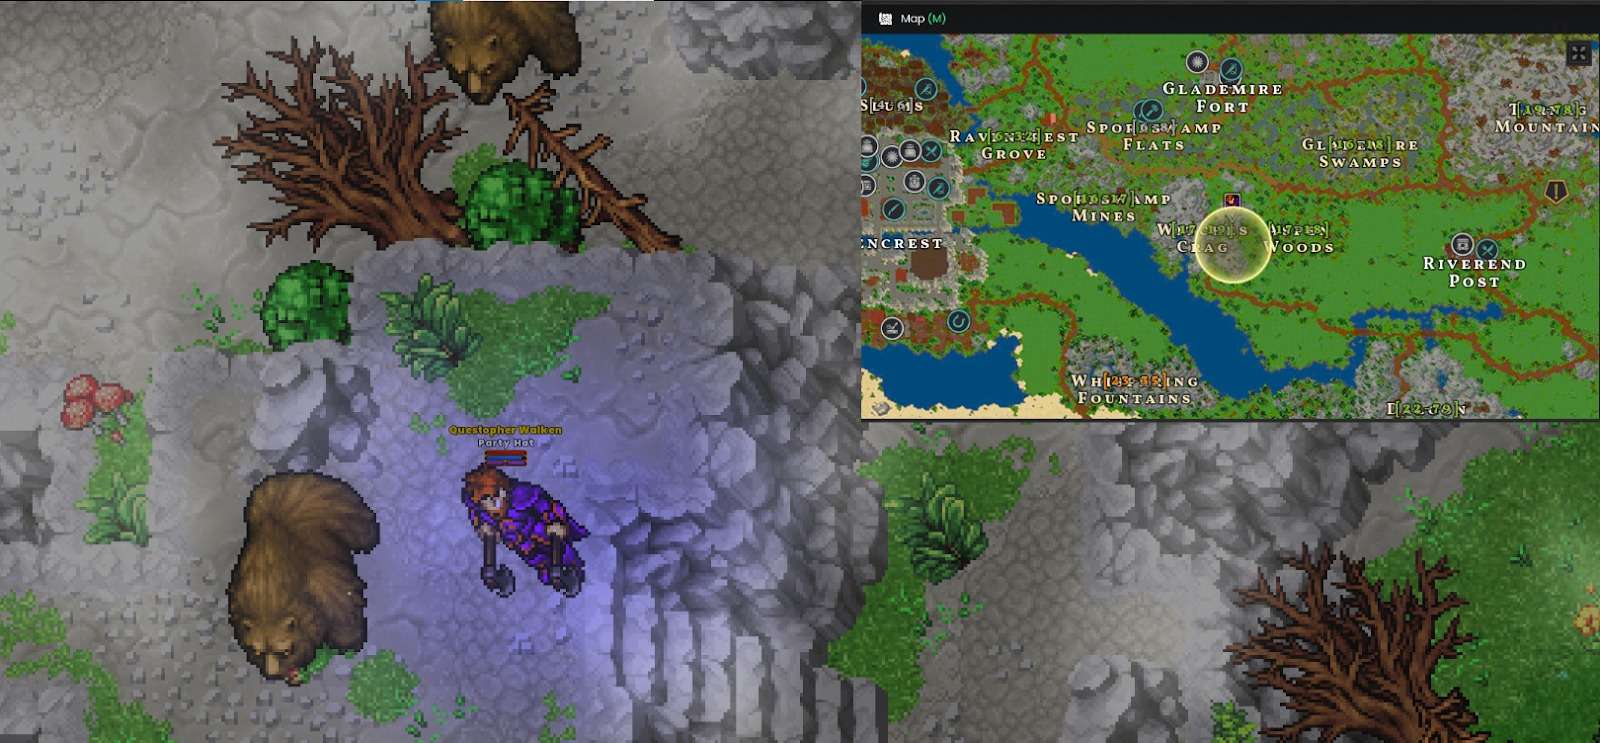
Use the Bog Spider Antidote to cure the three Poisoned Bears.
Steps to Complete:
- Locate the three Poisoned Bears in the area. Their locations are marked on the map.
- Use the Bog Spider Antidote from your inventory on each Poisoned Bear.
- Once all three are cured, return to Dr. Treadwell to proceed with the quest.
Quest 23: The Adventurer’s Path II
Speak with Commander Casper when you’re ready for your next mission.
Steps to Complete:
- Return to Glademire Fort and find Commander Casper at his usual location.
- Speak with him to receive your next mission and continue the storyline.
Quest 24: Swamp Fever
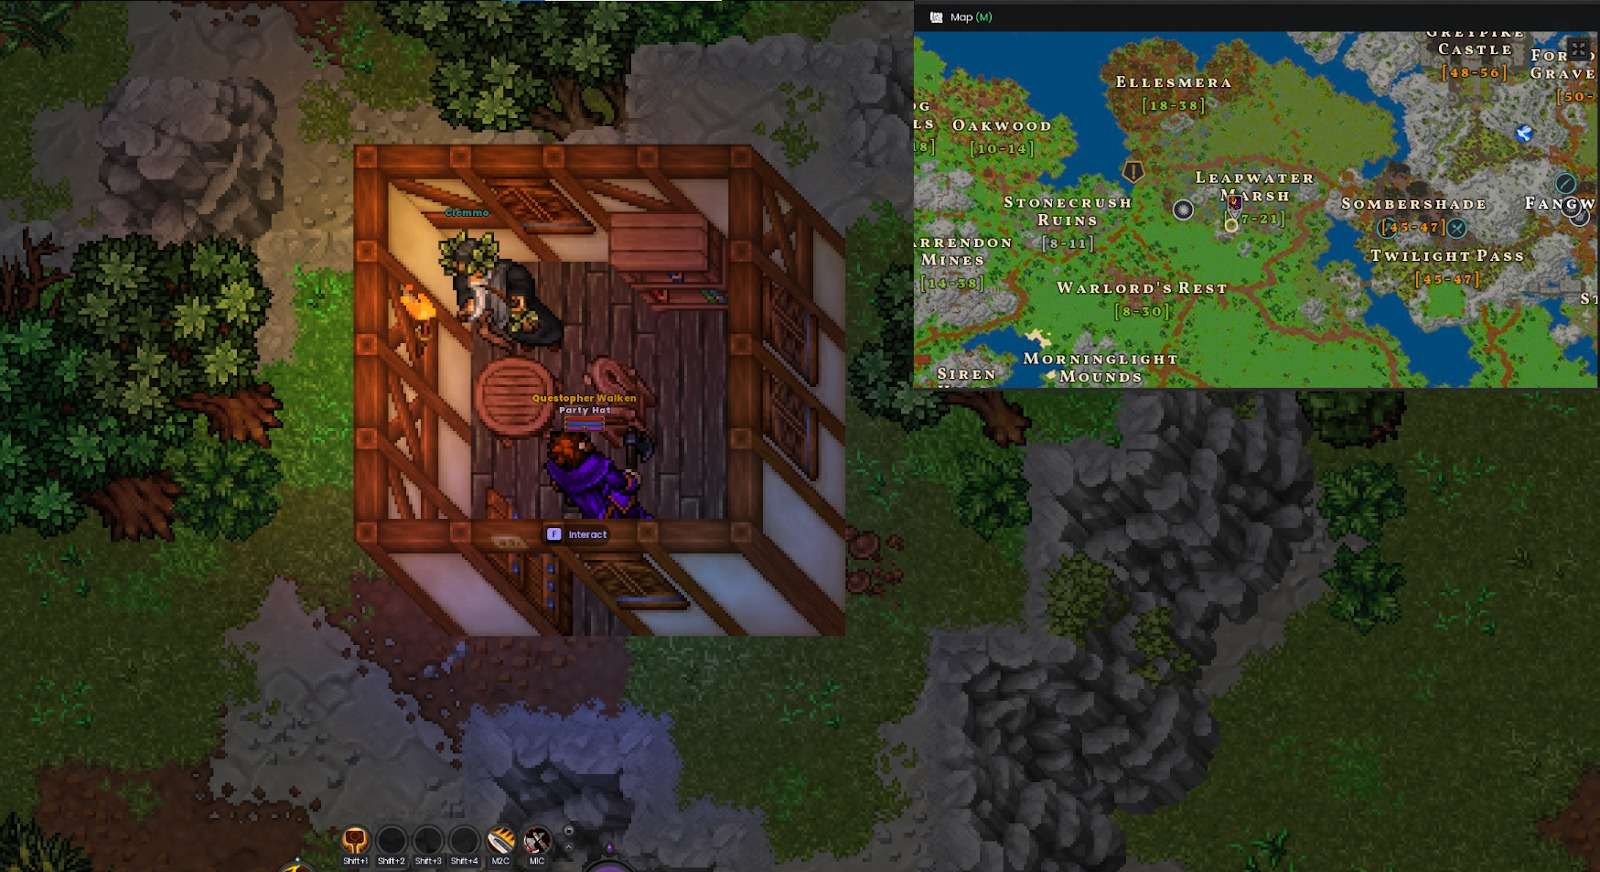
Find Clemmos’s hut and talk to him about his problem, then eliminate the swamp frogs in the area.
Steps to Complete:
- Use the Respawn Shrine to teleport to North Glademire.
- Locate Clemmos’s hut as marked on the map and speak with him to learn about his problem.
- Defeat 20 Swamp Frogs in the surrounding area to complete the task.
- Return to Clemmos once the frogs are eliminated.
Using the Water Pump Kit, collect samples from seven different underground pools located beneath Clemmos’s hut.
Steps to Complete:
- Enter the cave directly below Clemmos’s hut.
- Locate the small pools of water scattered throughout the cave.
- Use the Water Pump Kit twice per pool to collect the required samples.
- Once you have collected seven samples, return to Clemmos and speak with him.
Use the Regrowth Stone on the underground stone pillars to regrow the moss.
Steps to Complete:
- From Clemmos’s hut, head northeast and enter a different cave.
- Follow the right-side tunnel straight until you reach another stairway down.
- Locate and use one of the Regrowth Stones found near the stone pillars.
- Return one level up to the cave entrance and take the left tunnel this time.
- Follow the tunnel until you find the second Regrowth Stone and use it.
- Once both stones have been activated, return to Clemmos and speak with him.
Use the Regrowth Stone to collect spores from the Giant Mushroom.
Steps to Complete:
- Return to the first cave located beneath Clemmos’s hut.
- Locate the bush inside the cave and use it—this will open a hidden entrance.
- Descend the staircase and follow the one-way tunnel deeper inside.
- Descend another level to reach the lowest part of the cave.
- Find the Giant Mushroom and use the Regrowth Stone to collect spores.
- Once complete, return to Clemmos and speak with him.
Use the Medicinal Spores to cure Clemmos’s land of Swamp Fever.
Steps to Complete:
- Find the infected tree right next to Clemmos’s hut.
- Use the Medicinal Spores on the tree to cleanse the area.
- Once completed, speak with Clemmos again to proceed.
Quest 25: The Adventurer’s Path III
Speak with Commander Casper in Glademire Fort to receive your next mission.
Steps to Complete:
- Use the Respawn Shrine to teleport to South Glademire (to save time) or travel on foot.
- Find Commander Casper in the fort.
- Speak with him to advance to the next quest.
Now you receive your final Tier 1 set piece, craft it here in the Fort! (All crafting stations are available here.)
Quest 26: The Rites of Skorn
Go back to Commander Casper and learn your next objective.
Steps to Complete:
- Speak with Casper to receive your next mission.
Defeat the Skorn Cultists around the Chapel’s ruins and search for clues of Jayde’s whereabouts.
Steps to Complete:
- Travel to the marked area where the Skorn Cultists are located.
- Defeat the Skorn Cultists until the objective is completed.
- (Tip: If available, pick up the Skorn Cultist Ranger Company quest from the Bounty Board for extra rewards.)
- Return to Commander Casper at Glademire Fort once finished.
Bring the Illegible Note to Sergeant Mallius in Glademire Fort.
Steps to Complete:
- Locate Sergeant Mallius in Glademire Fort.He is found on top of the stone building inside the fort.
- Speak with Sergeant Mallius to hand over the Illegible Note.
- Return to Commander Casper to proceed with the quest.
Find Jayde and use the lockpicks to free her from captivity.
Steps to Complete:
- Return to the Skorn Cultists’ area.
- Head to the northern part of the marked area and enter a house.
- Descend one level, then immediately descend another level.
- Turn right when reaching the cell area and descend once more.
- Find Jayde, interact with her, and use the lockpicks to free her.
Recover St. Gadriel’s Bones, which have been removed from their altar and placed somewhere in the lower dungeon.
Steps to Complete:
- Exit to the surface from Jayde’s location.
- Find the largest house in the center of the area, identifiable by two large parallel staircases.
- Enter the basement and descend one level.
- Follow the corridor and descend another level.
- Continue along the corridor, then take the first right.
- Enter the large open chamber where a skeleton lies on the ground.
- Pick up St. Gadriel’s Bones.
- Return to Jayde via the other dungeon entrance.

Walk through the energy gate under the Skorn’s ruins and find St. Gadriel’s resting place.
Steps to Complete:
- Exit to the surface from Jayde’s location.
- Locate the house closest to Glademire Fort, which is positioned directly along the road.
- Enter the basement.
- Upon descending, head right and immediately turn right again.
- After passing through the energy gate Descend another level to continue the quest.
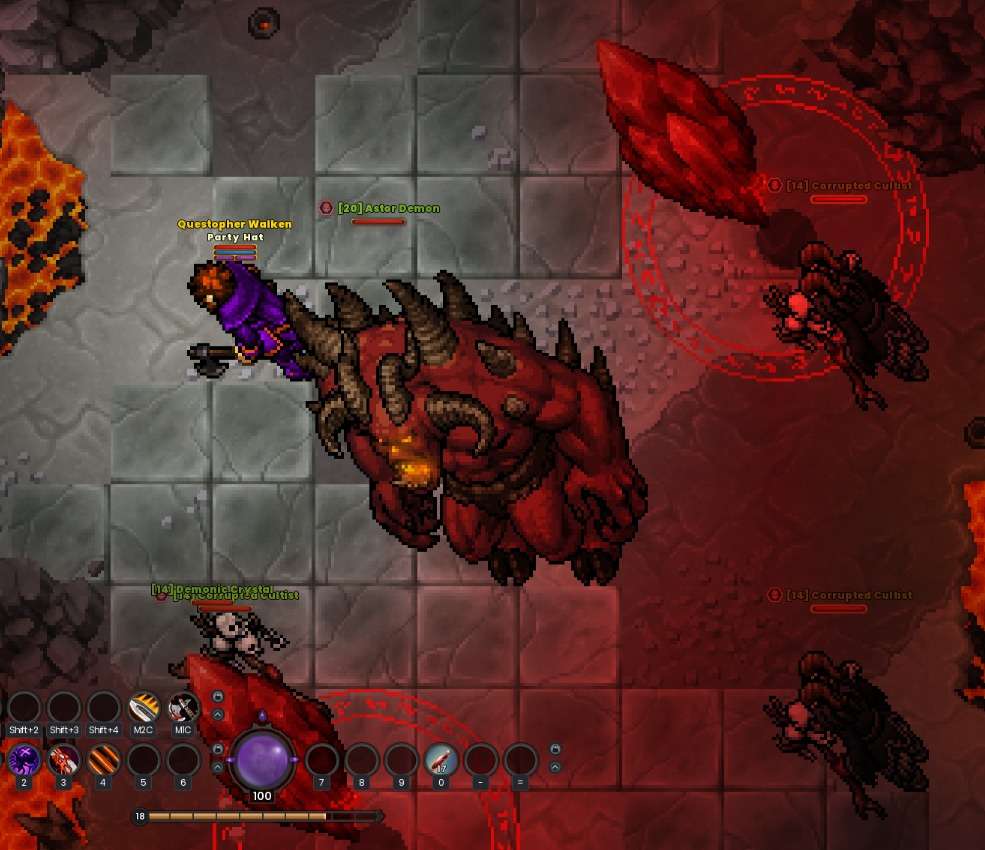
Defeat the Skorn cultists and put an end to their unholy work.
Steps to Complete:
- Prepare for battle! The fight may be challenging, so bringing allies is recommended.
- Destroy the Demonic Crystals first to weaken the demon boss.
- After eliminating the cultists and the demon, continue descending until you reach the altar.
- Use the altar to complete the objective.
- Return to Casper at Glademire Fort to complete the quest.
Quest 27: The Adventurer’s Path IV
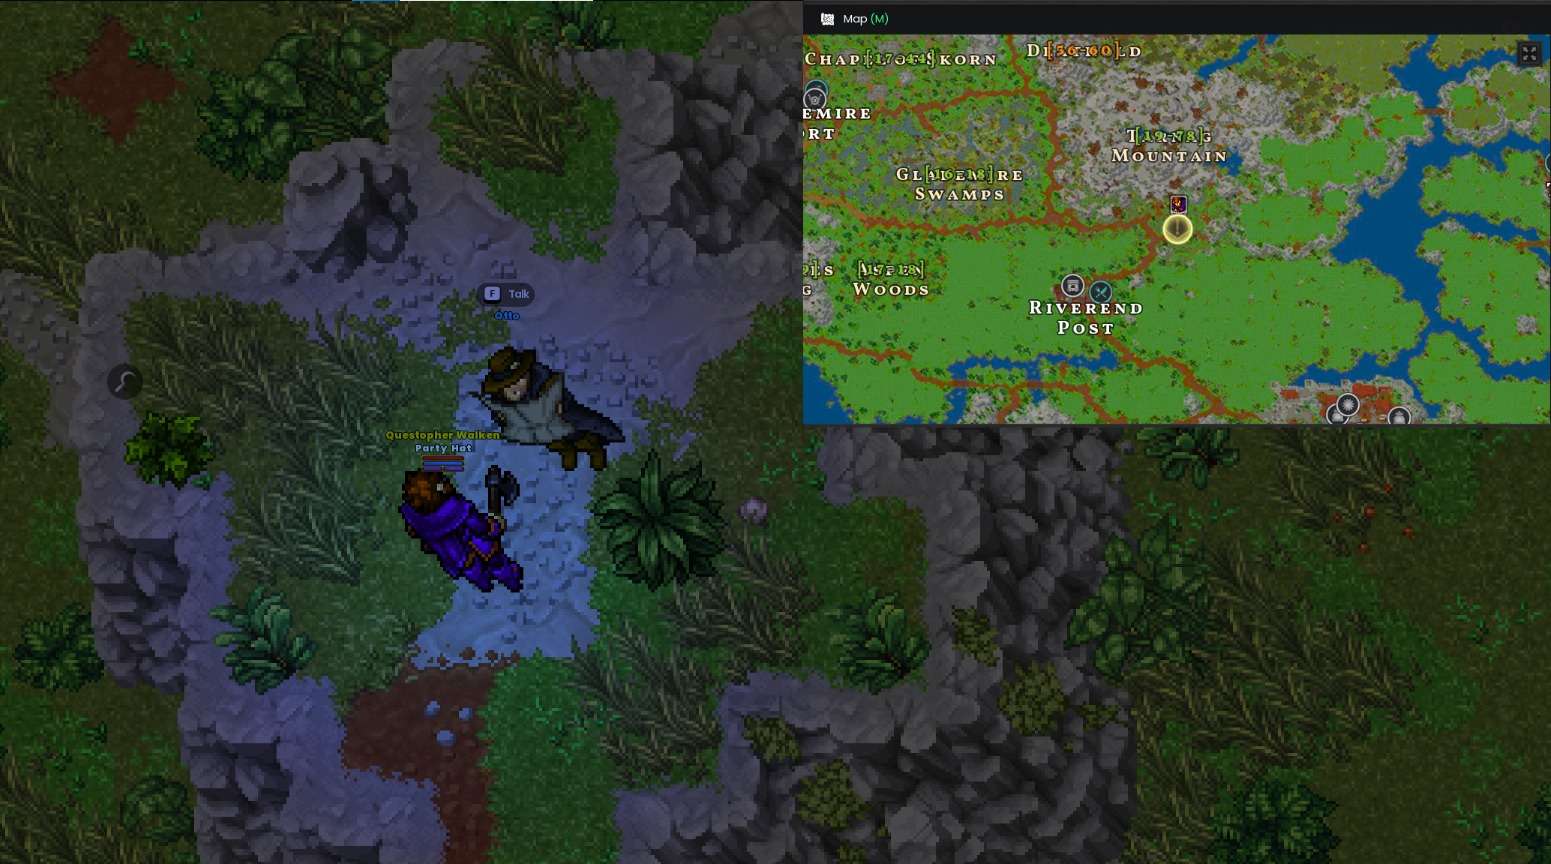
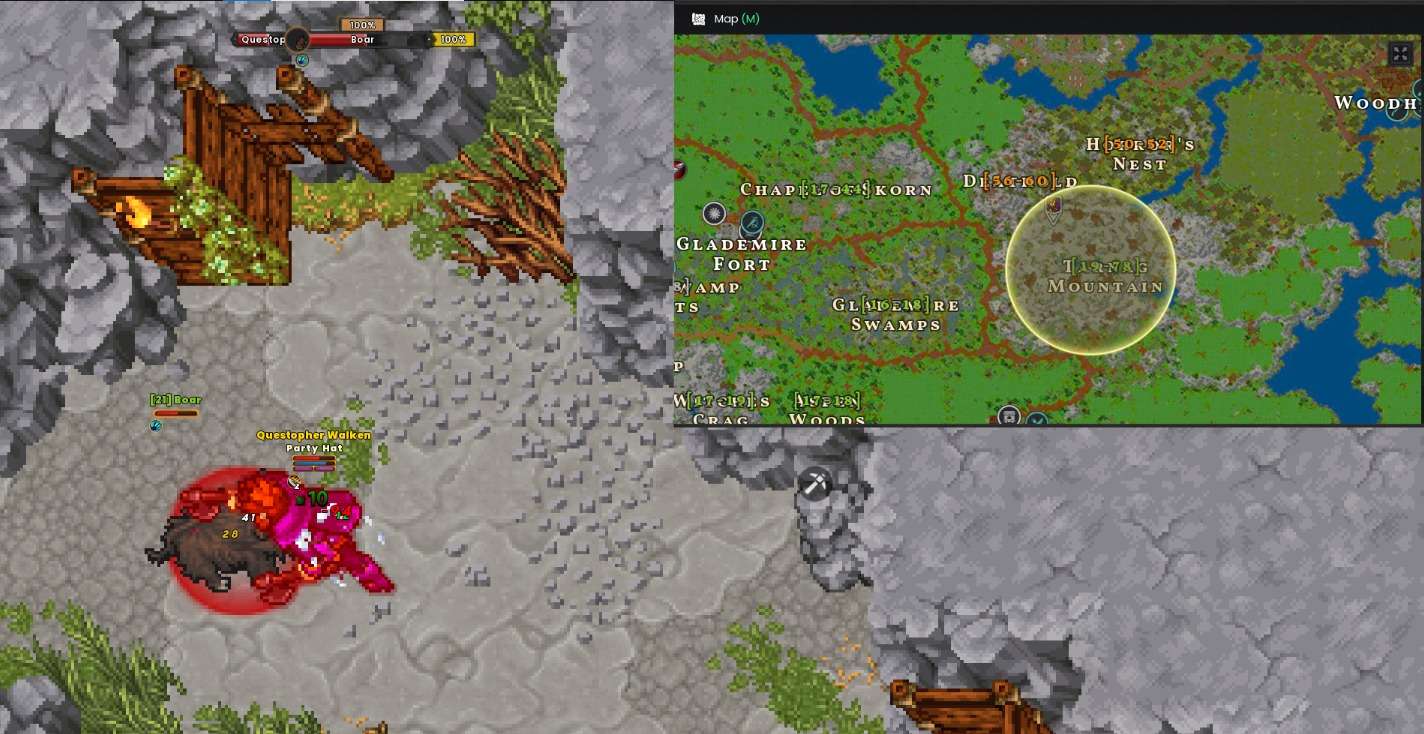
Find the beast hunter Otto, close to Tarnag Mountain.
Steps to Complete:
- Travel to Tarnag Mountain, following the main path.
- Search for Otto within the marked area.
- Speak with Otto to complete the objective.
Quest 28: The Mountain King
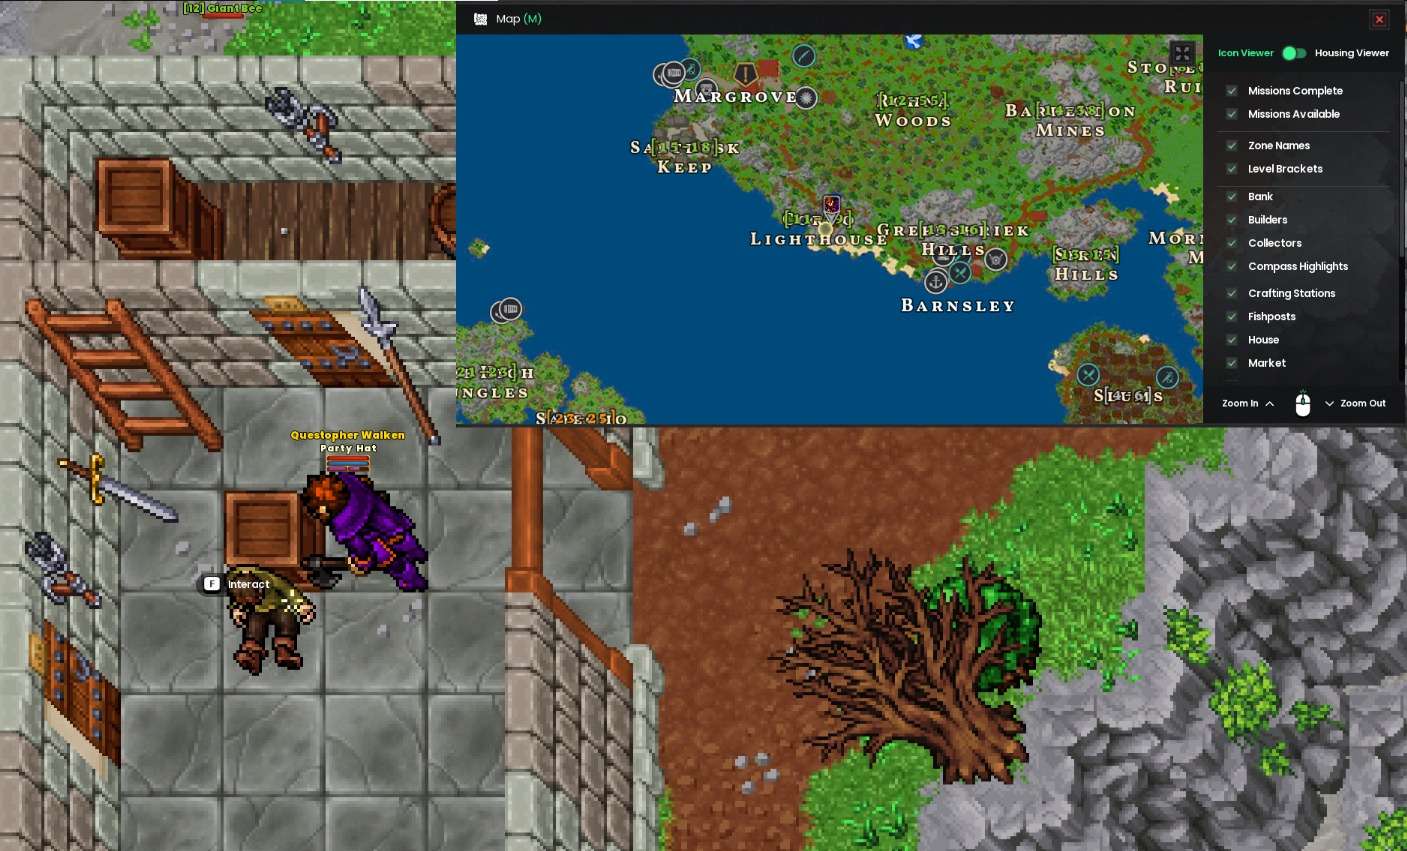
Find the entrance to the underground tunnels and the Troll Boneyard.
Steps to Complete:
- Follow the main path into Tarnag Mountain, the troll-infested area.
- Look for any of the cave entrances leading underground, there are multiple ways down.
- Descend one level into the tunnels.
- Check your map for the quest marker directing you to Barnaby’s remains.
- Investigate the correct pile as shown in the screenshot.
- Talk to Otto.

Depending on your conversation with Otto, you may receive these objectives in different orders, but all three must be completed.
Harvest 10 Boar Haunches from the boars wandering the mountain paths.
Steps to Complete:
- Depending on your conversation with Otto, you may receive this objective first or secondbut both must be completed.
- Return to Tarnag Mountain, where the trolls reside.
- Ascend one level higher from the underground tunnels to the middle tier of the mountain.
- Hunt the boars roaming the mountain paths until you collect 10 Boar Haunches.
- Once the objective is complete, return to Otto to continue the quest.
- Always use the outer path on the Boar level. On the right side of the mountain, there’s an open trapdoor at the end for descending.
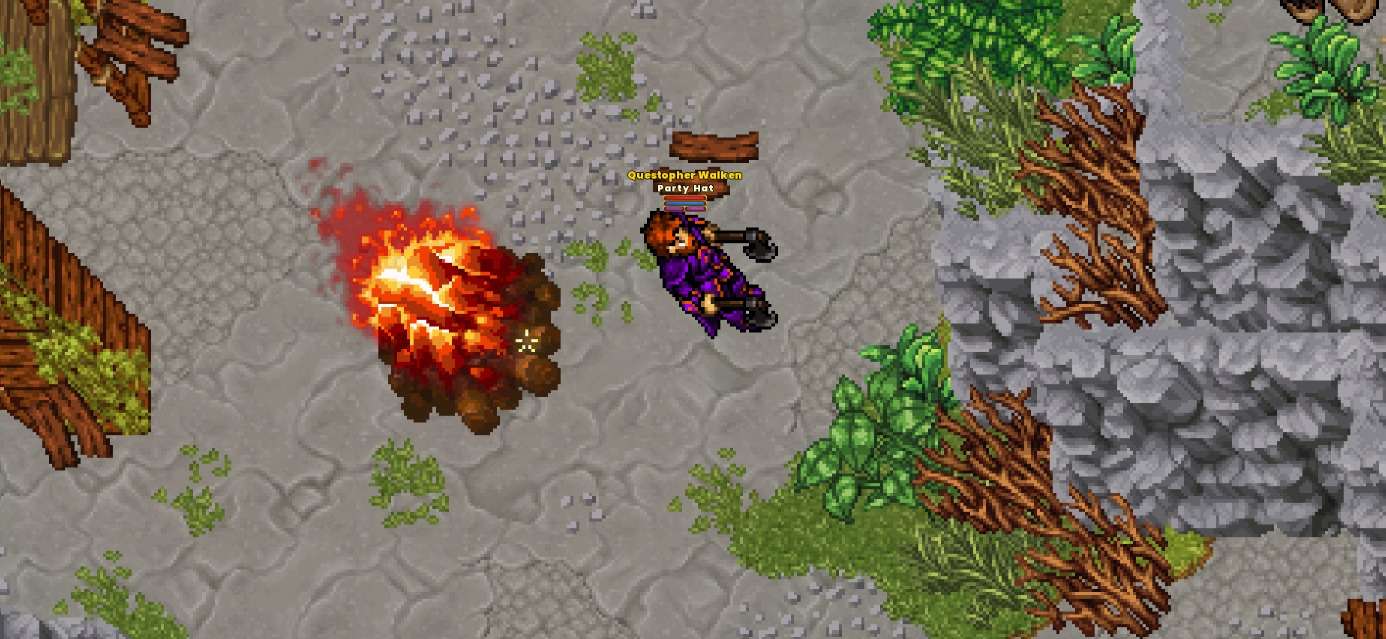
Try to lure out the Troll Titan by placing the Boar Haunch on the campfire in the Feeding Grounds.
Steps to Complete:
- Climb to the highest level of Tarnag Mountain.
- Head north from the lake at the peak of the mountain.
- Locate the large campfire in the Feeding Grounds.
- Use the Boar Haunch on the campfire to complete the objective.
- Once done, return to Otto.
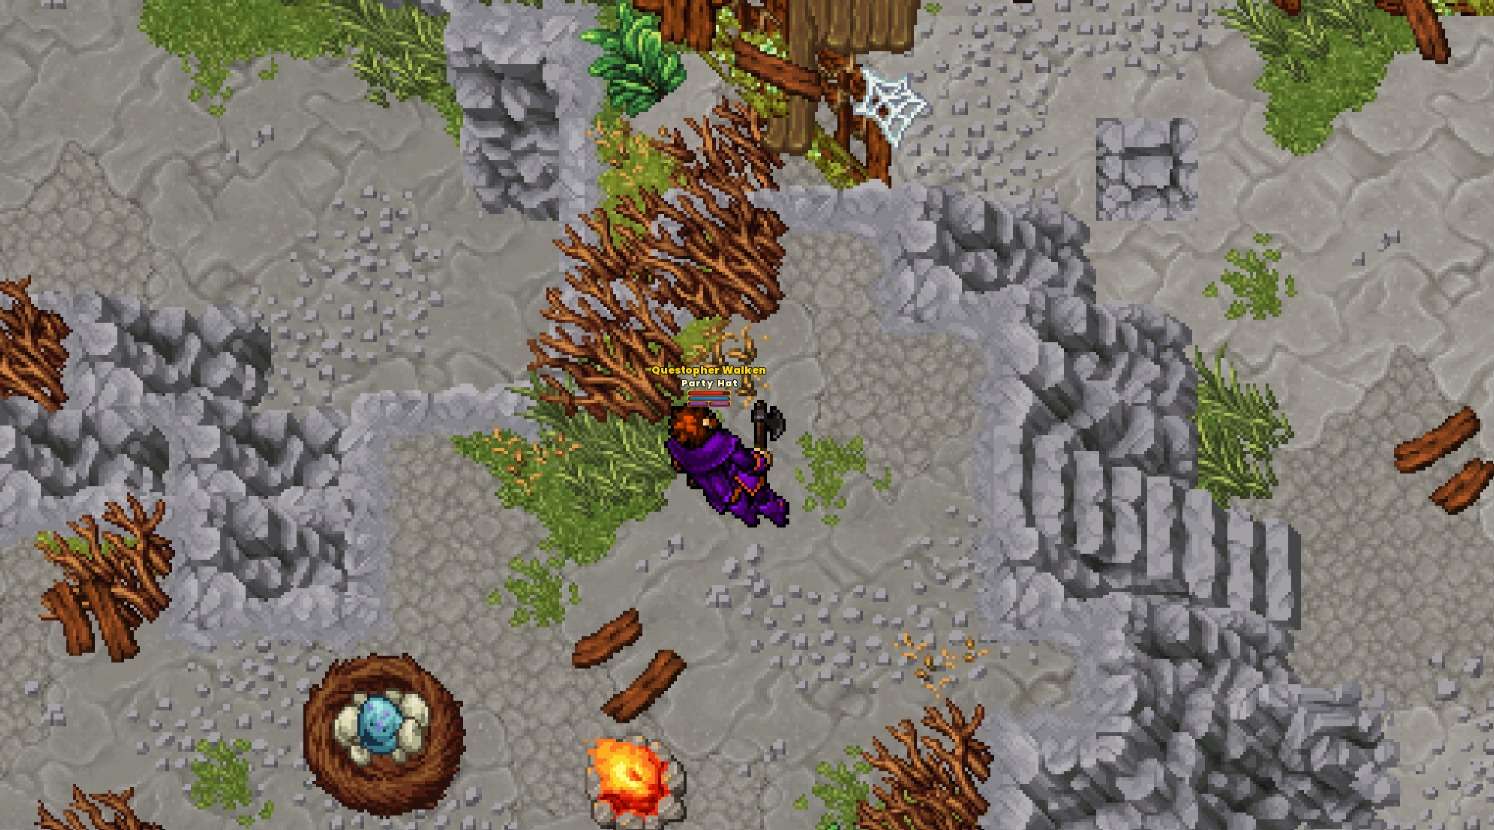
Harvest an Osprey Egg from the nests that can be found on the peaks above the Troll Feeding Grounds.
Steps to Complete:
- Return to the peak of Tarnag Mountain.
- Head south from the lake at the top of the mountain.
- Look for nests on the mountain peaks and collect an Osprey Egg.
- Return to the large campfire in the Feeding Grounds.
- Attempt to lure out the Mountain King again – this time, three trolls will spawn, so be prepared for combat.
- Once completed, return to Otto.
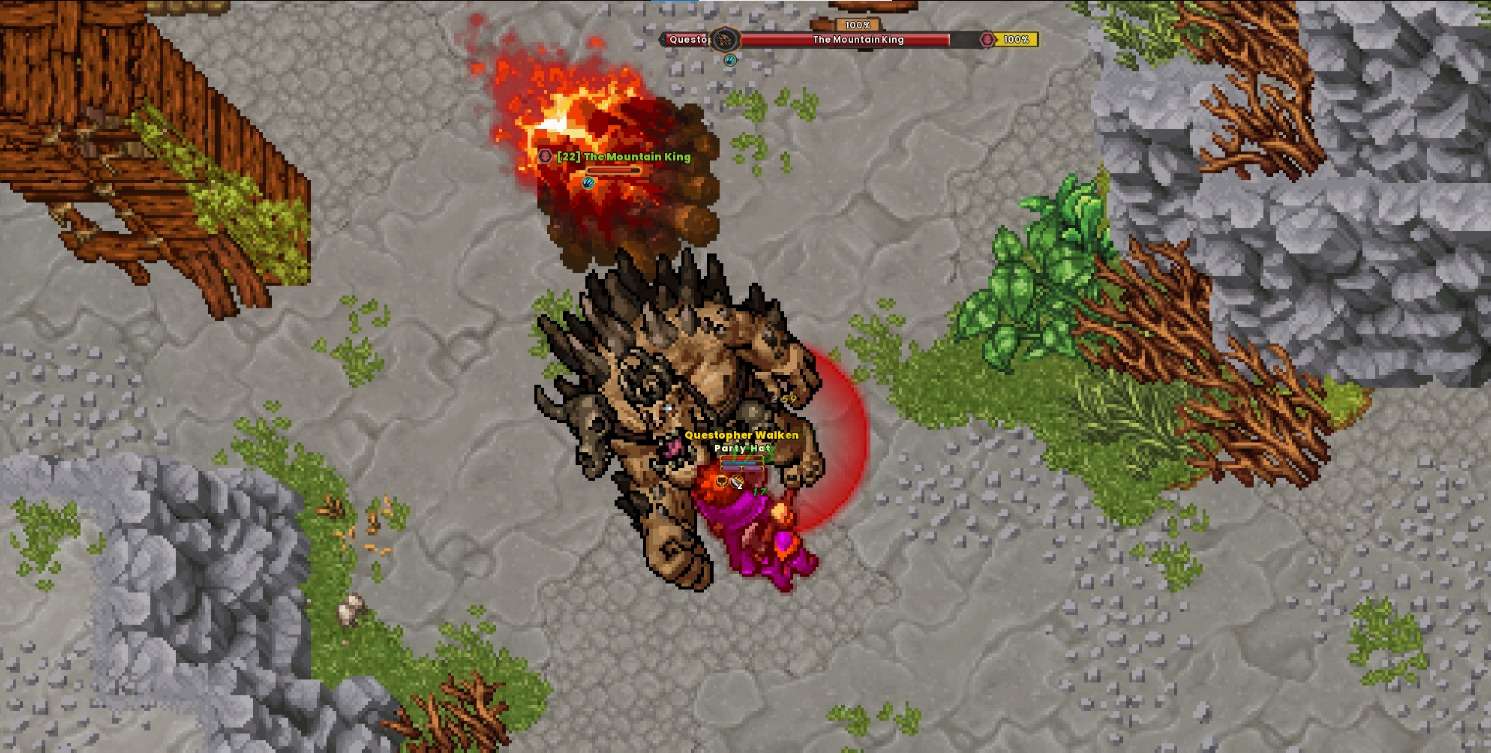
Catch one Rainbow Trout from the pond in the middle of Tarnag Mountain.
Steps to Complete:
- Return to the peak of Tarnag Mountain.
- Head to the pond located in the middle of the mountain.
- Catch one Rainbow Trout.
- Go back to the large campfire in the Feeding Grounds and place the fish on the fire.
- This time, the Mountain King will appear, defeat it.
- Once completed, return to Otto to finalize the quest.
Quest 29: The Adventurer’s Path V
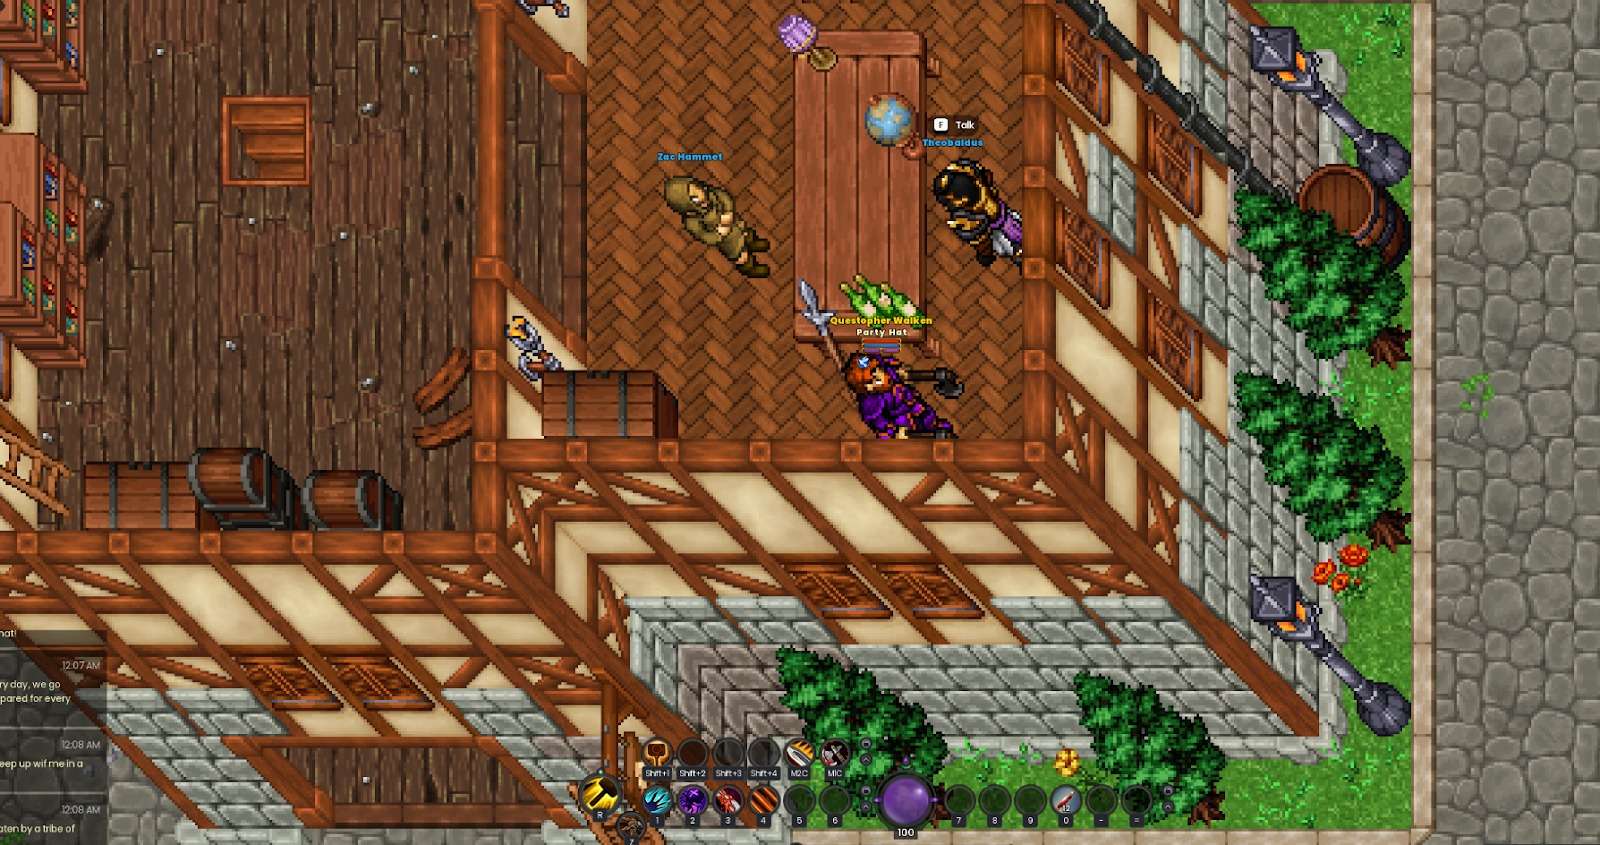
Deliver the Mountain King’s teeth to Theobaldus as proof you slayed the beast.
Steps to Complete:
- Use the green snail icon on the mini-map at 3 o’clock to teleport to Ravencrest.
- Open your map and locate the marked tavern in the city.
- Enter the tavern and go to the second floor.
- Speak with Theobaldus to deliver the proof.
Quest 30: The Reliant Shipwright
Talk to Dockmaster Brevin to receive your ship.
Steps to Complete:
- Head to the Ravencrest docks, located south of the city.
- Locate Dockmaster Brevin, who is standing near the ships.
- Talk to Brevin to receive your first ship.
- Equip your ship by opening the Transportation menu (Y).
- Click on the ship icon under Ship, then double-click your new ship to equip it. Equip your sail too!
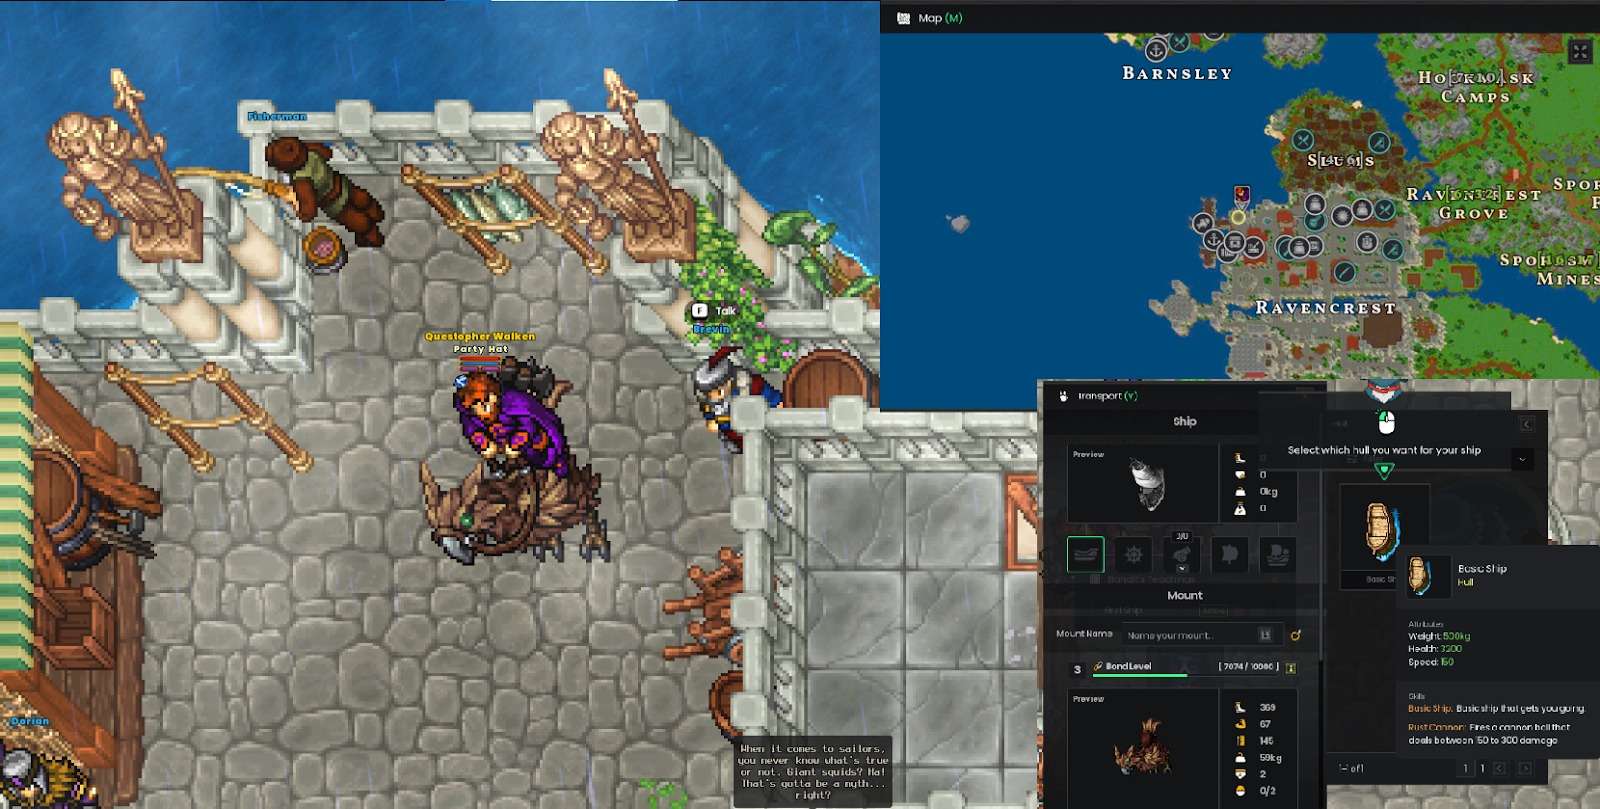
Sailing in RavenQuest lets you transport trade packs, engage in naval battles against other players, upgrade your ship, and fish from the deck.
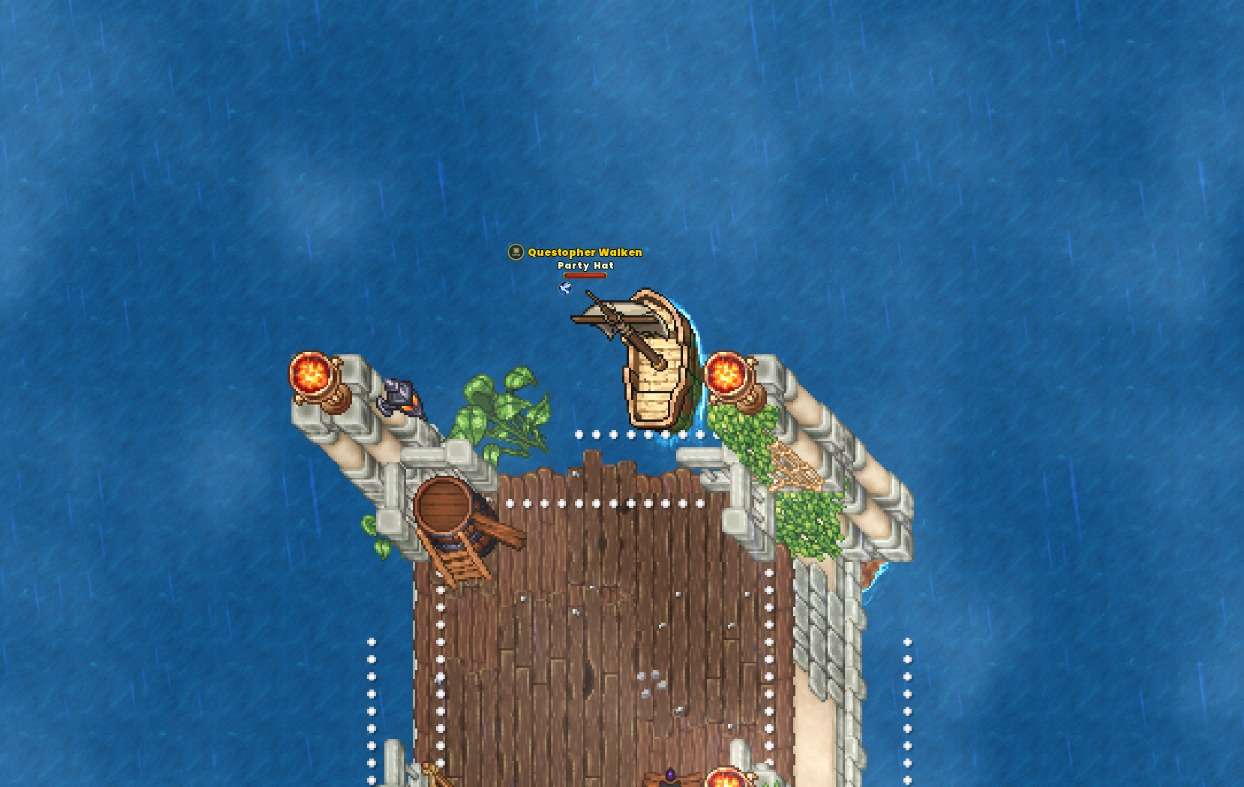
From Ravencrest City, sail along the coast and dock at Barnsley Hamlet.
Steps to Complete:
- Board your ship in the dotted sailing area at the Ravencrest docks.
- Familiarize yourself with the three basic ship abilities as you sail towards Barnsley.
- Follow the coastline and navigate east until you reach Barnsley Harbor.
- Dock your ship at the designated sailing area in Barnsley.
- Speak with Pehrgus, who is waiting for you at the Barnsley docks.
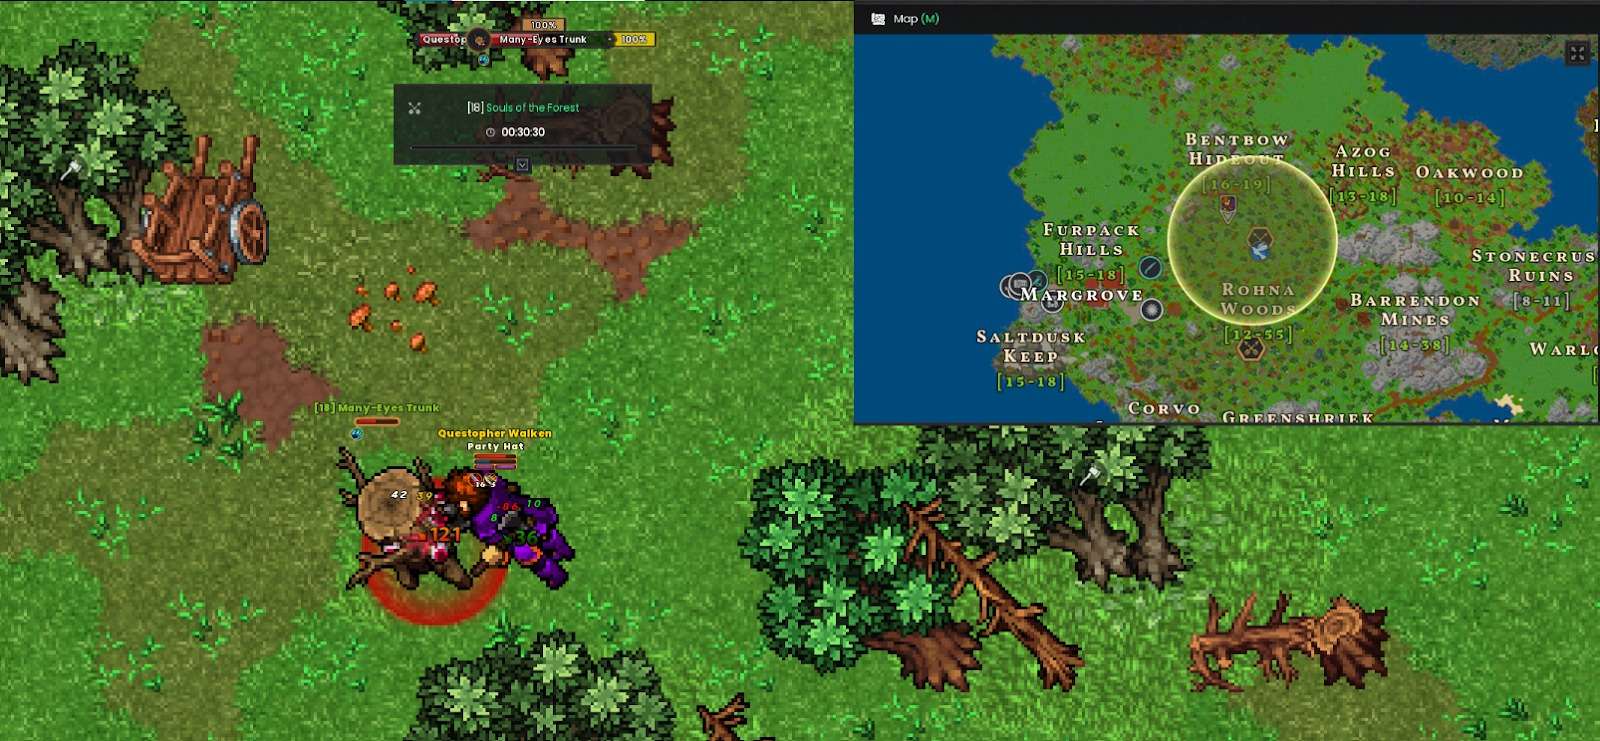
Harvest 10 pieces of Enchanted Wood from the Haunted Trunks found in Rohna Undergrove.
Steps to Complete:
- Travel north from Barnsley Hamlet to the marked area in Rohna Undergrove.
- Defeat Haunted Trunks in the area until you collect 10 pieces of Enchanted Wood.
- Once you have all 10 pieces, return to Pehrgus at the Barnsley docks.
Obtain 5 chunks of Mithril Ore from the wagons under Barrendon Mines.
Steps to Complete:
- Travel to Barrendon Mines, following the marked location on the map.
- Find the entrance to the underground mines and descend inside.
- Search for wagons throughout the tunnels; interact with them to loot Mithril Ore.
- Continue exploring the mine, collecting ore until you have 5 chunks.
- Return to Pehrgus at the Barnsley docks to complete the objective.

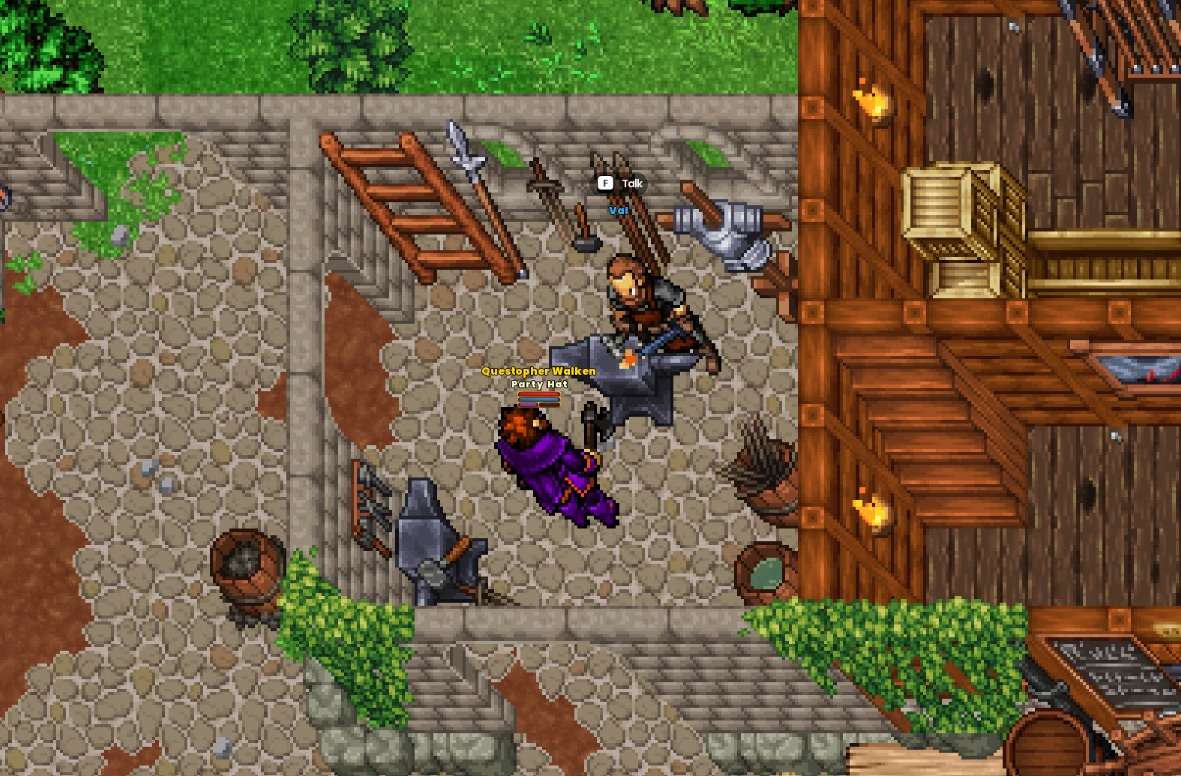
Ask Val the Blacksmith in Barnsley about making nails from the Mithril Ore.
Steps to Complete:
- Travel to Barnsley and find Val the Blacksmith (location is marked on the map).
- Speak with Val, who will provide information on crafting the Mithril Nails.
- Return to Pehrgus at the Barnsley docks to continue the quest.
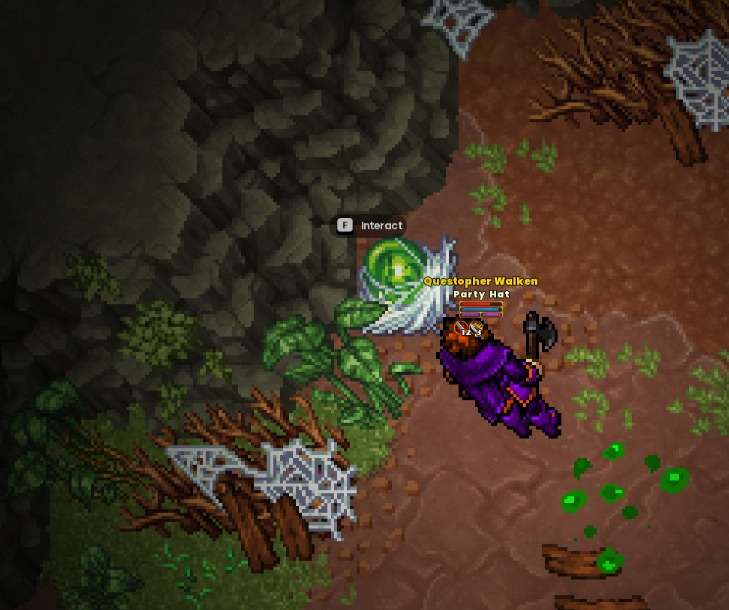
Gather 20 Widow Spider Eggs from the Widow Nests found in the tunnels beneath Rohna Woods.
Steps to Complete:
- Travel to Rohna Woods and locate the cave entrances marked on the map.
- Enter a cave where Widow Nests are found.
- Collect eggs from the nests by interacting with them.
- Once all nests in a cave are cleared, return to the surface and enter a different cave.
- Return to Pehrgus at the Barnsley docks to complete the objective.
Quest 32: The Adventurer’s Path VI
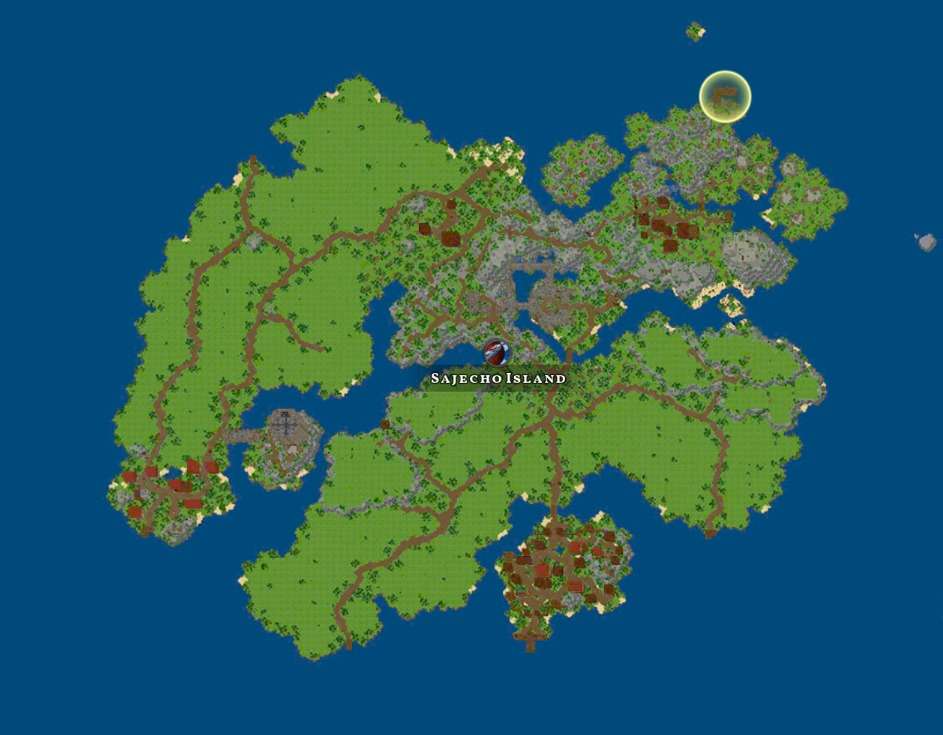
Set sail to the island of Sajecho, where a new adventure awaits! (Requires Legacy Level 27, but you can proceed at Level 20 for questing.)
Steps to Complete:
- Board your ship from the Barnsley docks.
- Sail east towards Sajecho, following the coastline if needed.
- Dock at the port upon arrival at Sajecho.
- Prepare for the next adventure on the island!
Note: Even though the quest states Legacy Level 27, you can continue questing at Level 20 without issues.
Arrival at Sajecho Island
Travel to Sajecho Island and meet Captain Barbose at the docks to receive your next mission.
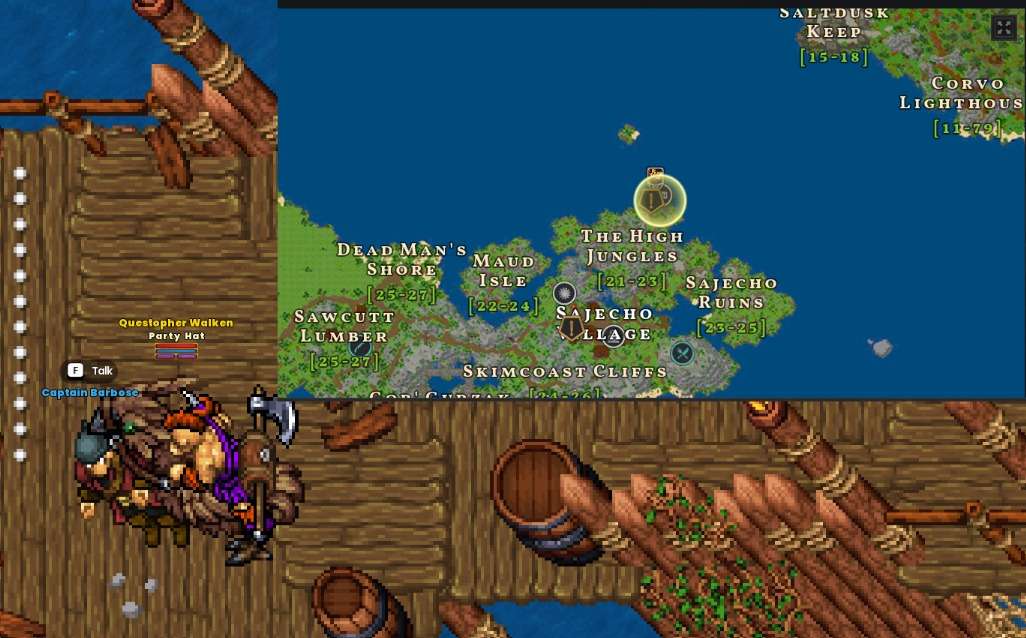
Quest 1: A Pirate’s Life
Defeat Poisonpetals and collect 15 Poisonpetal Sap.
Steps to Complete:
- Head south from the docks, you will immediately encounter Poisonpetals.
- Defeat Poisonpetals and collect 15 Poisonpetal Sap.
- Return to Captain Barbose and turn in the quest.
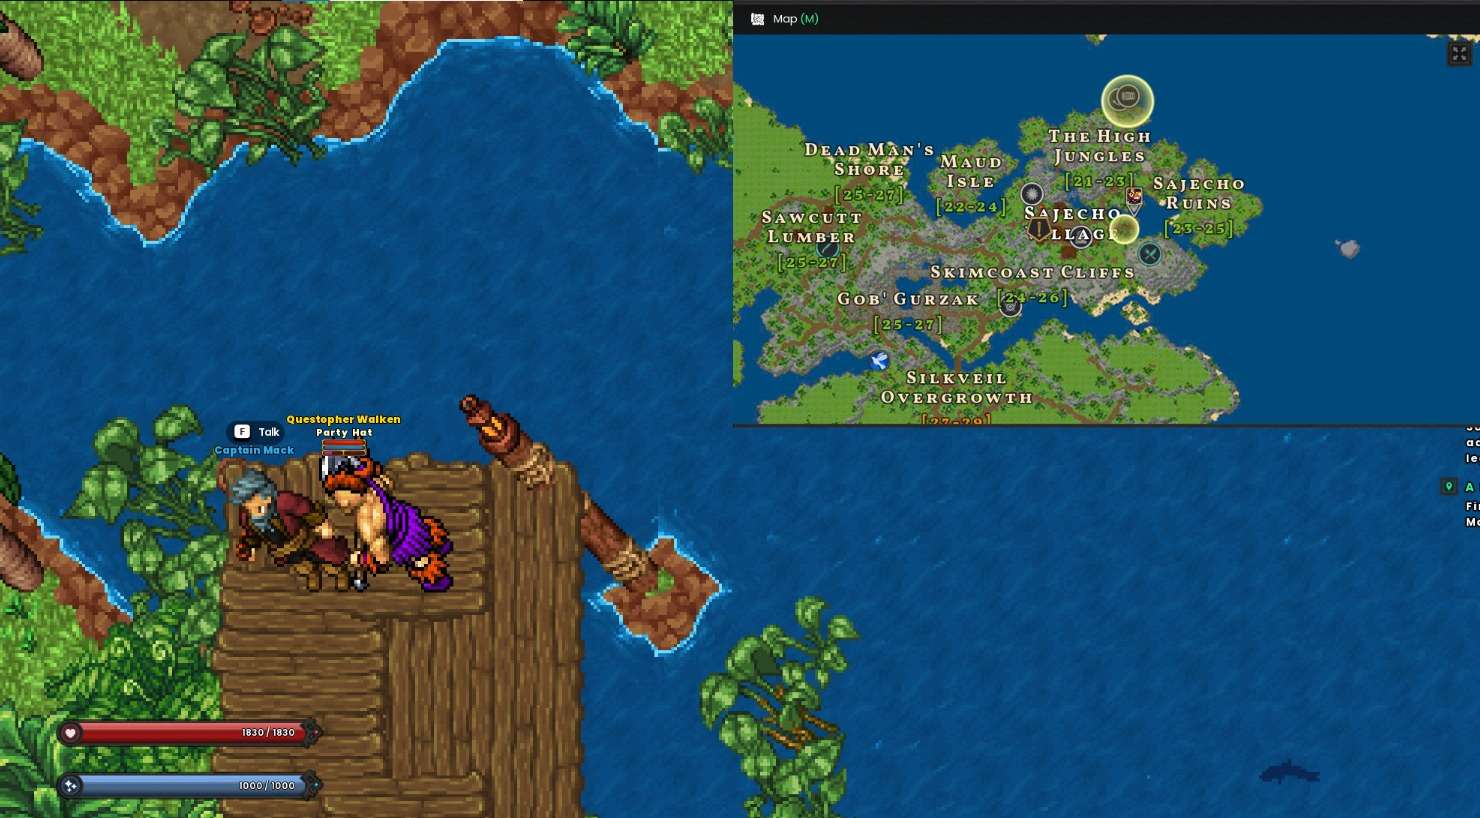
Find and speak with Captain Mack about the Treasure Map.
Steps to Complete:
- Follow the map marker to locate Captain Mack.
- Speak with Captain Mack to learn more about the Treasure Map.
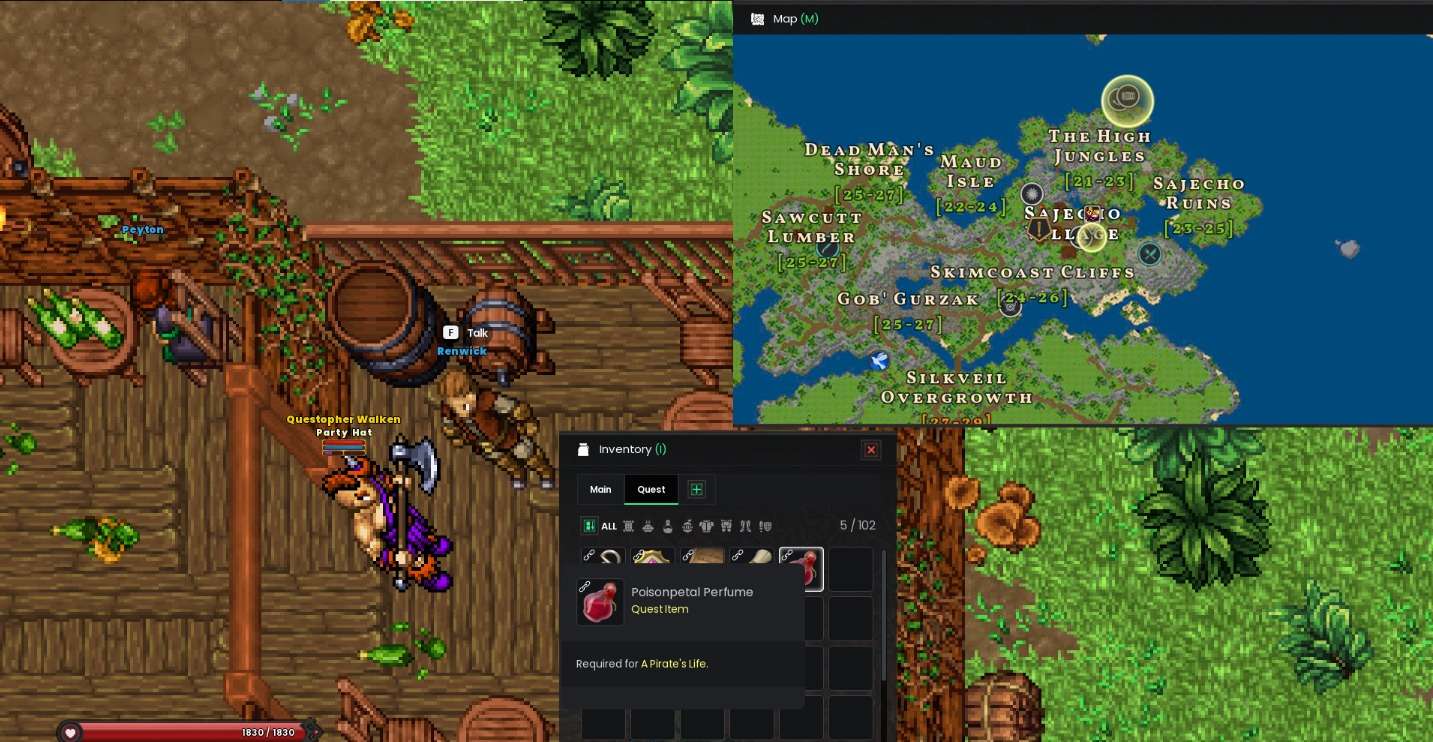
Find Renwick in Sajecho Village and convince him to rejoin Captain Mack’s crew.
Steps to Complete:
- Go to Sajecho Village and enter the tavern.
- Head upstairs to find Renwick and speak with him.
- Use the Poisonpetal Perfume from your inventory.
- Speak with Renwick again after using the perfume to convince him.
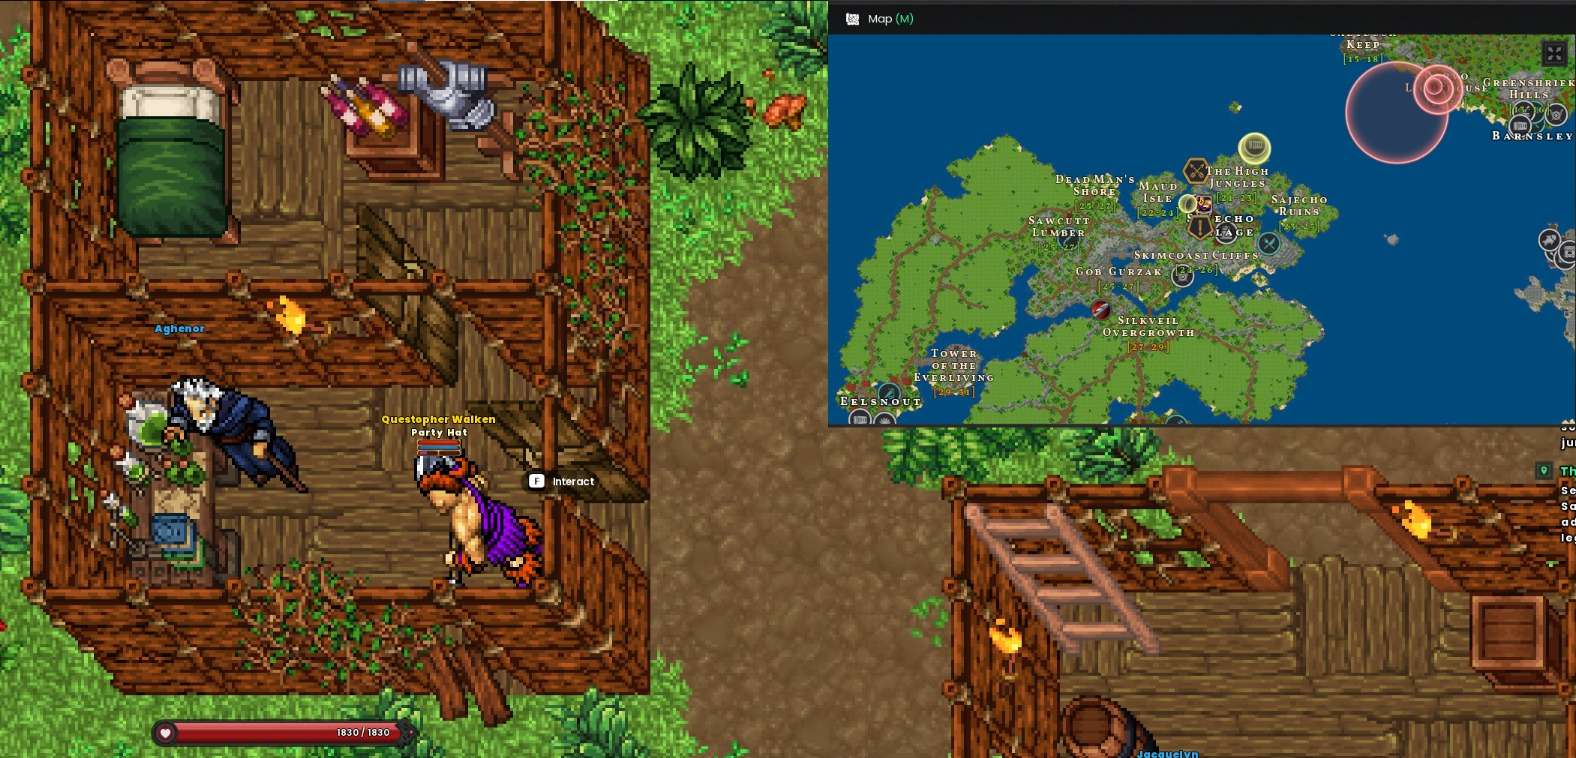
Find Beebe the Quartermaster somewhere in Sajecho’s jungles.
Steps to Complete:
- Before heading into the jungle, pick up the quest “A Most Wondrous Cloak” from Aghenor in Sajecho Village.We going to finish Pirate’s Life during our new quest.
Quest 2: A Most Wondrous Cloak
Collect 10 pieces of Green Toad Skin from the greenish toads on Maud Isle.
Steps to Complete:
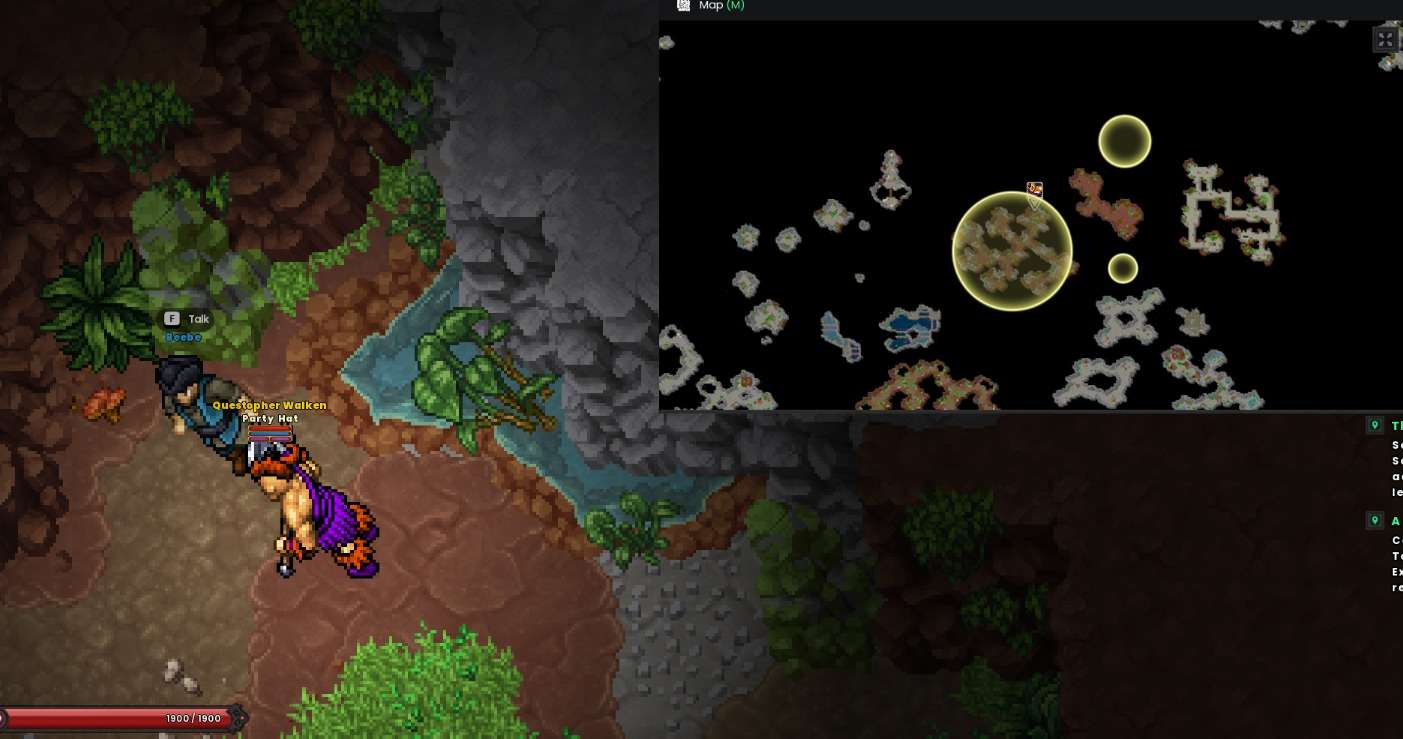
- Use the cave entrance slightly north of the Village Shire in Sajecho.
- Descend into the cave and defeat the greenish toads for Green Toad Skin (drop rate is low).
- Once you have all 10 pieces,(you get a new objective) head to the cave’s southern section and look for the only path leading deeper.
- Go down one level, then head northeast through the cave.
- At the end of the cave, interact with the rock and Speak with Beebe to progress “A Pirate’s Life”.(Just have to speak with both Captains to finish the Quest.)
- Finally, return to Aghenor to continue “A Most Wondrous Cloak”.
Collect 4 Toad Glands from Toad Praetorian and Toad Executioner on Maud Isle.
Steps to Complete:
- Return to the cave from before and proceed towards the other exit leading to the island.
- Alternatively, stay on the lower level of the cave and farm the required Toad Glands from the correct mobs.
- Once you have all 4 Toad Glands, return to Aghenor in Sajecho Village.
- Wait for half a day in-game time before you can continue the quest.
- When the objective changes, speak with Aghenor again.
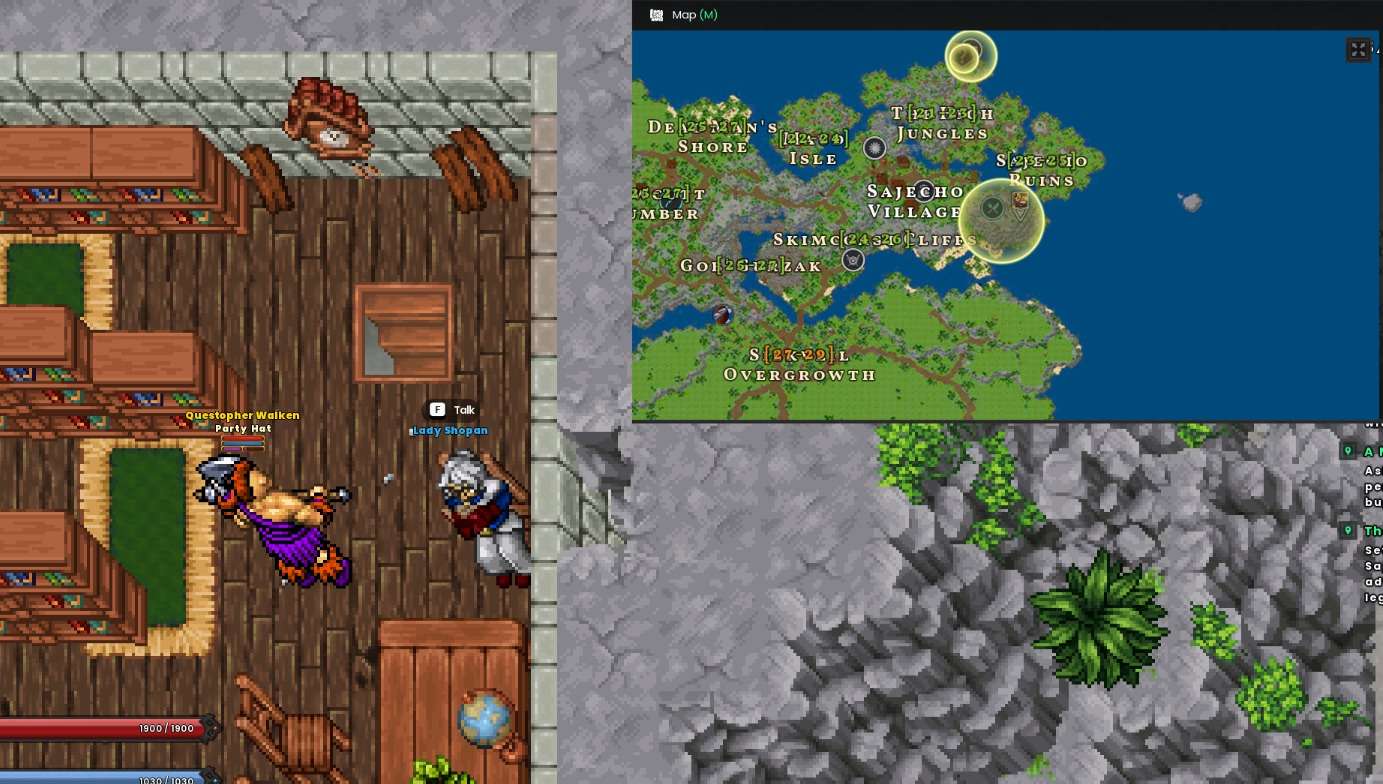
Ask for Lady Shopan’s permission to collect some bugs and wine.
Steps to Complete:
- Head to the castle marked on the map and speak with Lady Shopan.
- Use the passage right next to Lady Shopan to go downstairs.
- Descend one more time immediately.
- Interact with the large wine barrel in the room.
Search the furniture in Kugu Castle to collect 5 bugs and fill the Empty Bottle.
Steps to Complete:
- Find the 5 bugs in the following locations:
- Weapon Rack in the basement.
- Large Barrel next to the stairs on Lady Shopan’s floor.
- Firewood stack next to the fireplace in the bedroom (accessible from the staircase room).
- Green sofa on the same floor, northwest side.
- Firewood stack next to the stairs in the kitchen area.
- Once all 5 bugs are collected, return to Aghenor.

Travel back to Maud Isle to test the Toadish Cloak.
Steps to Complete:
- Head to the Toad Cave but talk to Pigeon first, who is waiting near the entrance.
- After speaking with Pigeon, enter the cave.
- Descend one level (marked by a small red triangle on the minimap).
- Go down one more level.
- Lure out Boro’gorom and defeat him.
- Return to Aghenor and talk to him.
- Finally, speak with Pigeon again to complete the quest.
Quest 3: A Goblin Obsession
On the hill south of Sajecho Village, collect all the quest items.
Steps to Complete:
- Accept the quest from Lady Shopan in the castle.
- Exit the castle and head outside.
- Defeat Goblins until you collect all required items.
- Once all quest items are obtained, return to Lady Shopan.
Search the bookshelves in the library for Glider Diagrams.
Steps to Complete:
- Search the bookshelves in the library until you find the Glider Diagrams.
- Return to Lady Shopan and speak with her.
- Exit the castle and head north to the marked location on the map.
- Discover the sealed passage in the center of the area.
- Go back to Lady Shopan and report your findings.
Kill Goblin Bombers in the Sajecho Ruins to gather 15 Explosive Powder.
Steps to Complete:
- Return to the sealed passage you discovered earlier.
- Defeat Goblin Bombers in the area until you collect 15 Explosive Powder.
- Go back to Lady Shopan and report your progress.
- Return to the sealed passage once more.
- Use the gathered materials to open the passage and enter inside.
Descend into the dungeon and obtain a Goblin Soul Orb.
Steps to Complete:
- Follow the corridor until you reach a staircase, you don’t need to enter any rooms on this floor.
- Descend one level.
- Repeat the process, move forward and descend another level.
- Follow the corridor again and enter the gate at the end.
- Use the treasure chest inside the room.
- Defeat the boss that spawns.
- Open your inventory, navigate to the Quest tab, and use the Goblin Soul Orb.
Recover Lord Shopan’s Bones from deeper inside the dungeons.
Steps to Complete:
- Exit the boss room.
- Go up one level using the nearby staircase.
- On this floor, find and collect Lord Shopan’s Bones.
- Once obtained, return to Lady Shopan to complete the quest.
Quest 4: The Disappearance of Lord Shopan
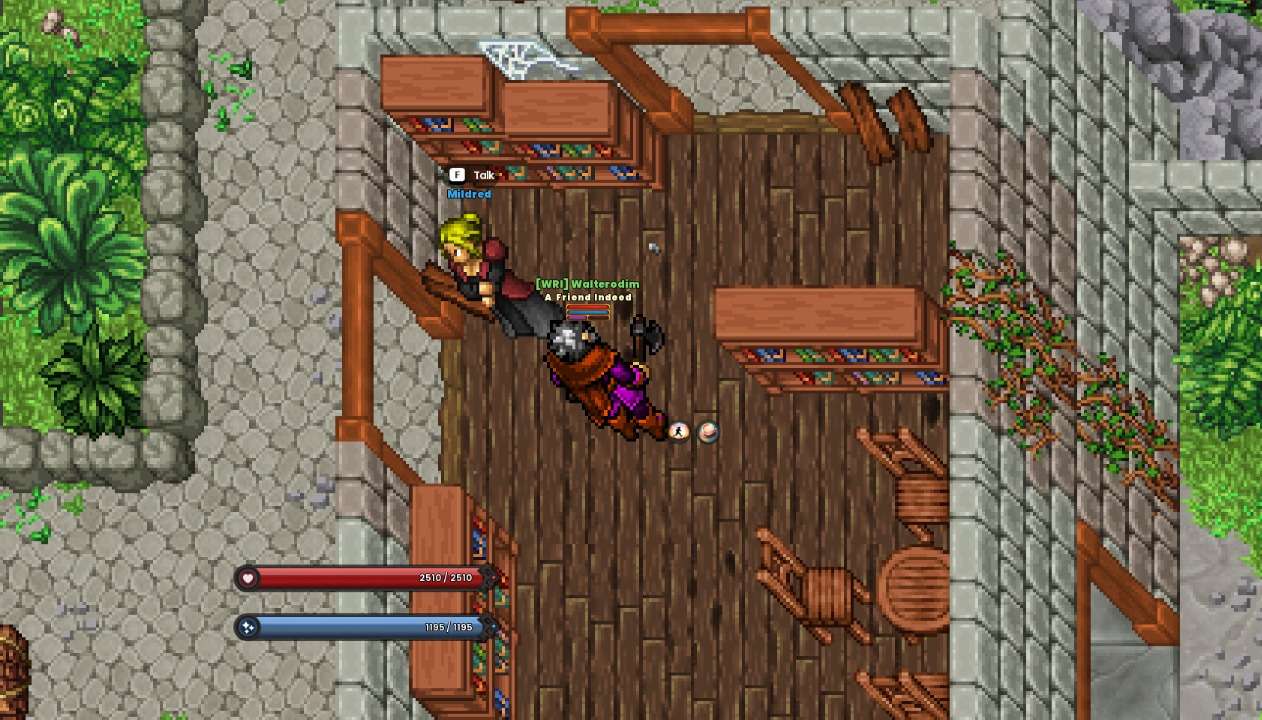
Talk to Mildred about the break-in.
Steps to Complete:
- Accept the quest from Lady Shopan inside the castle.
- Go upstairs in the castle to find Mildred.
- Speak with Mildred about the break-in.
Investigate the bedroom for clues about the robbery.
Steps to Complete:
- Go downstairs to the bedroom.
- Examine the window to look for clues.
- Return to Lady Shopan and report your findings.
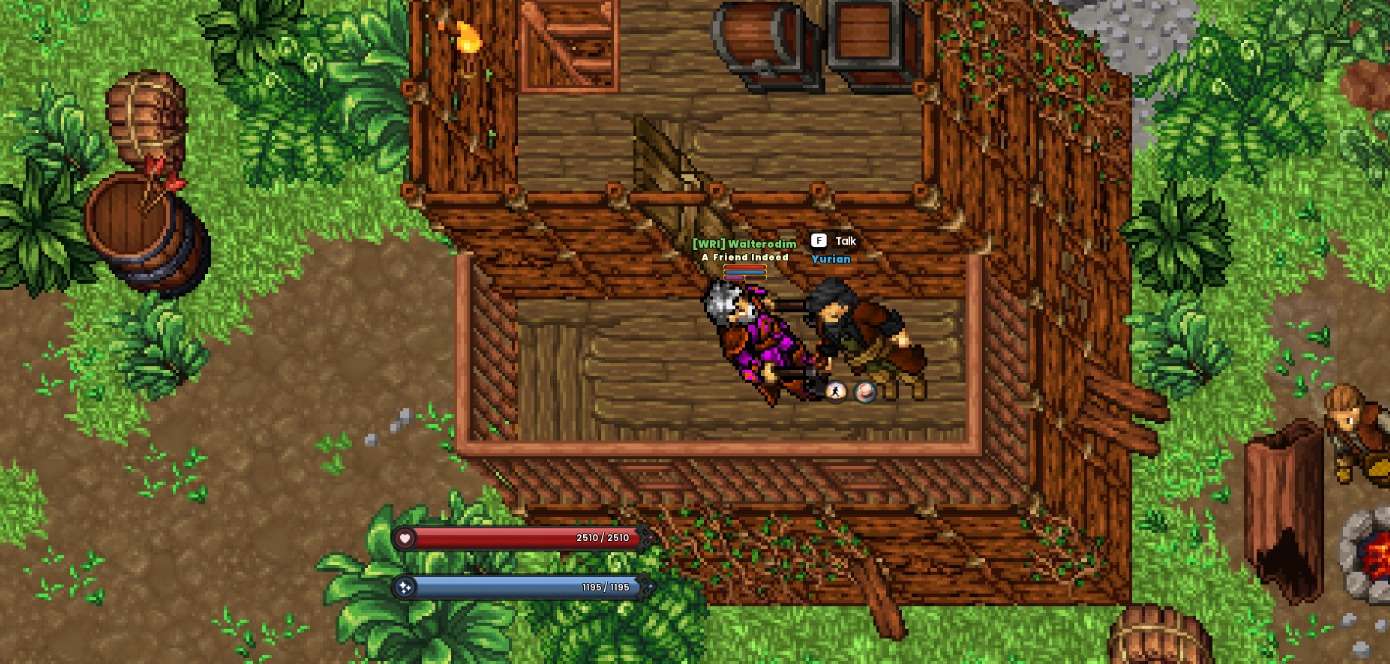
Ask around the village for clues about the robber.
Steps to Complete:
- Go to the village to gather information.
- Find and speak with Yurian to ask about the robbery.
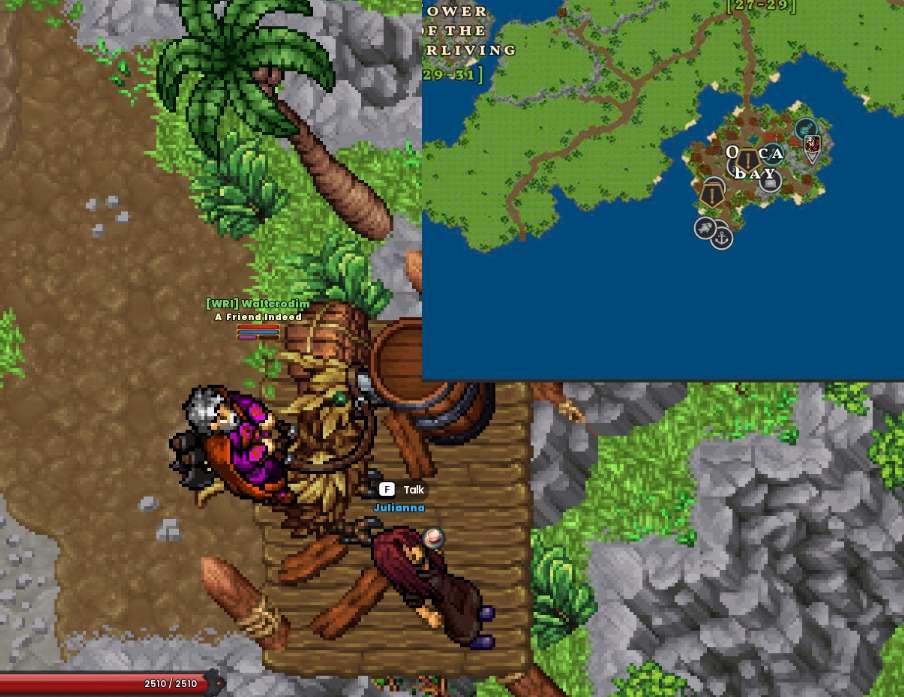
Search for a person with long red hair and bright blue eyes.
Steps to Complete:
- Travel to Orca Bay, located in the southern part of Sajecho.
- Find and speak with Julianna to gather information.
- Read the letters Julianna gives you.
- Return to Lady Shopan and report what you found.
Dig up the Diamond Ring from Lord Ronan’s grave, underneath Kugu Castle.
Steps to Complete:
- Go to the shoreline directly below Kugu Castle.
- Enter the crypt and follow the hallway inside.
- At the end of the corridor, interact with the correct sarcophagus.
- Defeat the ghost that appears.
- Return to Juliana to report your findings.
- Finally, speak with Lady Shopan to continue the quest.

Search the bookshelf in the corner for an old amulet.
Steps to Complete:
- Locate the bookshelf in the corner of the room.
- Interact with it to retrieve your reward.
- Quest complete!
I wanted to finish all of Sajecho island at the very least, but unfortunately, I didn’t have enough time, so this is where it ends!
Conclusion
Congratulations! You’ve reached the end of the Basic Leveling Guide. By now, you’ve acquired your full Tier 1 set, your mount, your wagon, and your ship, setting the foundation for your journey in RavenQuest.
From here, the possibilities are endless:
- Continue questing and uncover more of the game’s lore.
- Take on Rangers Company tasks for fame and rewards.
- Dive into professions, which I didn’t cover in this guide but could fill an entire one on its own.
Or simply explore the vast world of RavenQuest and experience everything it has to offer.