SERAPH: In the Darkness – Ultimate Beginner’s Guide
Complete Guide for New Players
Getting Started
The first step after entering the game is to get used to the controls
The controls in SERAPH are very simple, and most operations can be completed by clicking the mouse buttons.
Clicking the left mouse button on your destination will move your character there. You can also hold down the mouse button or move the mouse to change the direction of movement.
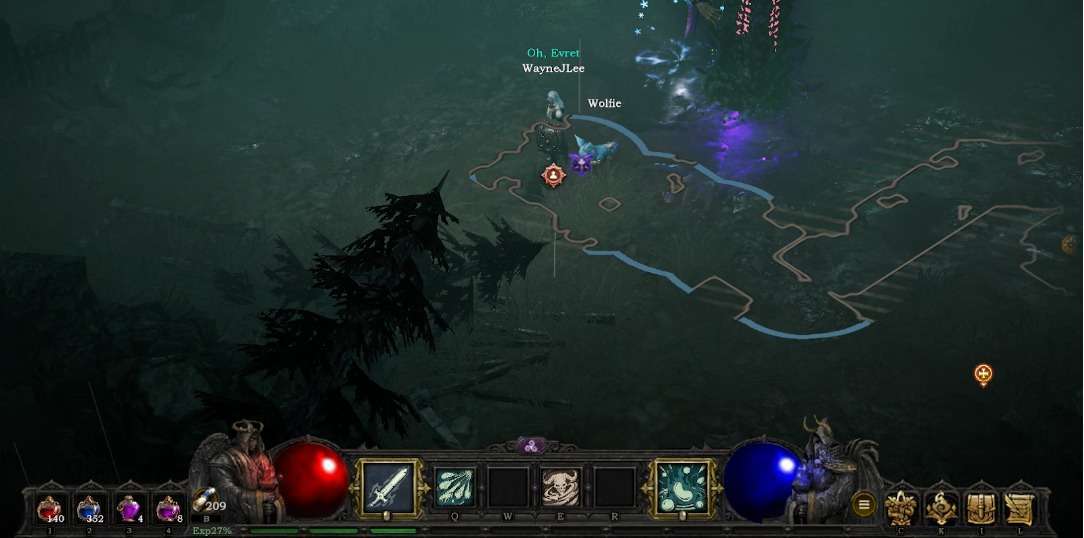
You’ll find many things worth interacting with in the game. To check if something is interactive, move your mouse cursor over it. If it shows a green outline, you can click to interact.
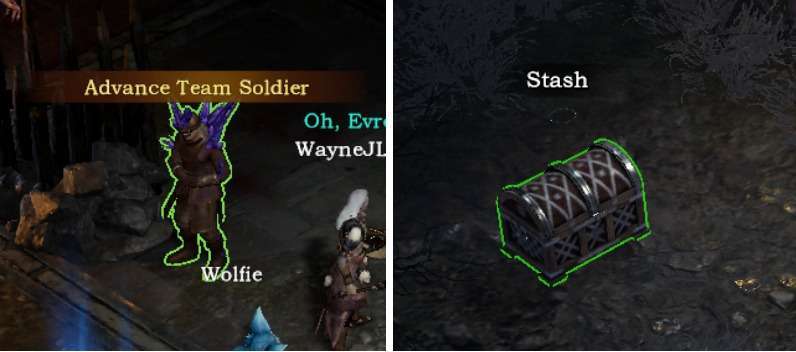
Whether it’s an iron door, wooden door, or treasure chest, clicking them with the mouse will open them. The same goes for items; click to pick them up. The same applies to interacting with characters you meet; click on them to start a conversation and listen to their dialogues. Everything can be done with the left mouse button.
Next, let’s get familiar with the interface and see what these function bars represent.
UI Panel

- Potion Slot.
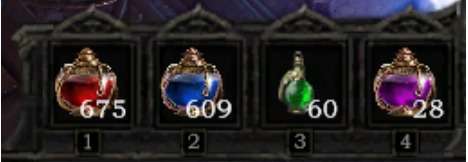
Left-click to select potions in the backpack, then left-click any slot in the potion bar to place the potion where you want. Right-click on the item bar or press the corresponding number to use the potion in the backpack directly.
If you need to use potions to restore health or mana during combat, the best and quickest way is to use the corresponding quick keys 1, 2, 3, 4 for the potions in the potion bar.
- Health and Mana.
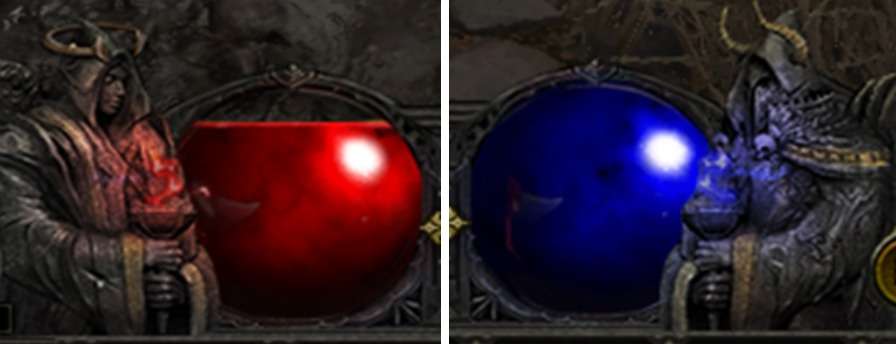
Like most games, the red orb represents the character’s health, and the blue orb represents mana.
- Skill Bar.
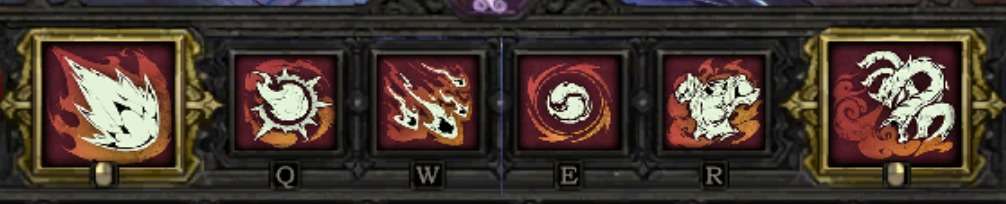
There are 6 quick keys for skills: Left mouse button, Q, W, E, R, Right mouse button. Any slot in the skill bar can be clicked to change the skill.
- Town Portal.
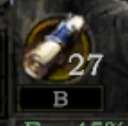
B is the default quick key for the town portal scroll, and the number of scrolls will be displayed on the UI panel.
- Backpack.
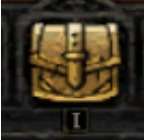
The backpack is used to store your items and equipment. You can quickly open and close the backpack window with the shortcut key “I”. In addition to viewing acquired items, the backpack also allows you to organize items, change equipment, and discard unwanted items. Additionally, the backpack can be expanded to store more items and equipment.
- Experience.

At the bottom of the UI panel, the green progress bar indicates your character’s current level progress.
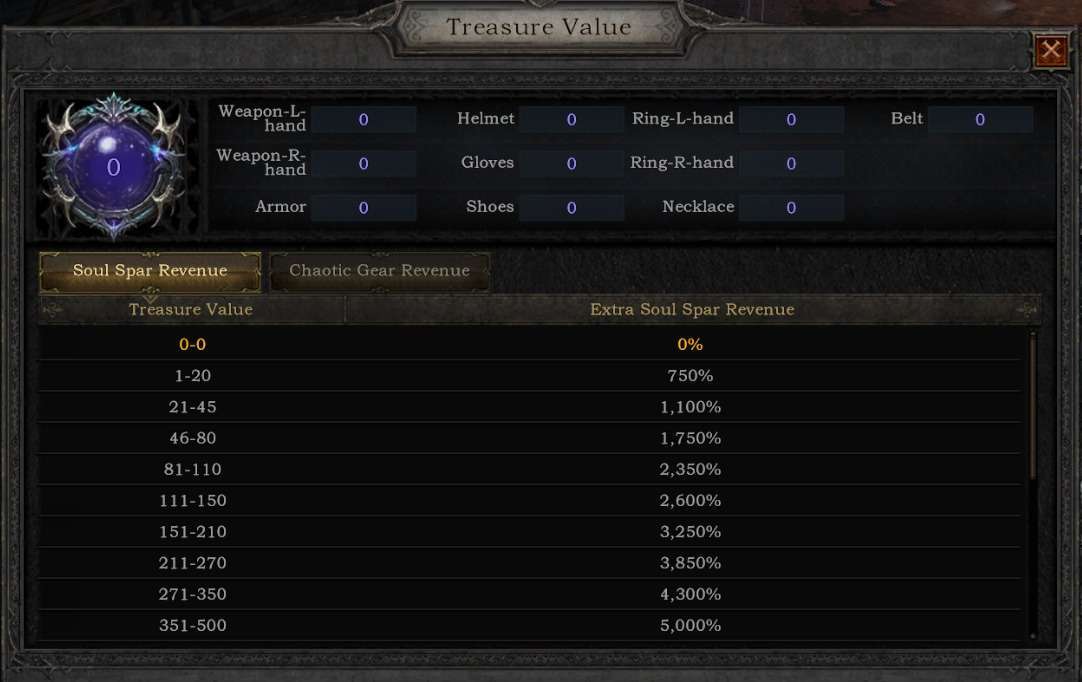
- Treasure Value.

At the top of the UI panel, clicking the symbol will display the character’s current treasure value.
At the top of the UI panel, clicking the symbol will display the character’s current treasure value.
- Function Menu.

The function menu next to the blue mana orb allows quick access to the paid shop or to change game settings.
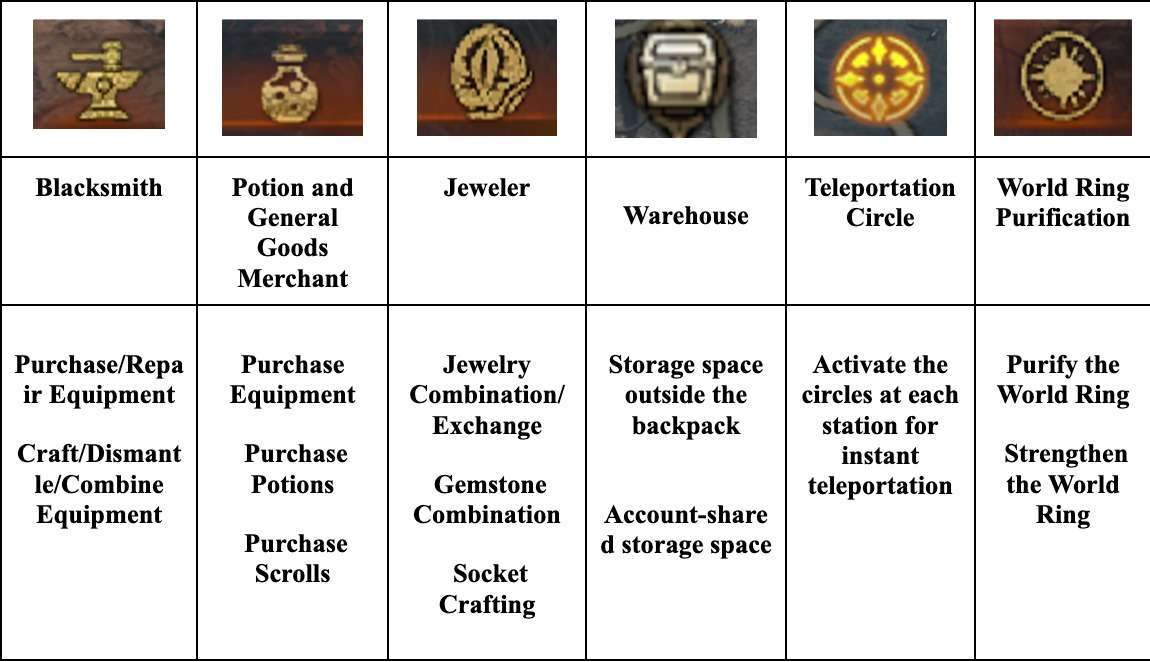
- Main City Map.
In the game, each map’s main city is a place where every player frequently visits. Here are the essential stations that every player must know:
After getting familiar with these interfaces and operations, you are just one small step away from starting your real adventure!
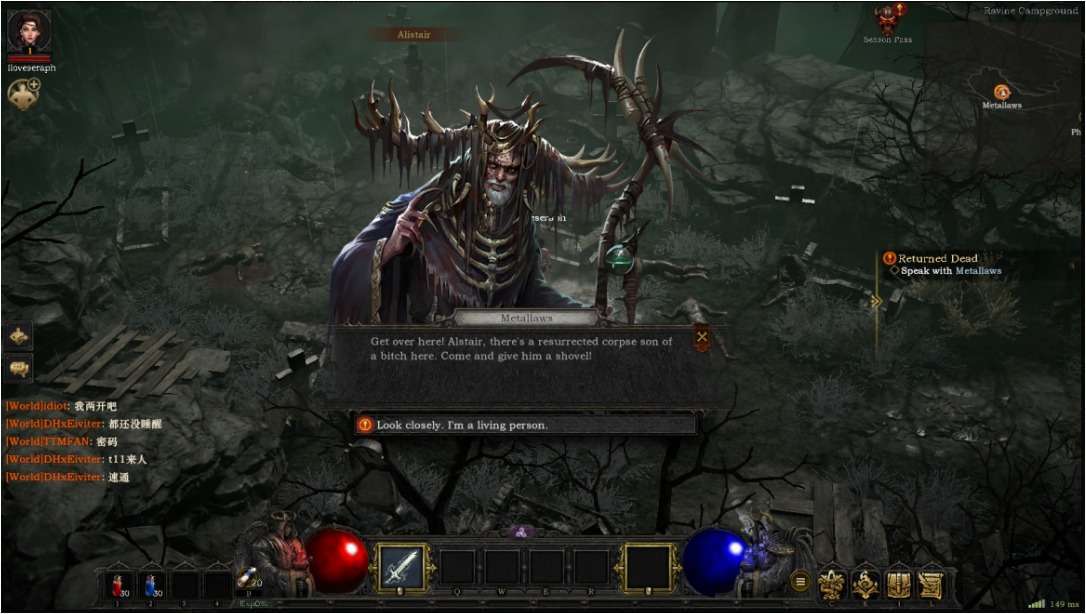
After the game starts, you need to find an NPC at the spawn point in the Bay Camp and talk to them to accept a mission, which officially begins our journey. If we don’t talk to the NPC, we can’t accept missions or continue to get new ones, which may result in wandering around the camp and wasting a lot of time.
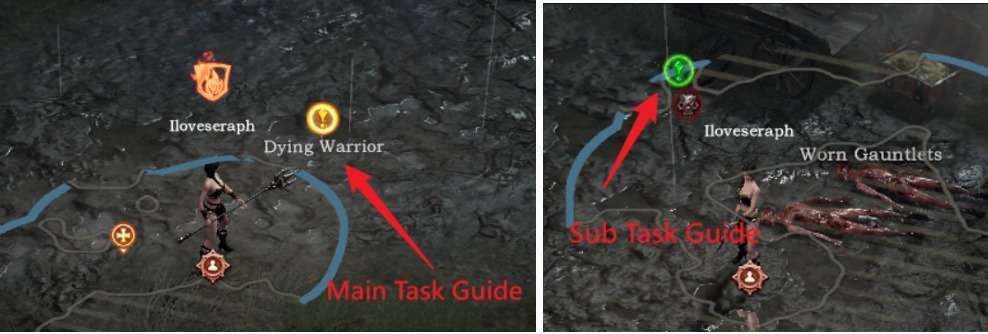
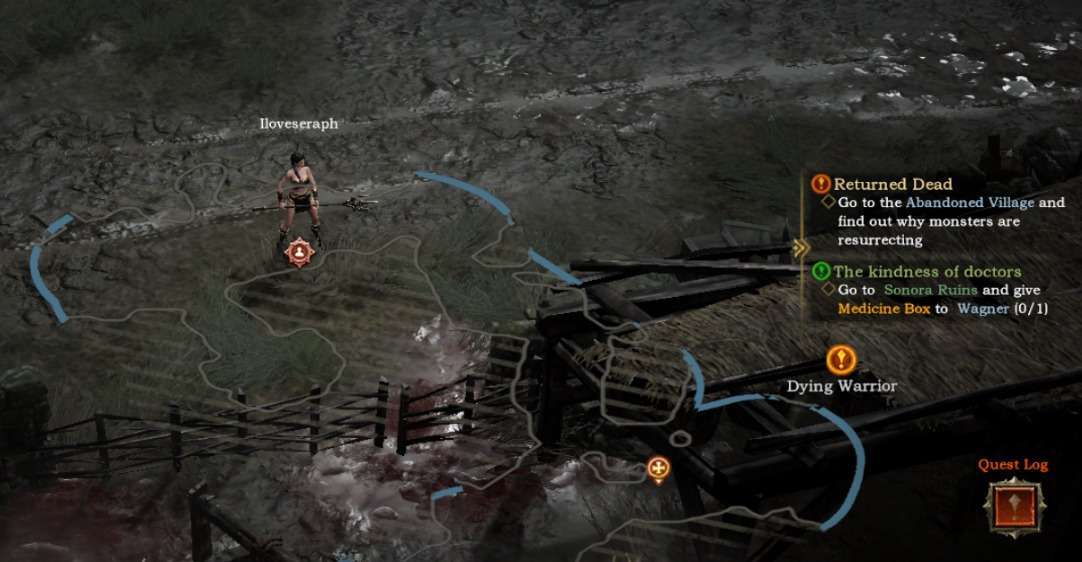
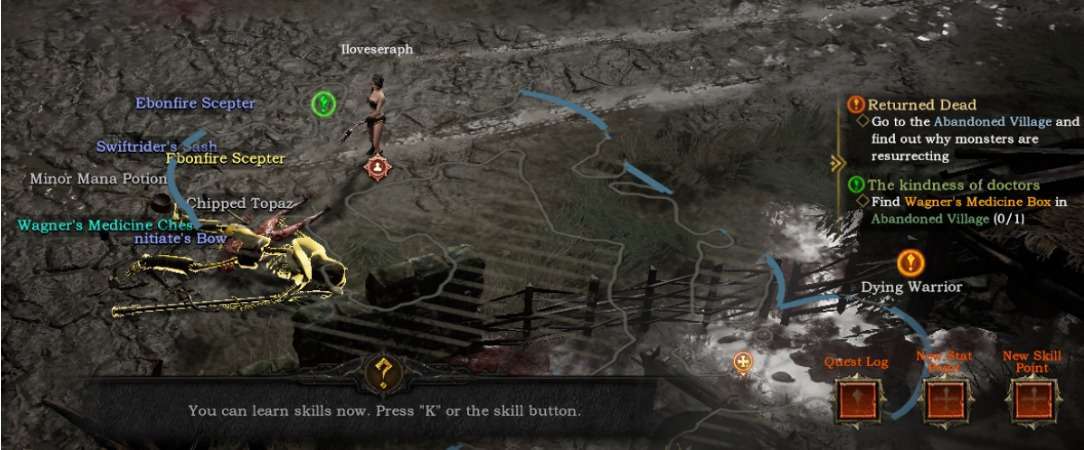
In the game, there’s a mini-map in the upper right corner, which helps us determine our current location, useful for finding objectives and exploring the map. Additionally, the mini-map shows exclamation marks, with orange ones indicating the direction of the main quests. We can follow these to reach our objectives. The green exclamation marks indicate side quests, which we can follow if interested in completing them.
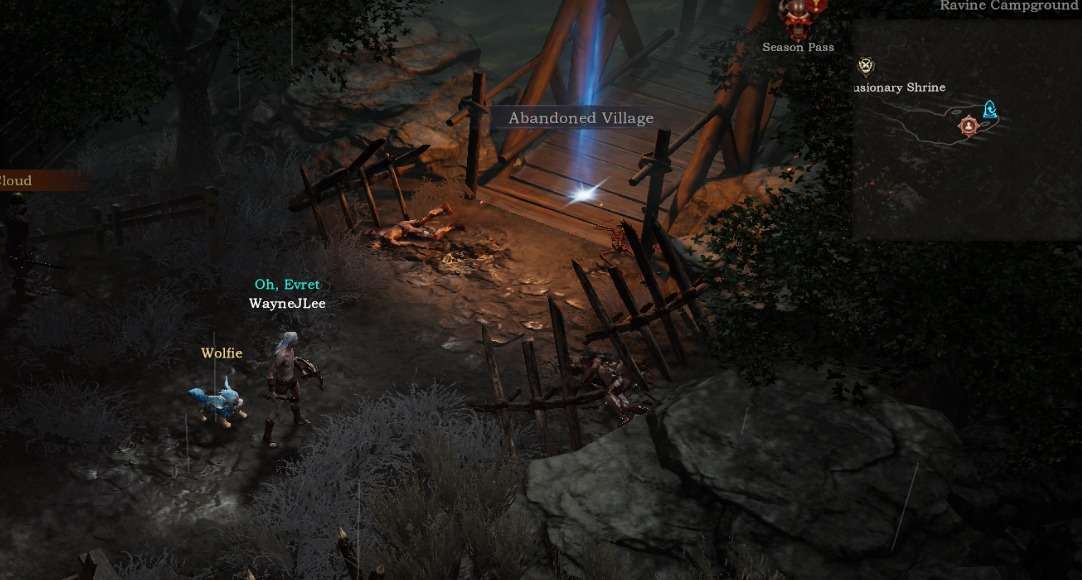
To enter the first chapter’s dungeon in the game, we need to go to the right side of Bay Camp and find NPC Agamand. Opposite him, there is a wooden signpost. Next to the signpost, there’s a path, and if we follow this path to the end, we can find the dungeon entrance.
Which Class to Choose
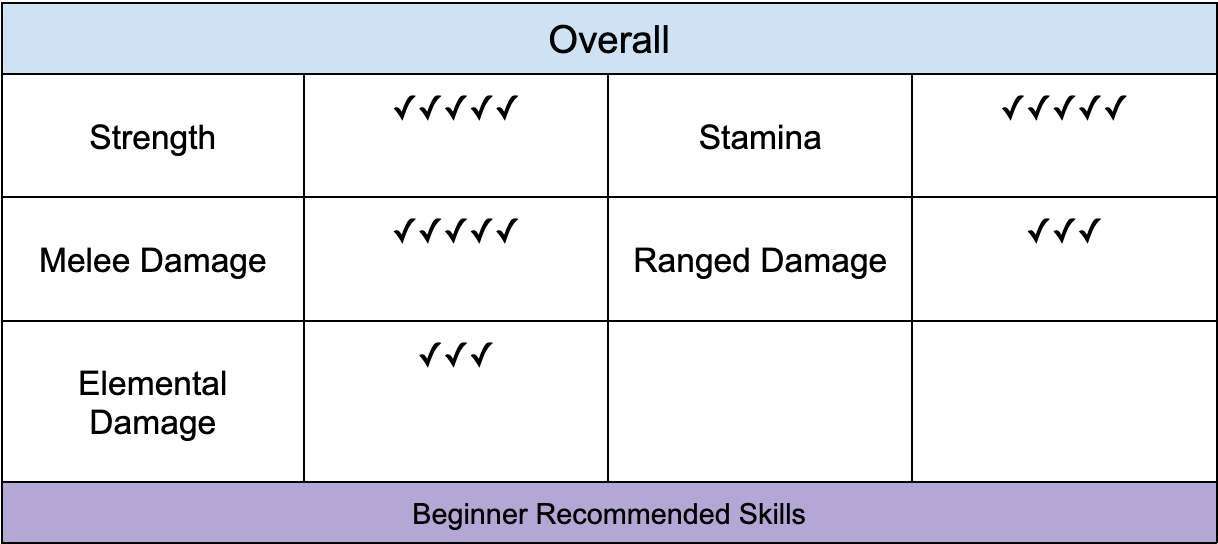
Barbarian
One of the most iconic characters, they possess immense strength and stamina, capable of using various weapons and combat skills to engage in close-quarters combat with enemies. The primary attributes for Barbarians are [Strength] and [Stamina].

Combat Master (Axe Throwing, Lava):
- Axe Throwing:
- Primary Attribute: Agility, followed by Strength and Stamina.
- Main Skill: Throwing Axes, with axes being the primary weapon.
- Lava Bouncing Barbarian:
- Primary Attribute: Energy, followed by Strength and Agility in gear.
- Main Skill: Lava Slam, with swords and hammers being the primary weapons.
Berserker (Whirlwind Cut, Frenzied Combo):
- Whirlwind Cut:
- Primary Attributes: Strength and Agility.
- Main Skill: Whirlwind Cut, with dual-wielding two-handed hammers, axes, and swords as the primary weapons.
Equipment Choices:
- Physical Equipment: Prioritize equipment with high physical damage and attributes in Strength and Agility.
- Lava Series Equipment: Prioritize skill-enhancement gear.
Skill Points Suggestions:
- War Bloodline: Increases movement speed and enhances agility.
- Unbreakable: Improves defense, strengthening survivability.
- Whirlwind Cut: Significantly strengthened in this update, highly recommended to upgrade the skill level.
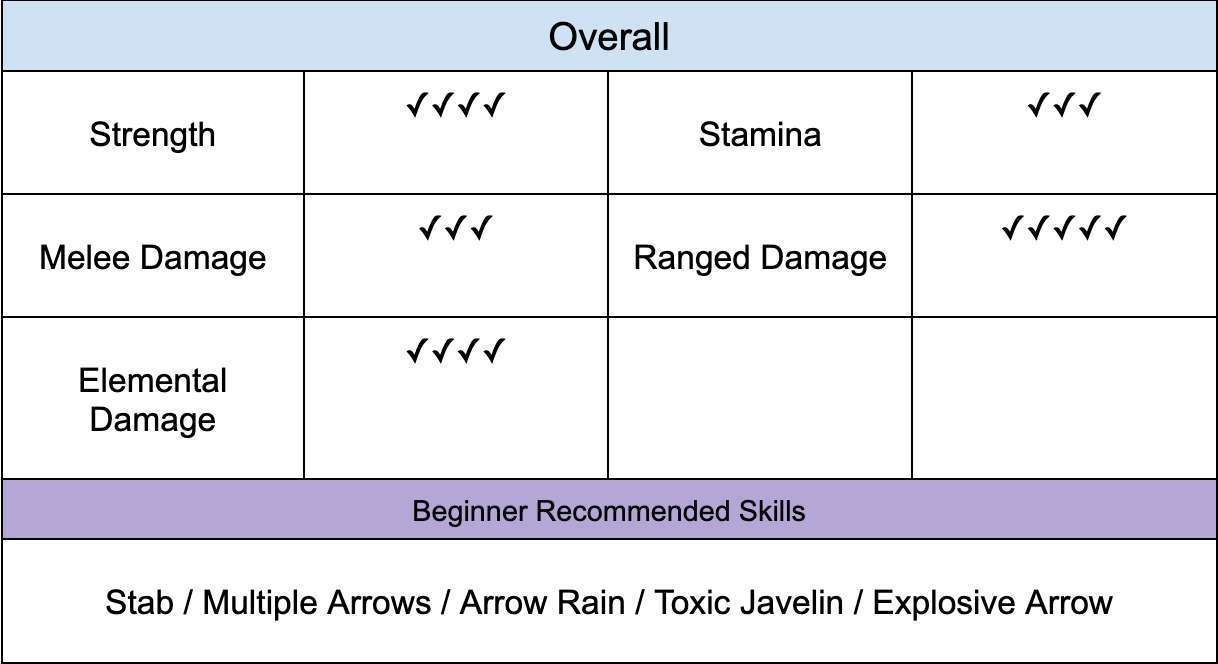
Valkyrie
The class most proficient in ranged attacks in the game, specializing in the use of bows and spears, they destroy enemies with long-range attacks in battle. The main attributes for Valkyries are [Agility] and [Energy].
- Physical Output: Physical Bow, Physical Spear.
- Elemental Magic Output: Elemental Bow, Poison, Thunder Spear.
Basic Skills
- Essential Skills: Roll (Movement) and Valkyrie Descent (Monster Resistance), recommended to learn.
- Magic Output Enhancement: Valkyrie’s magic output skills have been greatly enhanced in this test.
Skill Points Suggestions
- Physical Bow/Spear: Mainly add Agility, skill points in Arrow Rain, Unbreakable Sting, Sweep.
- Elemental Bow/Spear: Mainly add Energy, skill points in Ice-Fire Elemental Arrow, Plague Javelin, Thunder Javelin, etc.
Equipment Choices
- Physical Equipment: Prioritize high-damage and Agility-Strength equipment.
- Elemental Equipment: Prioritize skill-level-increasing equipment.
Notes: Adjust point allocation and equipment choices flexibly according to the faction. Try to maintain dual proficiency in physical and elemental bows and spears.
Mage
A class primarily focused on magic, capable of manipulating ice, fire, and lightning elements to attack enemies, using various spells and magic to control the situation in battle.
The main attribute is [Energy], which increases mana limit and elemental spell damage. It’s recommended to choose equipment with damage bonuses for your chosen elemental talent (e.g., Frost talent should go for frost damage bonuses).

Mage Characteristics
- Category Classification: Lightning, Frost, Fire.
- Main Attribute: Energy, secondary attribute is Stamina.
- Skill Characteristics: Ice magic had advantages in previous test versions but was nerfed in the chaos test, while the lightning and fire series were strengthened.
Basic Skills
- Essential Skills: Lightning’s Flash of Lightning (Movement) and Binding Dark Thunder (Monster Attraction).
- Elemental Immune Monsters: Be aware of elemental immune monsters encountered early on, specialize in one series as needed.
Main Damage Skills
- Ice Magic Main Damage: Frost Burst Bomb or Frost Storm
- Fire Magic Main Damage: Fire Meteor.
- Skill Enhancement: Fire Dragon’s Breath has been greatly enhanced in this update, worth trying.
- Lightning Magic Main Damage: Lightning Javelin or Binding Dark Thunder.
Equipment Choices
- Priority: Skill-level-increasing equipment.
- Secondary: Spell elemental amplification equipment.
Training Suggestions
- Early Stage: Specialize in one series, choose according to the type of monsters encountered.
- Later Stage: Recommend dual specialization in ice and fire, maintain flexibility against various enemies.
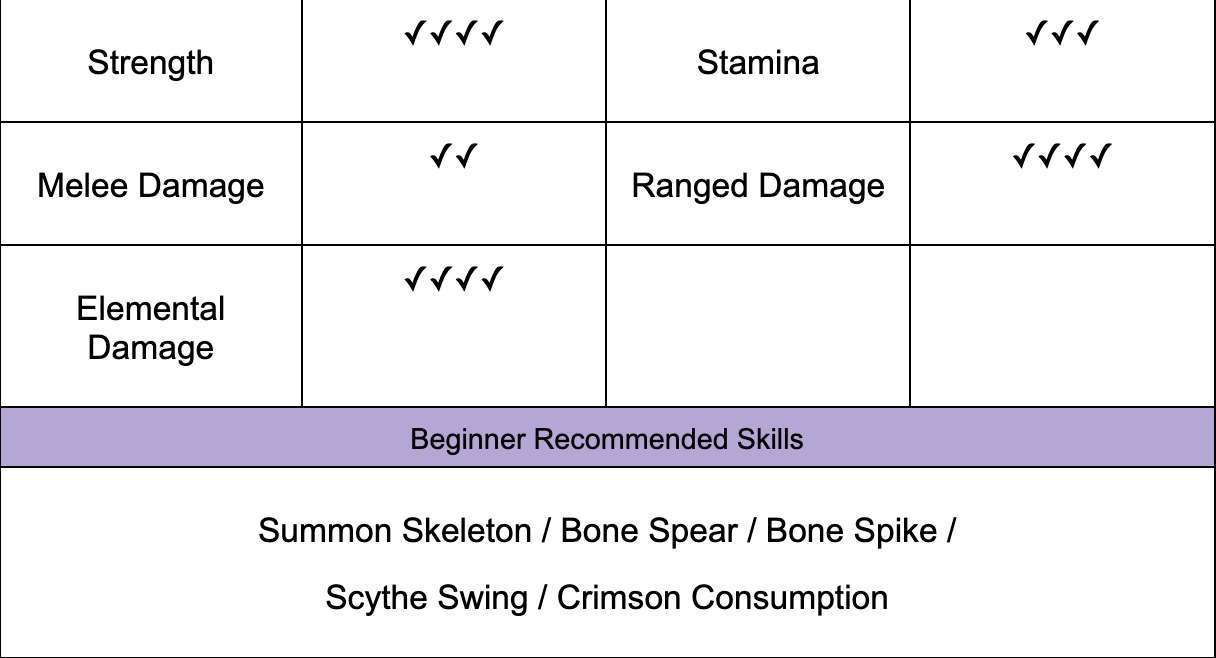
Necromancer
The Necromancer is a versatile class, capable of summoning the dead to fight as soldiers, engaging in direct combat to absorb life from enemies with area curses, or using bone manipulation for various attacks, trapping or piercing opponents!
The attribute points for the Necromancer vary depending on the chosen talents. If you choose the Curse talent tree, focus on the [Energy] attribute for spell damage; for the Bone talent tree, focus on [Agility] for physical damage; and for the Summoning talent tree, [Stamina] for survivability is advisable, as the strength of summons depends on the talent level rather than the player’s attributes.
- Desecrated Legion (Summoning): The primary attribute is yet to be explored; choose equipment that enhances summoning abilities, with staves as the recommended weapon.
- Bone Shadow (Physical): Main attributes are Agility and Strength, choose equipment that increases physical damage, suitable weapons are scythes and other high physical damage weapons.
- Crimson Curse (Spell): Main attribute is Energy, choose equipment that increases skill levels, followed by spell attribute amplifiers, with staves as the recommended weapon.
Basic Skills
- Desecrated Legion: Summons do not inherit player attributes, only benefit from skill points and item affixes.
- Bone Shadow: Physical enhancement, focus on increasing physical damage.
- Crimson Curse: Spell enhancement, focus on increasing skill levels and spell attributes.
Equipment Choices
- Desecrated Legion: Choose items that enhance summoning abilities, staves are recommended weapons.
- Bone Shadow: Prioritize items that increase physical damage, suitable weapons are scythes and other high physical damage weapons.
- Crimson Curse: Select items that increase skill levels and spell attributes, staves as recommended weapons.
Notes: Adjust equipment and point allocation flexibly according to different skill trees. Maintain summoning abilities of the Desecrated Legion, enhance physical damage of Bone Shadow, and strengthen spell attributes of the Crimson Curse.
Leveling Strategy
Master game details for hassle-free quick leveling!
In SERAPH, players can turn high-level treasures obtained in the game into NFTs for trading. To acquire these high-level treasures, the ‘Void Realm’ system plays a crucial role. Once a player reaches level 60, they can venture into the ‘Void Realm,’ which is divided into 18 difficulty levels. The higher the difficulty, the more formidable the monsters and bosses faced, but it also increases the chances of obtaining high-level treasures. Therefore, quickly reaching level 60 to enter the ‘Void Realm’ becomes a primary goal for players in the early stages of the game.
Follow the Quests for Fast Leveling!
For beginners who want to level up quickly, in addition to choosing a class, it’s essential to grasp the following key principles for efficient leveling.
At the start of the game, it’s best to progress following the main storyline quests, as this is the easiest way to gain experience in the initial stages. As you progress through the main story, you will encounter many monsters. However, it’s important to note that often you will receive both main and side quests simultaneously. When carrying multiple quests, pay attention to your route. Focus primarily on the main quests, and complete side quests that you pass along the way to avoid wasting time traveling.
Additionally, if you are unsure where to go for a quest, you can click on the task prompt on the right side of the main screen. Footsteps will appear on the ground, which you can follow to reach the quest location. After completing the main quests on normal difficulty, your level should be around 30, and upon completing them on nightmare difficulty, it should be around 55. At this point, you can start preparing to enter the ‘Void Realm’!
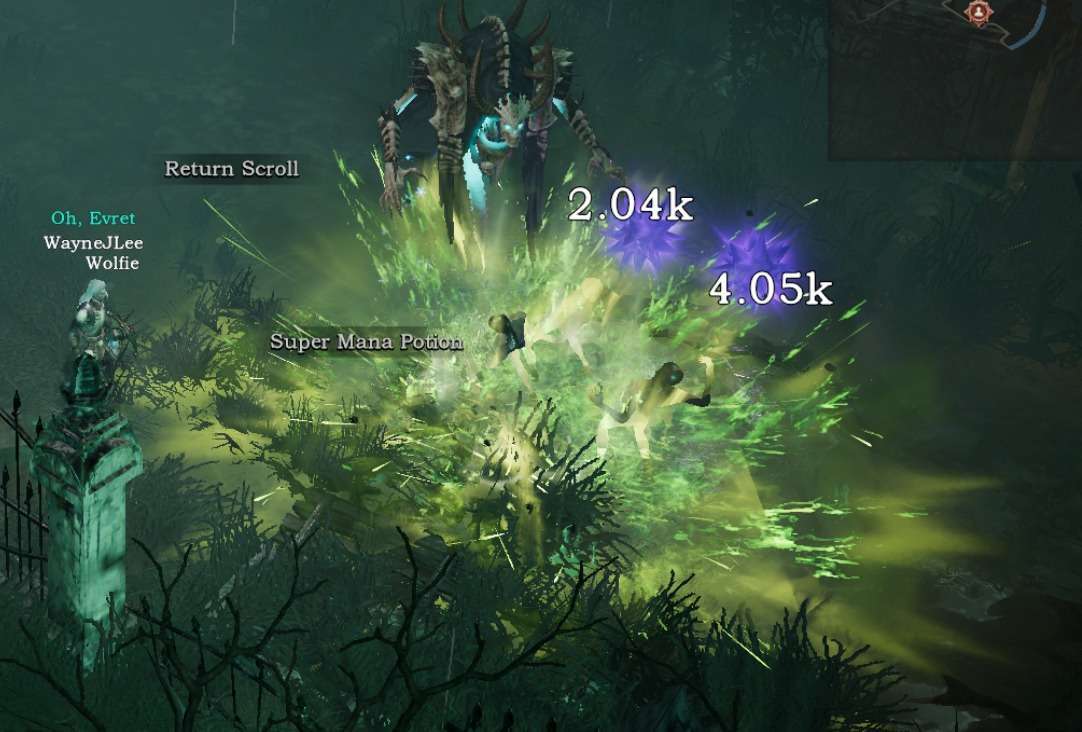
In the early stages, just follow the quests for leveling up while completing them.
Challenging bosses, apart from experience points, the main highlight is the treasure.
Season Pass!
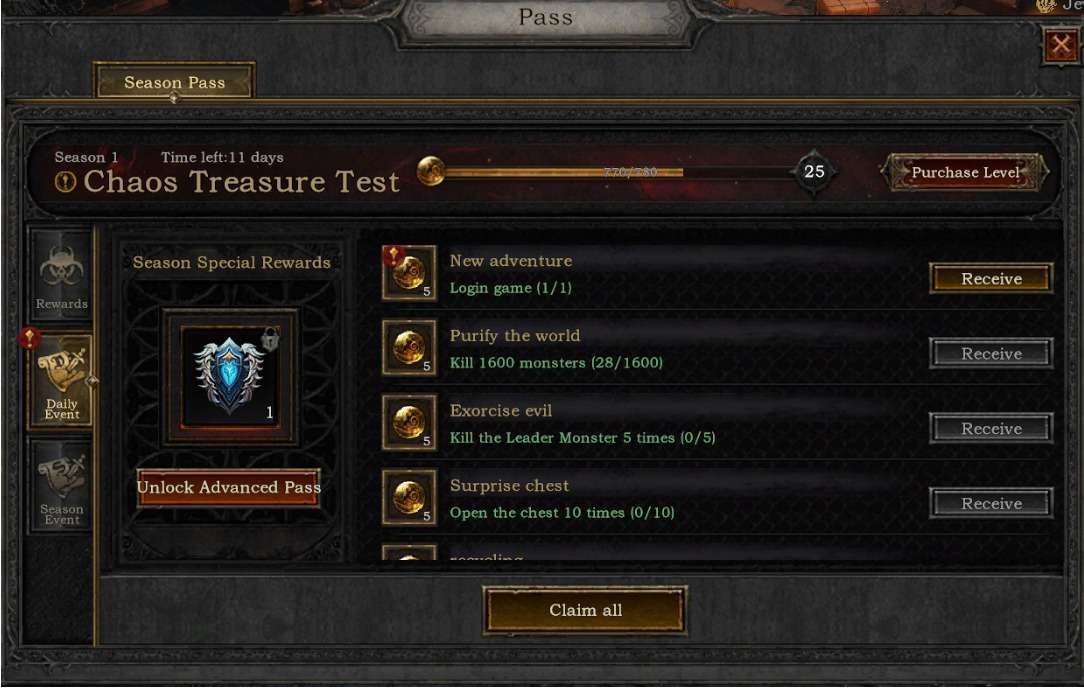
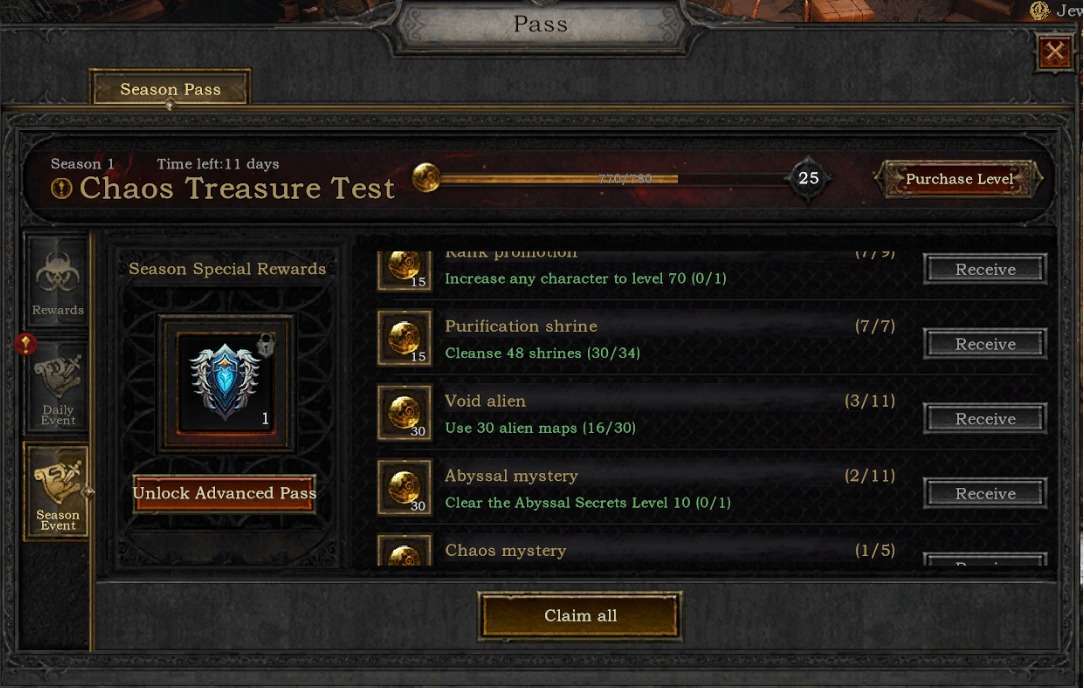
While progressing through the main storyline, there’s another place where you can easily obtain game resources – the Season Pass, located in the upper right corner of the game. By completing daily and seasonal tasks, players can earn pass points. Accumulating enough points allows you to level up the pass and receive corresponding rewards, including rare gems, treasure chests, and expanded backpacks! This means no more frequent trips back to the main city to buy and sell equipment, making life much more convenient!
From daily logins to defeating monsters. Friends, let’s rush forward!
Each season also comes with seasonal tasks to complete.
Weapons / Armor / Items
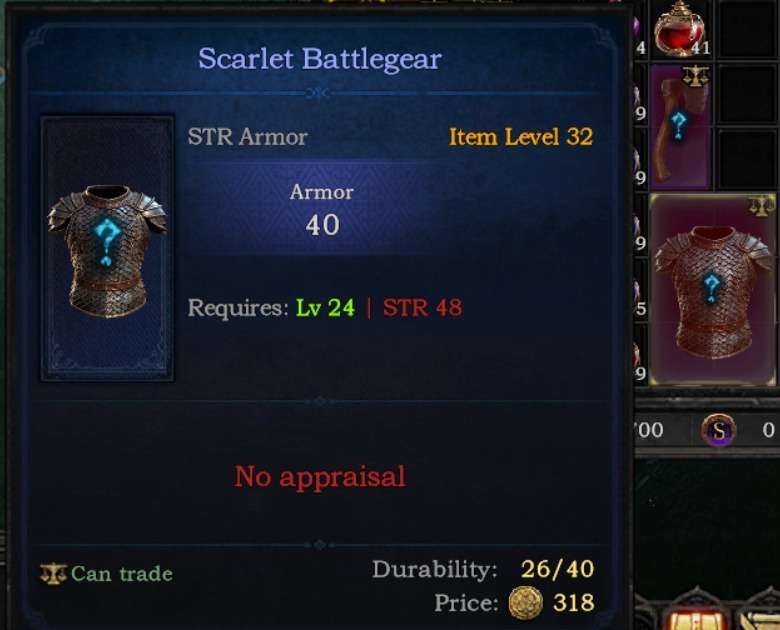
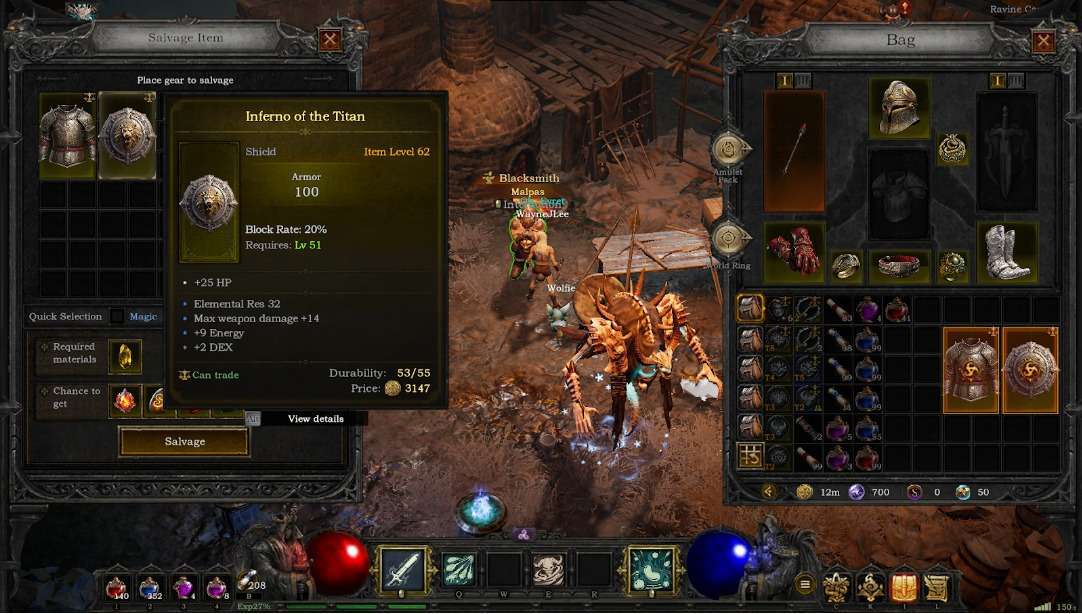
A unique aspect of ‘SERAPH: in the darkness’ is that not every item or piece of equipment is the same size. Therefore, managing your backpack space effectively becomes crucial. Every time a player returns to the city, in addition to repairing equipment, it’s essential to replenish potions, identification scrolls, and town portal scrolls. There’s no carrying limit for potions, so as long as you have enough gold, it’s advisable to buy more to increase your survival rate in the wild. Identification scrolls are used to immediately identify and compare equipment obtained in the field.
When returning fully loaded, it’s generally recommended to dismantle blue or unused gold-quality or higher equipment (dismantling is preferable to selling because the materials obtained will be useful later). It’s worth mentioning that equipment, whether identified or not, sells for the same amount to the blacksmith, so there’s no need to waste identification scrolls on lower-tier equipment.
In the game, we can expand our backpack pages to increase the number of items carried. This also avoids the need to rearrange backpack space when finding valuable loot. Therefore, it’s highly recommended for players to invest a little in the store to purchase backpack expansion, which will definitely save a lot of time in organizing.
The true value of equipment can only be known after identification.
If the backpack isn’t expanded, you’ll need to spend more time organizing it.
- Equipable Items: Left-hand weapon, right-hand weapon, necklace, rings*2, helmet, clothes, belt, gloves, shoes – a total of ten items.
- Equipment Affixes: Affixes are a crucial attribute of equipment. The type and value of affixes are randomly generated within the range of the equipment’s condition. There are too many affixes to display them all, so players will discover them gradually in the game.
- Equipment Grades: White, Blue, Gold, Dark Gold, NFT Equipment
- White Equipment: Only basic material attributes (related to equipment level and type) usually 1-2 affixes.
- Blue Equipment: Material attributes + prefix, up to 5 affixes.
- Gold Equipment: Has material attributes + prefix + suffix, up to 8 affixes.
- Dark Gold Equipment: Has unique attributes and affixes that cannot be changed.
- NFT Equipment: Material attributes + prefix + suffix + chaos affixes, up to 10 affixes.
Character Development
Each level-up grants 5 ability points and 1 skill point. The distribution of ability points should align with the strengths of your class. For instance, warriors should mainly invest in Strength and Stamina, while mages should focus on Energy.
Some equipment requires certain attribute levels, so allocating points to meet these requirements, especially when the equipment has excellent affixes for your class, can be very beneficial.
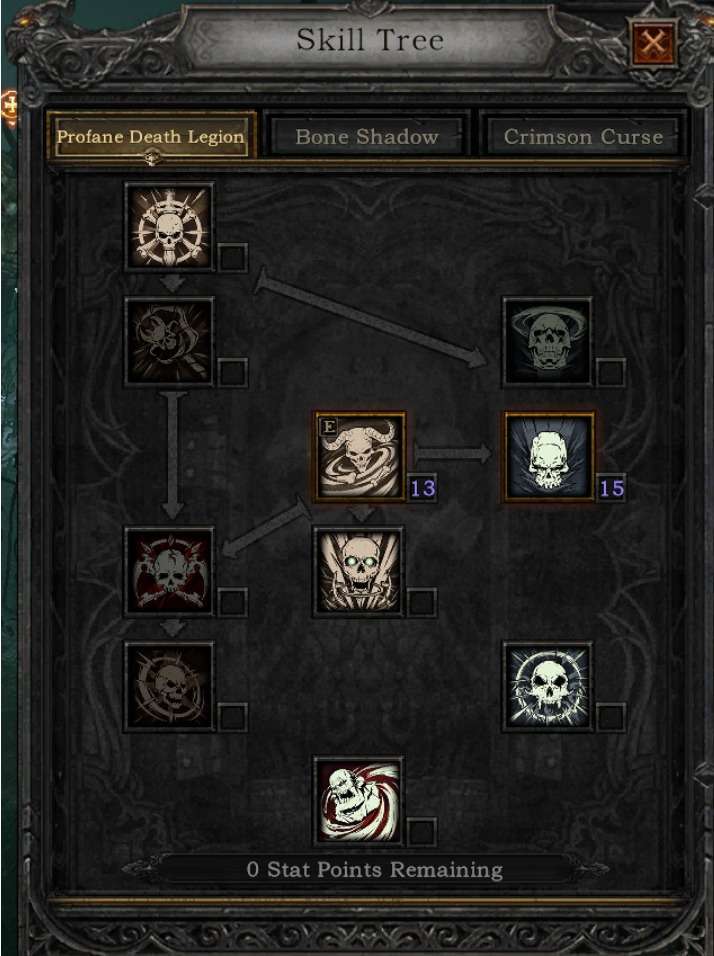
Regarding skills, each class has three skill tree tabs, representing different playstyles. Take the Valkyrie for example, whose skill tree includes ‘Bows and Crossbows,’ ‘Passives and Magic,’ and ‘Javelins and Spears.’ ‘Bows and Crossbows’ and ‘Javelins and Spears’ represent different attack modes. Focusing on one and complementing it with some ‘Passives and Magic’ skills will give the Valkyrie a solid foundation.
Although it’s possible to invest in all three talent branches simultaneously, and many combinations look powerful, skills within the same talent tree often enhance each other. So, it’s recommended in the early stages to concentrate on one talent tree for stronger effects.
Every class has three skill tree tabs, allowing players to freely allocate points.
When mages learn attack skills, clearing mobs becomes much more convenient.
Practical Tips for Time and Effort Saving
Finally, here are a few tips to help players progress more smoothly in the game:
- Teleport points on the map need to be activated by standing on them. Once activated, you can teleport to them anytime by opening the map.
- Whether in the wild or in dungeons, remember to use the environment during combat. For example, a warrior’s kick can push enemies away, but if used correctly, it can corner monsters, saving time chasing them.
- Joining a party in a room can grant experience bonuses. Some difficult bosses are easier to defeat with the help of teammates.
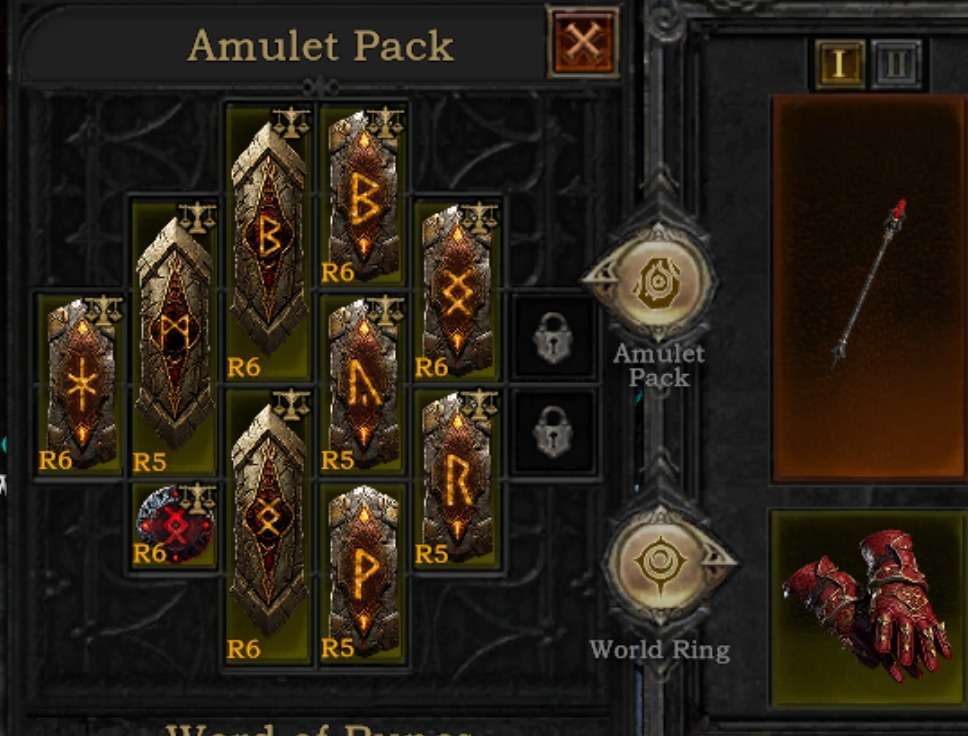
- As you level up, you will find amulets. Remember to place the amulets in the amulet bag to activate their effects.
- Always purify unclean shrines you encounter. Completing the challenges they offer grants unique items – don’t miss out!
Joining a room and teaming up with others provides experience bonuses and makes defeating monsters more efficient.

Amulets must be placed in the amulet bag to be effective.
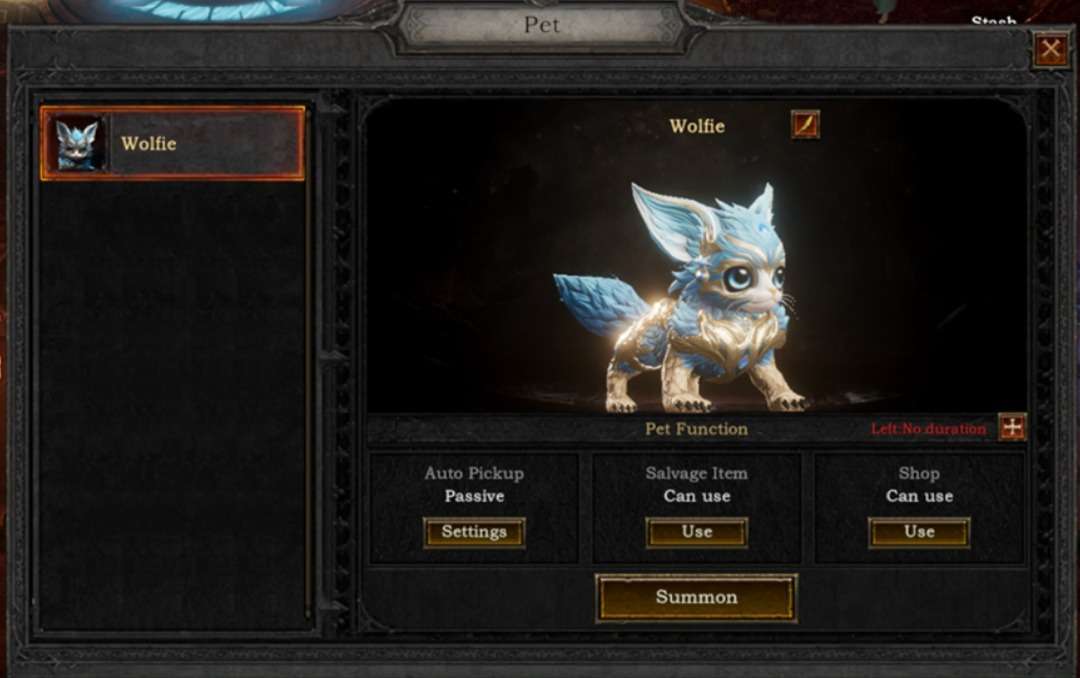
Pets
In the game, players can acquire pets through certain means. Pets can assist players in picking up items and opening a portable shop for selling or dismantling items. They are highly functional and make great companions for adventures!
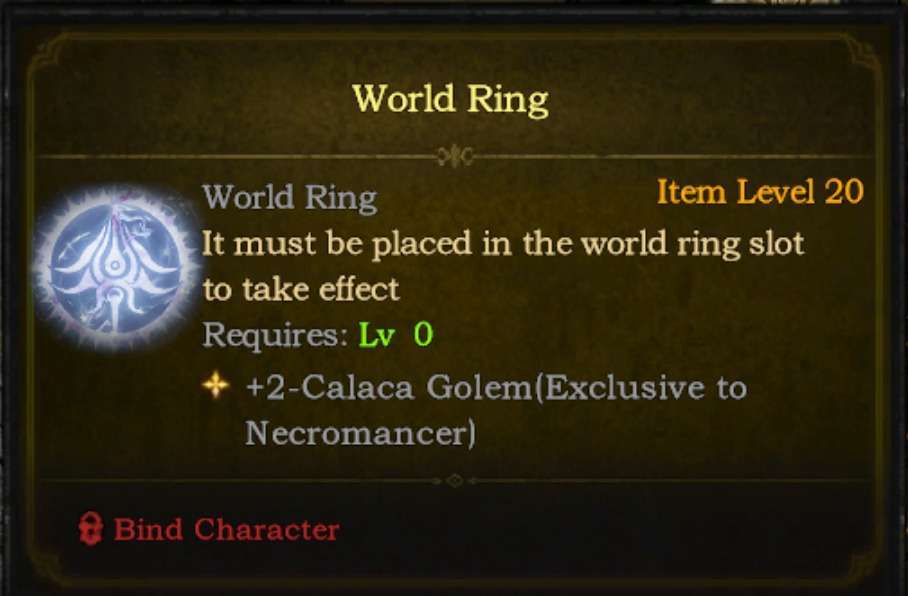
World Ring
In addition to the main content mentioned above, the game also includes rich story elements, puzzles, and collectible details for players to discover. Most of these offer practical combat power boosts when successfully solved.
As players progress through the main storyline, they will purify the ‘World Ring’ at the end of each chapter. Successful purification allows players to proceed to the next chapter and grants an equippable ‘World Ring.’ Each player’s World Ring comes with different affix bonuses. If you obtain affixes unsuitable for your class, there’s no need to worry. In the latter half of the main storyline, a feature to refresh the World Ring’s affixes will be unlocked.
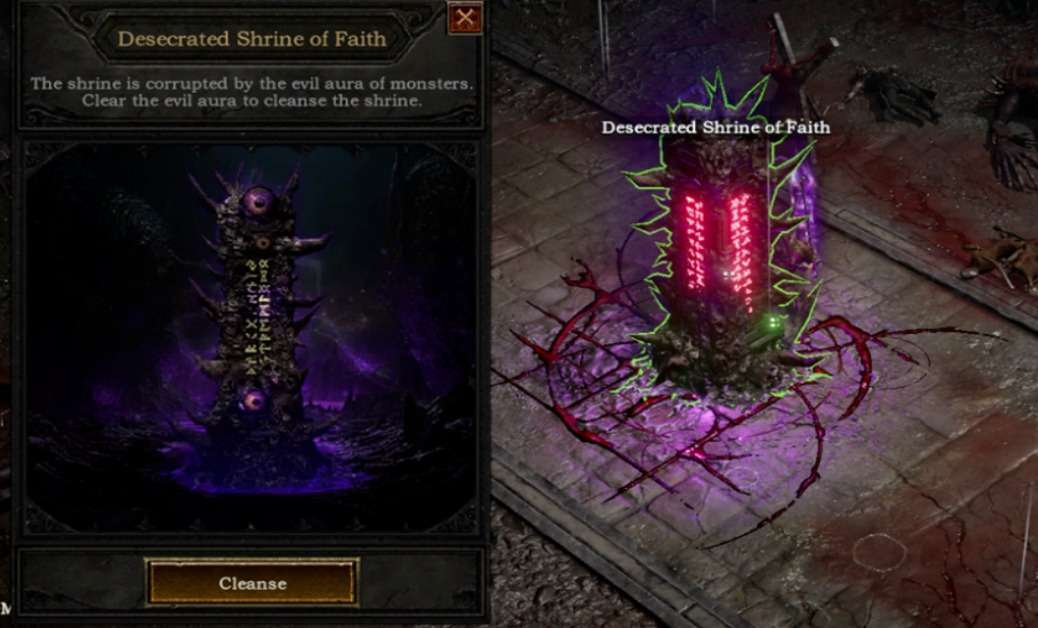
Shrine
During the progression of the main storyline, players will inevitably encounter noticeably unique devices on some maps, known as ‘Shrines.
Shrines’ offer time-limited challenges. By achieving the challenge objectives within a set time, players can unlock a key to expand their amulet bag slots. This is currently the only way to obtain these keys in the game.
The challenges presented by ‘Shrines’ vary greatly. Some may require sacrificing a portion of your mana, while others might involve defeating a certain number of monsters. But don’t worry, all the challenges are generally quick and only need to be completed in the vicinity of the Shrine.
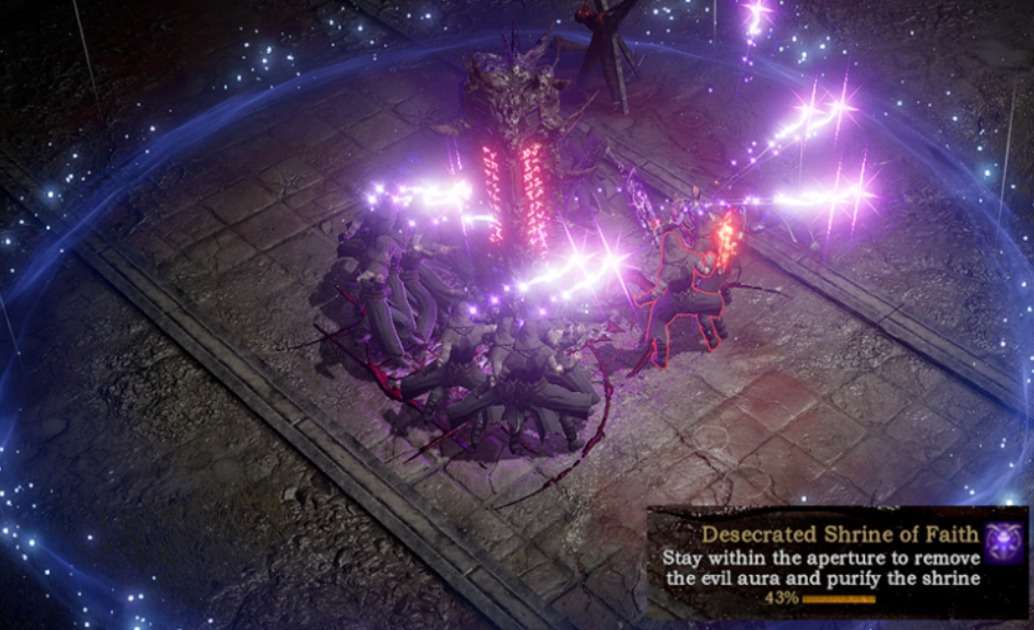
Some Shrines might not be successfully completed on the first attempt. To help players identify which Shrines on a map are still incomplete, the map will display the progress of Shrines (e.g., 0/1 indicates there is one Shrine on the map, and it is yet to be completed).
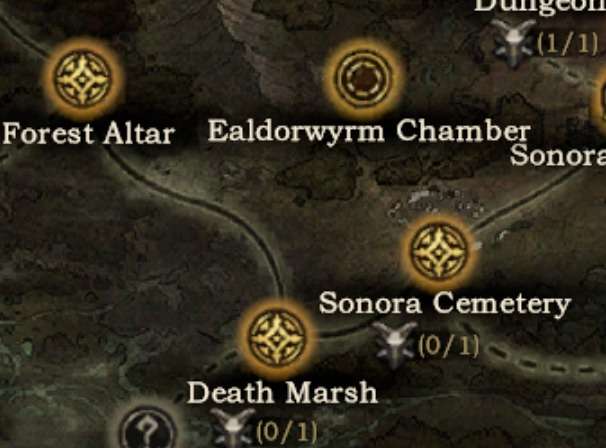
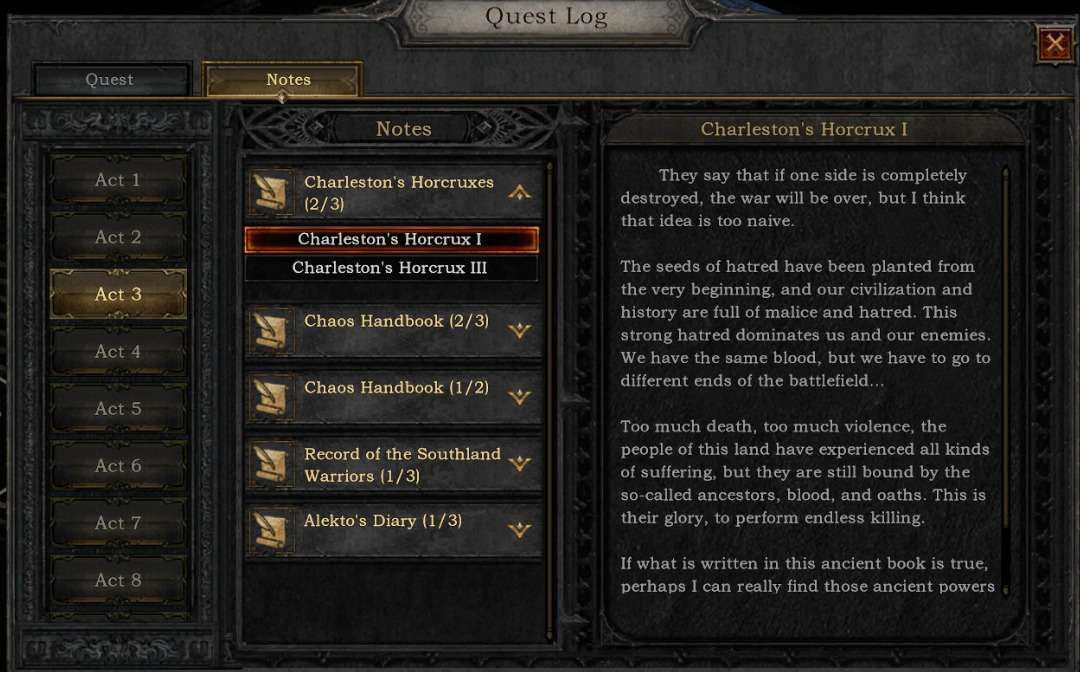
Notes
As players move around any map, they might suddenly find a note on the ground that can be picked up. After picking it up, right-clicking on it in the inventory will allow you to read and complete the collection of that note!
Collecting notes doesn’t offer any rewards, but since there are no guides to their locations, collecting them all is quite challenging, even more so than defeating chapter bosses. This adds an exciting challenge for players who enjoy collecting!
Marketplace
As a blockchain game, SERAPH allows players to mint and trade valuable in-game items on the blockchain. These items include Chaos-infused equipment, certain Dark Gold items, and Punch Stones.
As a game centered around treasure hunting and crafting, players have a significant need for item trading, such as gold items with excellent affix attributes and various materials. Due to the vast quantity of similar items, conducting all transactions as NFTs on the blockchain would be impractical. Therefore, an in-game marketplace has been developed to facilitate the trade of everyday in-game items that are not on the blockchain.
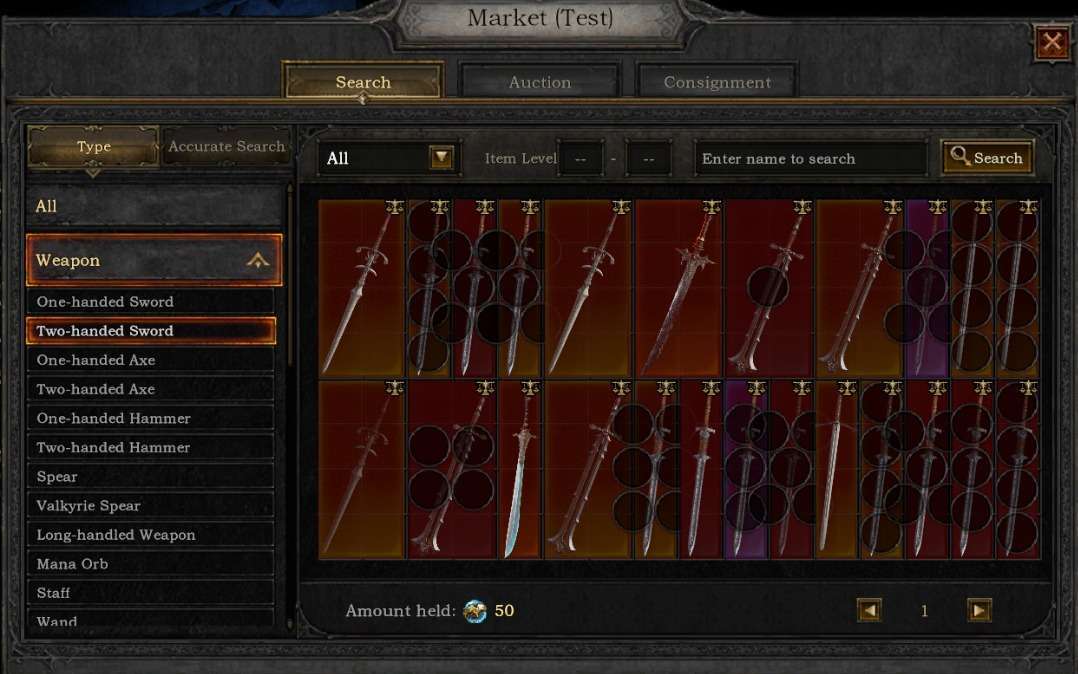
The in-game marketplace supports filtering by item type, quality, item level, item name, and even affixes, offering comprehensive browsing features. To sell items, players need to spend a small amount of ‘gold coins’ to increase their backpack and listing slots, enabling them to sell more items.
The intention is to provide players with the joy of treasure hunting and business trading beyond combat.
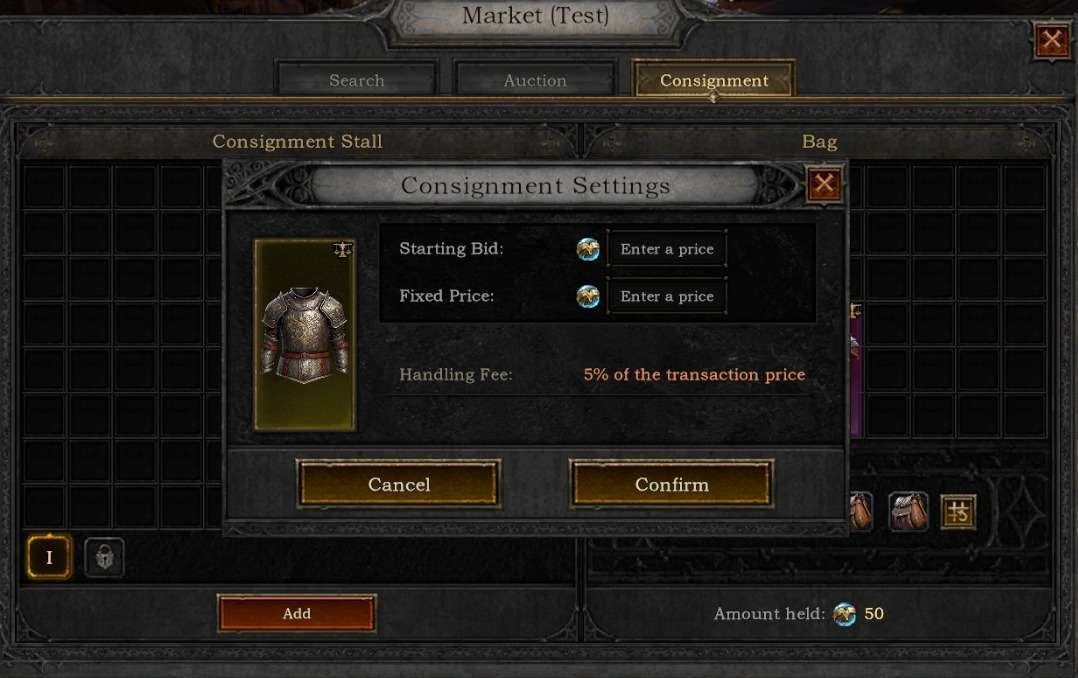
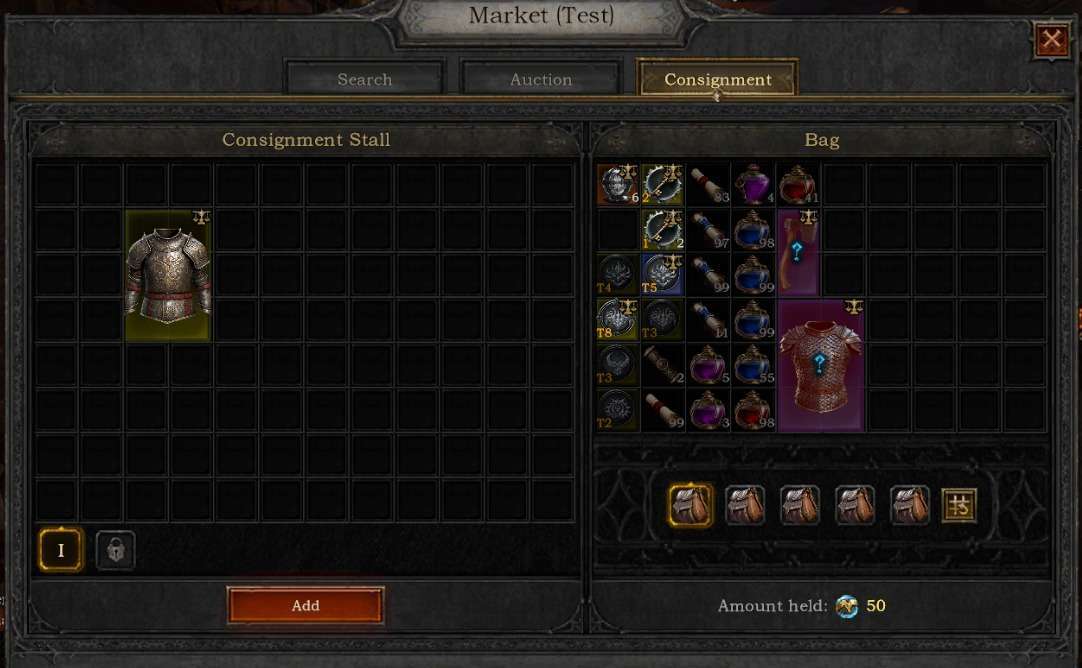
Consignment of Goods
To consign items for sale, players first need to use Chaos Stones to purchase a marketplace stall.
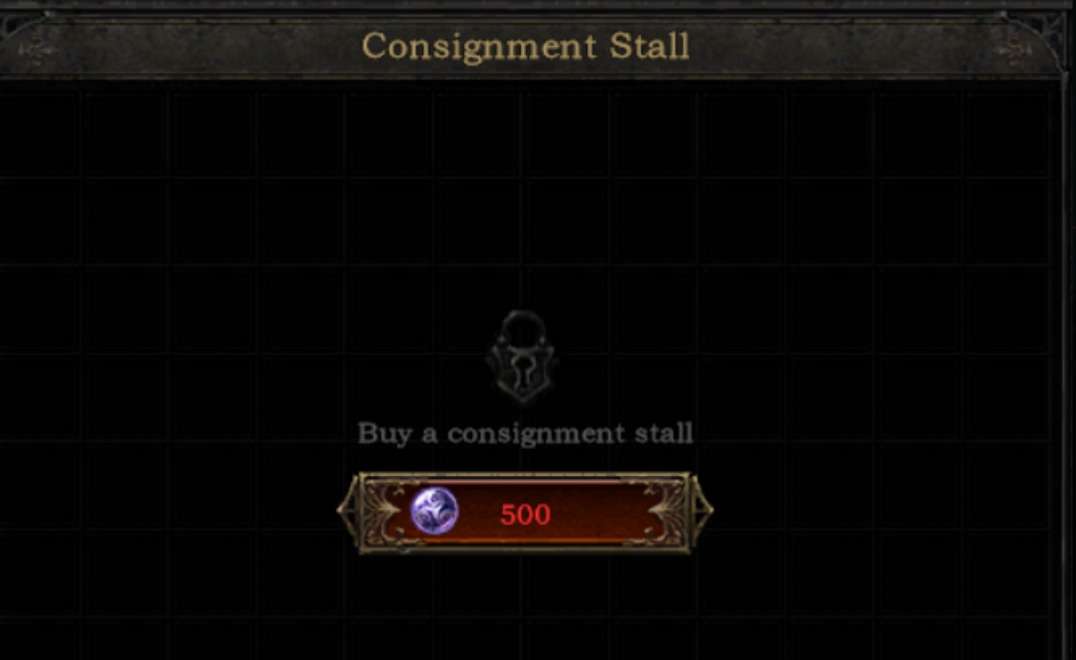
Place the ‘tradable’ items from your backpack into the stall, and click on the stall to list it on the marketplace. The listing duration is 1 day, after which items will be automatically delisted.
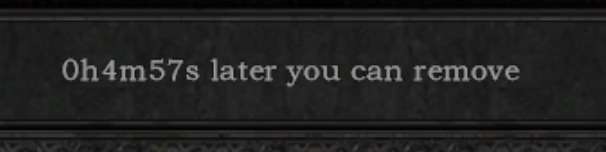
After listing, the stall can be manually delisted, but there is a 5-minute cooldown period.
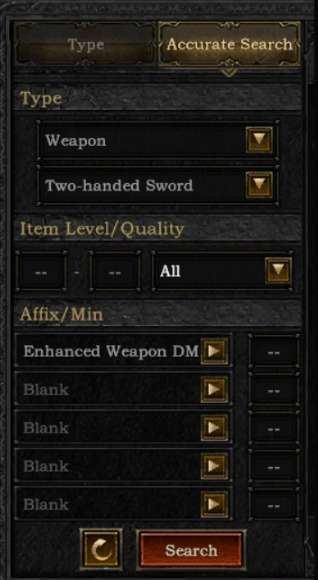
Item Search
Players can search for items in the listed marketplace stalls using categories.
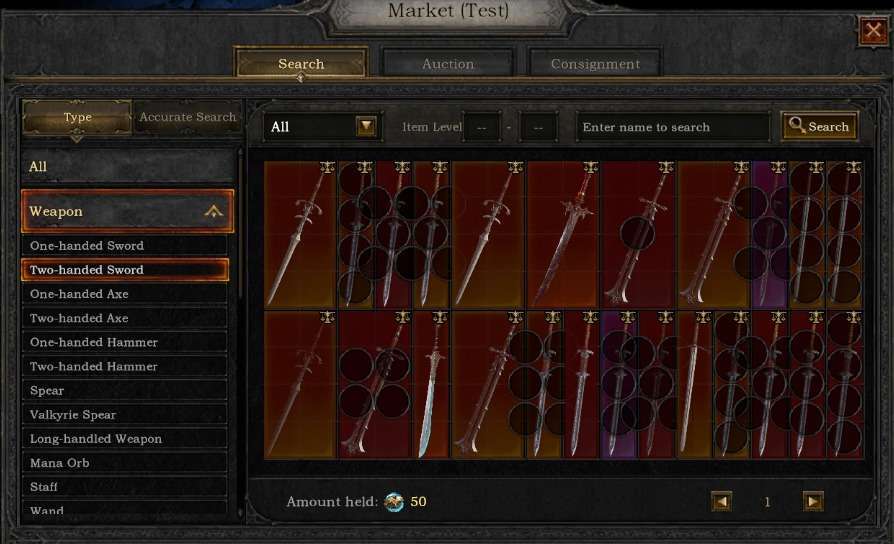
Currently, there are two types of searches: category search and precise search. Category search is based on the type of item, while precise search uses affixes to filter and find equipment that meets the criteria.
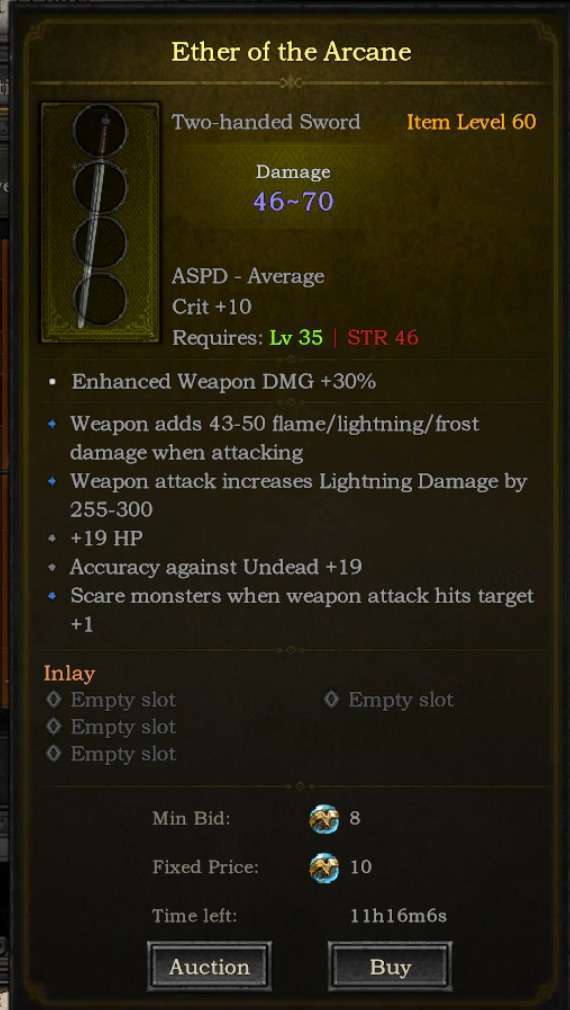
Purchasing Items
There are currently two ways to purchase items:
- One is to buy directly at a fixed price by paying the equivalent amount of Soul Crystals.
- The other is to participate in an auction. Each bid must exceed the minimum bid in Soul Crystals. The highest bidder at the end of the remaining time wins the item. If a bid exceeds the fixed price, the transaction will be completed at the fixed price. If an auction fails due to being outbid or other reasons, the Soul Crystals paid for bidding will be refunded.
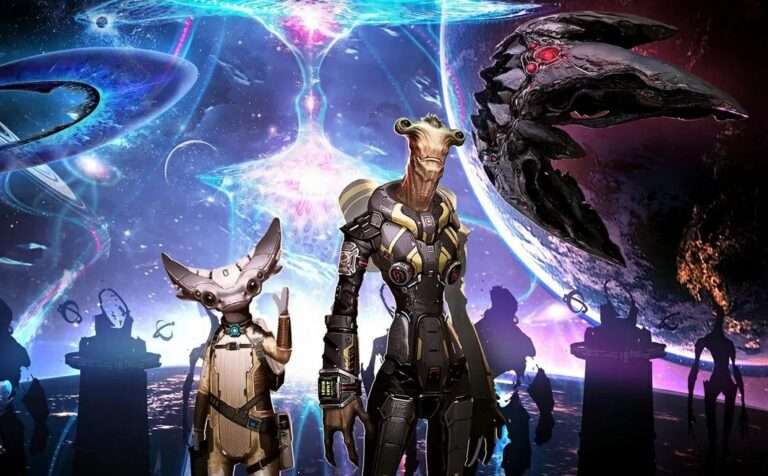
Void Realm
The Void Realm is one of the core gameplay elements of SERAPH, playing a significant role in the mid to late stages of the game. It involves using tickets of various levels to open corresponding alternate realm maps, where players fight monsters and bosses to win final rewards.
The story of the Void Realm unfolds after the protagonist’s team defeats the mastermind behind the chaos. Even after restoring the World Ring, the chaos power still invades the world. The protagonist enters the chaos dimension through the Chaos Stele, defeating the guardians of each dimension, ultimately facing the Chaos Overlord Azathoth.
Void Realm Entry Process
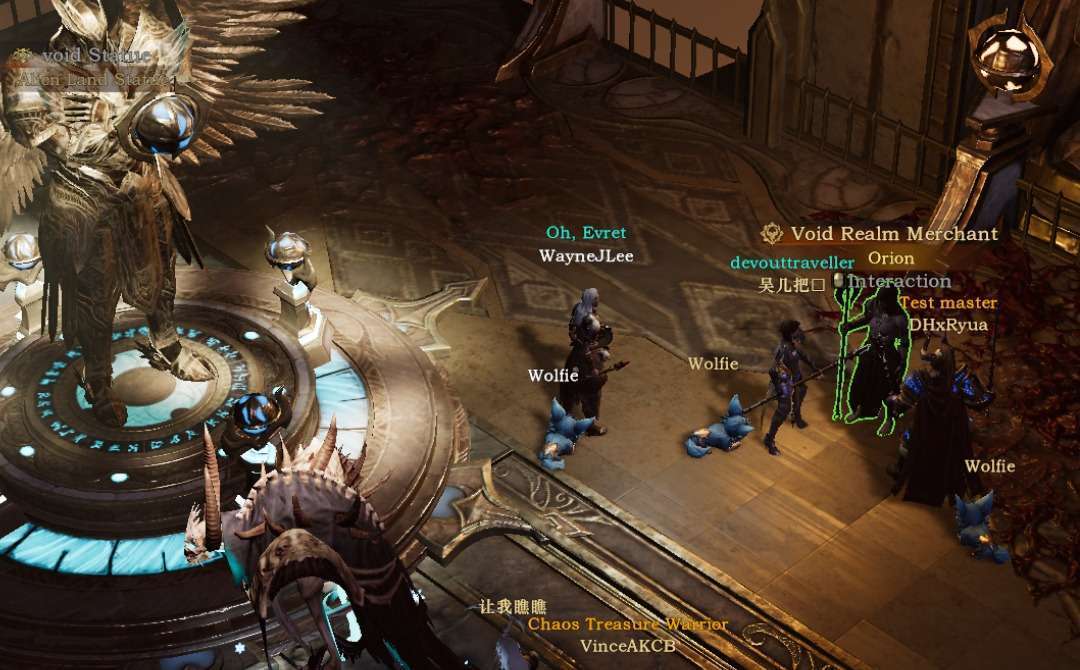
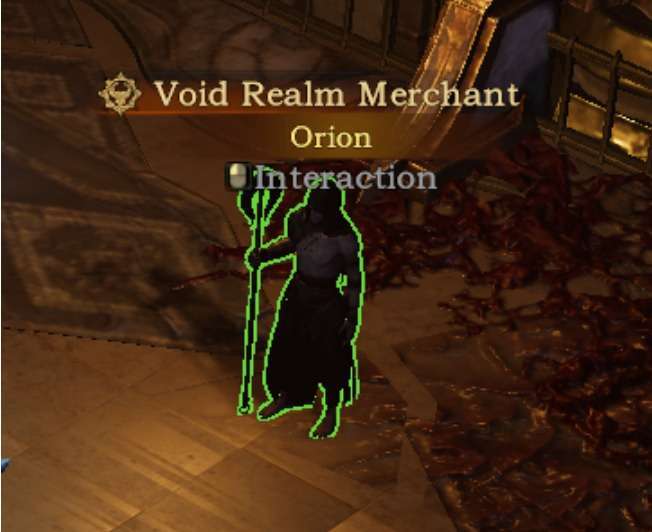
After completing the final chapter of the story, return to the camp and find the Void Realm NPC to start exploring the Void Realm.
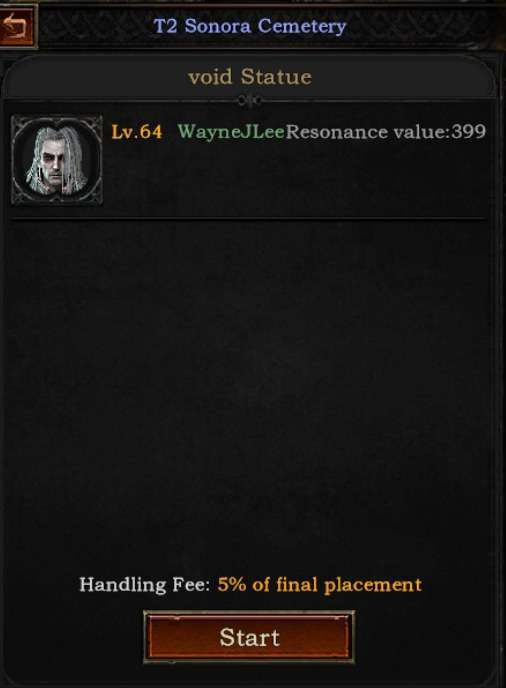
The NPC provides players with an initial map ticket and Void Crystals to enter the alternate realm. Players use the Void Realm statue to open the entrance interface, where they place the map ticket and Void Crystals to open the alternate realm instance.
- Void Realm Entrance Interface Introduction.
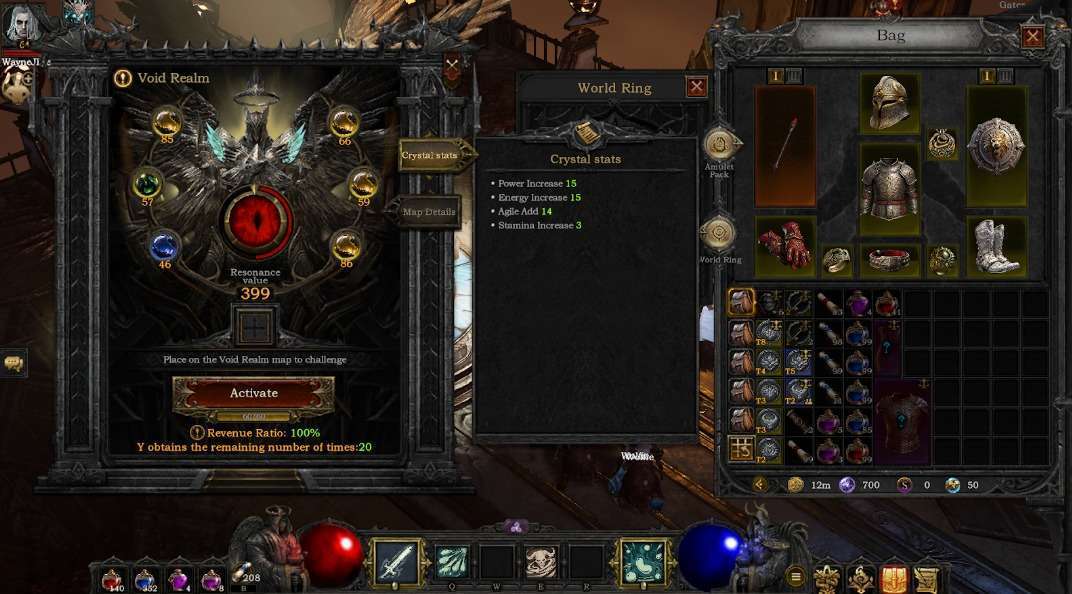
Ticket Insertion: Players can drag and drop the map ticket from the inventory with the left mouse button or right-click to insert it directly.
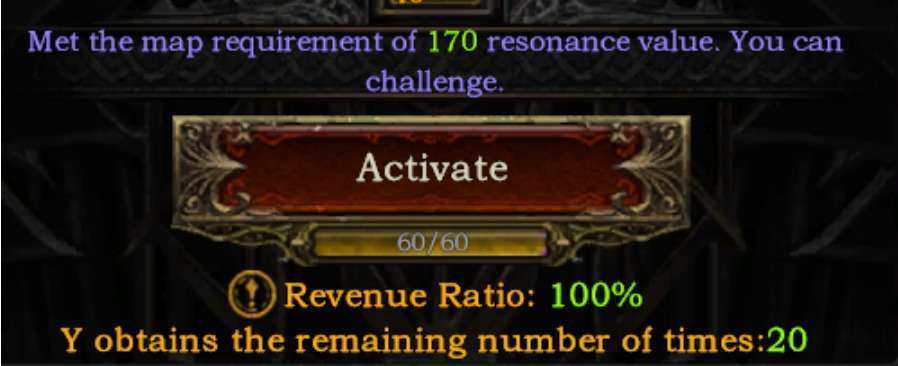
Resonance Value: The interface has six circular slots for placing Void Crystals. Each Void Crystal carries a fixed resonance value. The total resonance value of the player must exceed the map ticket’s required value to open the alternate realm.
Chaos Energy: Indicates the number of entries, deducting one point per entry, resetting daily. The number of entries affects instance rewards.
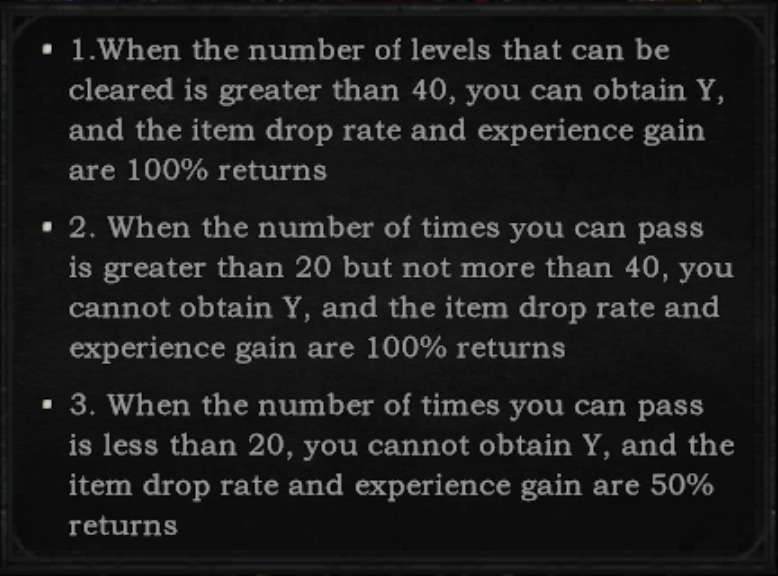
It’s important to note that the special tradable currency, Soul Crystals, only drops in the first 20 daily entries to the alternate realm and is subject to a daily drop limit influenced by the number of NFT equipment a player wears.
Void Realm Entrance: After successfully opening the Void Realm, six teleportation gates appear around the statue. Clicking on a gate allows direct entry into the alternate realm instance. Each opened realm offers six challenge opportunities. If all are used, the instance closes and can’t be re-entered. Dying or exiting the instance within the realm also counts as a challenge attempt.
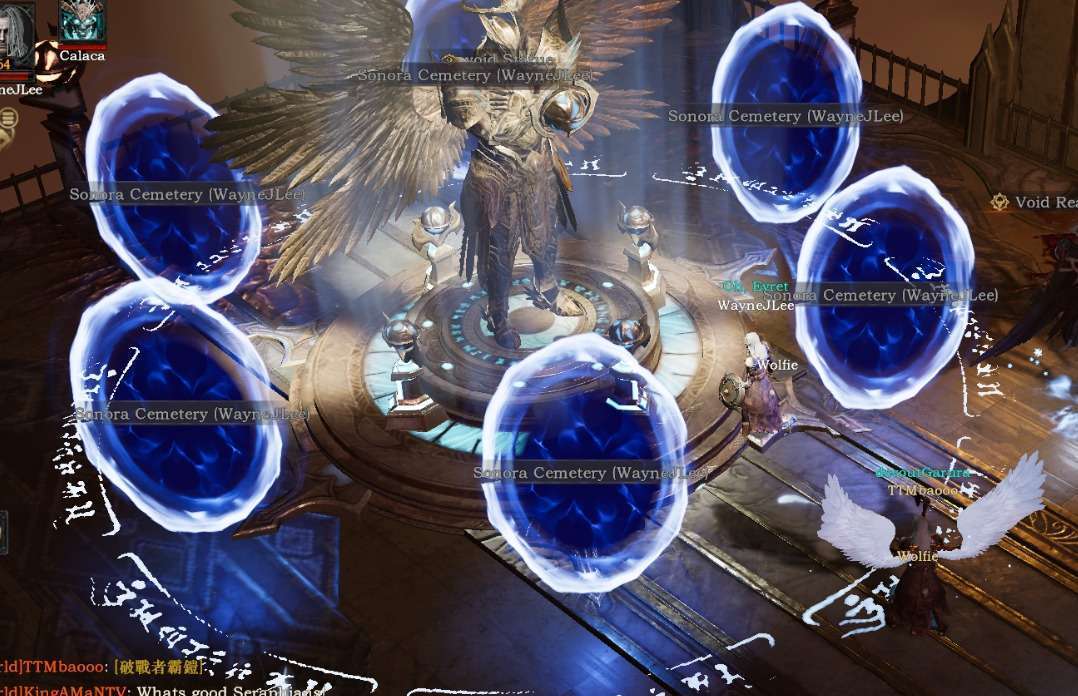
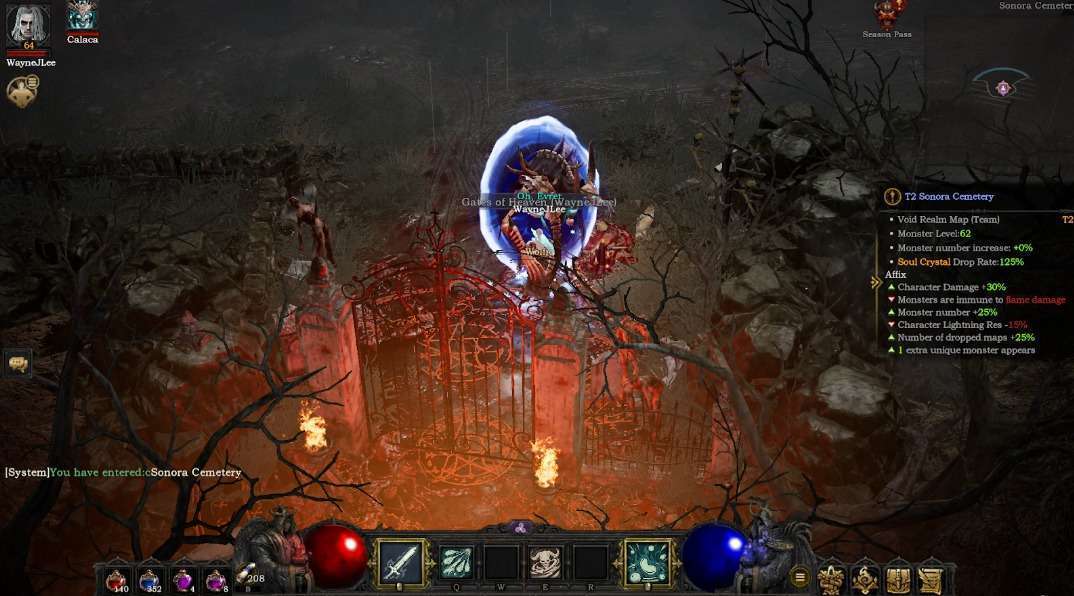
- Inside the Void Realm Instance.
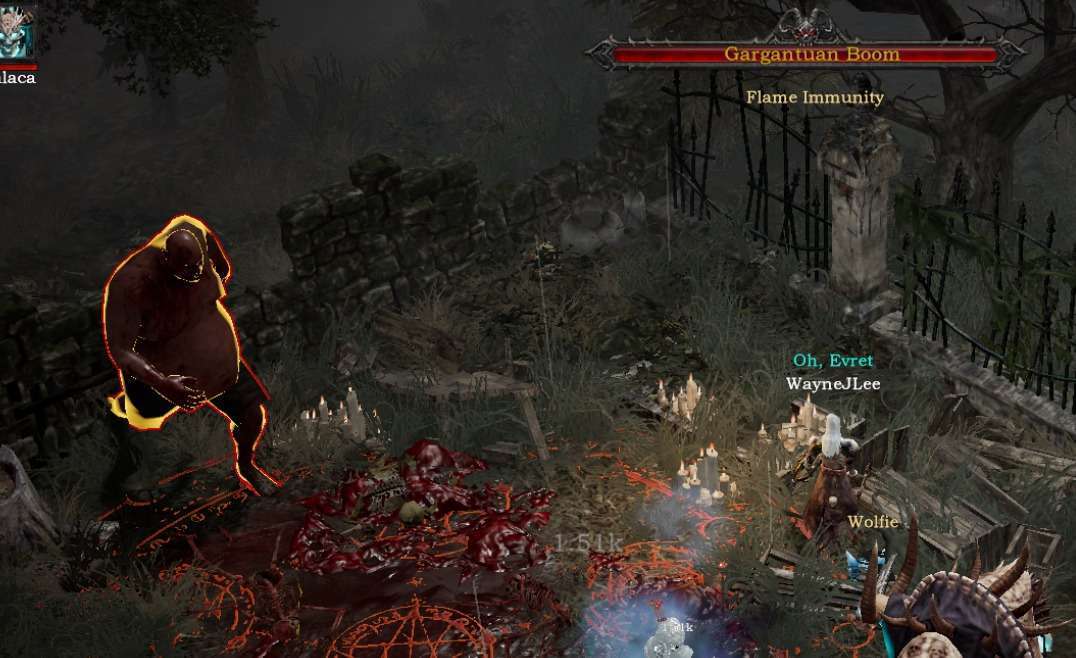
Once inside, players can start exploring and challenging the realm. It contains numerous elite monsters (blue and shining gold monsters) that yield rich rewards upon defeat. Only one boss monster exists in the instance, randomly appearing in the scene and requiring players to find it. The boss poses a significant challenge and must be approached with caution.
Upon death in the alternate realm, there are three resurrection options: 1. Resurrect on the spot; 2. Resurrect at the resurrection point; 3. Resurrect in the camp, similar to the wilderness. Once the challenge attempts are used up, players can only resurrect in the camp, and the current alternate realm instance closes.
It should be noted that using a teleportation scroll to reopen a gate back to the camp also consumes a challenge attempt.
Random Events in the Void Realm: Each entry is accompanied by random events, occurring at various locations within the scene. Completing these events grants special rewards.
Void Realm Ticket Introduction
Each Void Realm map ticket opens one alternate realm instance. Tickets vary in level and quality, corresponding to different difficulties and rewards. Higher levels and qualities yield better drops but are more challenging.
The highest ticket level is 18, with four qualities: Common, Magic, Shining Gold, and Dark Gold. Dark Gold maps come with a unique affix.
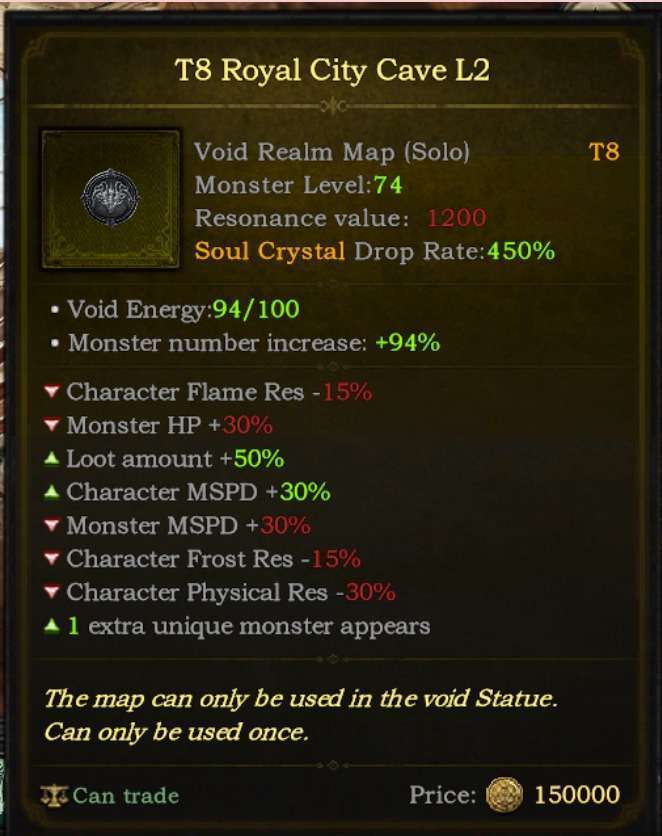
Void Realm Map Ticket Basic Attributes:
- Map Name: Each name corresponds to a scene; different names mean different monster quantities.
- Map Type: Solo/Team, with team-type maps allowing multiple players.
- Monster Level: Indicates the level of monsters in the instance.
- Resonance Value: Required value to open the map.
- Soul Crystal Drop Information
- Void Energy: Can be developed at the Void Realm NPC, affecting the number of monsters in the instance.
- Exclusive Affix: Unique to Dark Gold maps.
- Normal Affixes: Generated randomly upon dropping, divided into buffs and debuffs, can be refined at the NPC.
Main ways to obtain Void Realm Map Tickets:
- Purchase from the Void Realm NPC merchant.
- Drop from monsters in the alternate realm.
- Acquired through marketplace trades.
Team Map Introduction:
When a team ticket is inserted and opened, other members in the same room can enter together. Team map drops are individual and don’t affect each other. Room members must meet entry requirements to open the team alternate realm entrance. If not, a special red prompt appears on the interface.
Room members must ensure no current open alternate realm instances to open a team alternate realm instance.
Currently, alternate realm instances close by:
- Clicking the function button at the Void Realm NPC in the camp.
- Using up entries through entry/exit or death.
- Automatic system closure (instances close automatically if no players are present for a certain duration).
Void Realm Ticket Development
Void Realm tickets can be developed at the Void Realm NPC in the camp, mainly to increase the base number of monsters on the map, change the map ticket’s affixes, and upgrade the ticket’s quality.
- Increasing Map Void Energy
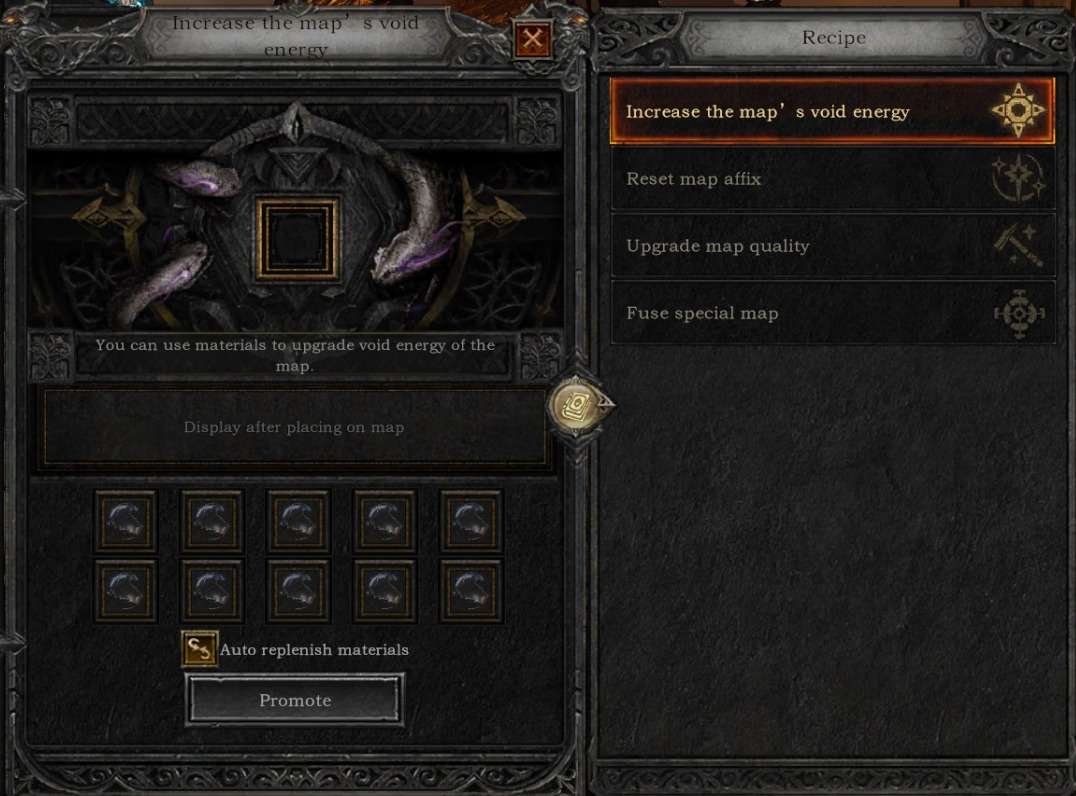
Consuming Void Crystals to increase each map’s void energy. Higher energy values increase the number of monsters, affecting instance rewards. Void Crystals are obtained from alternate realm instance drops.
- Resetting Map Affixes.
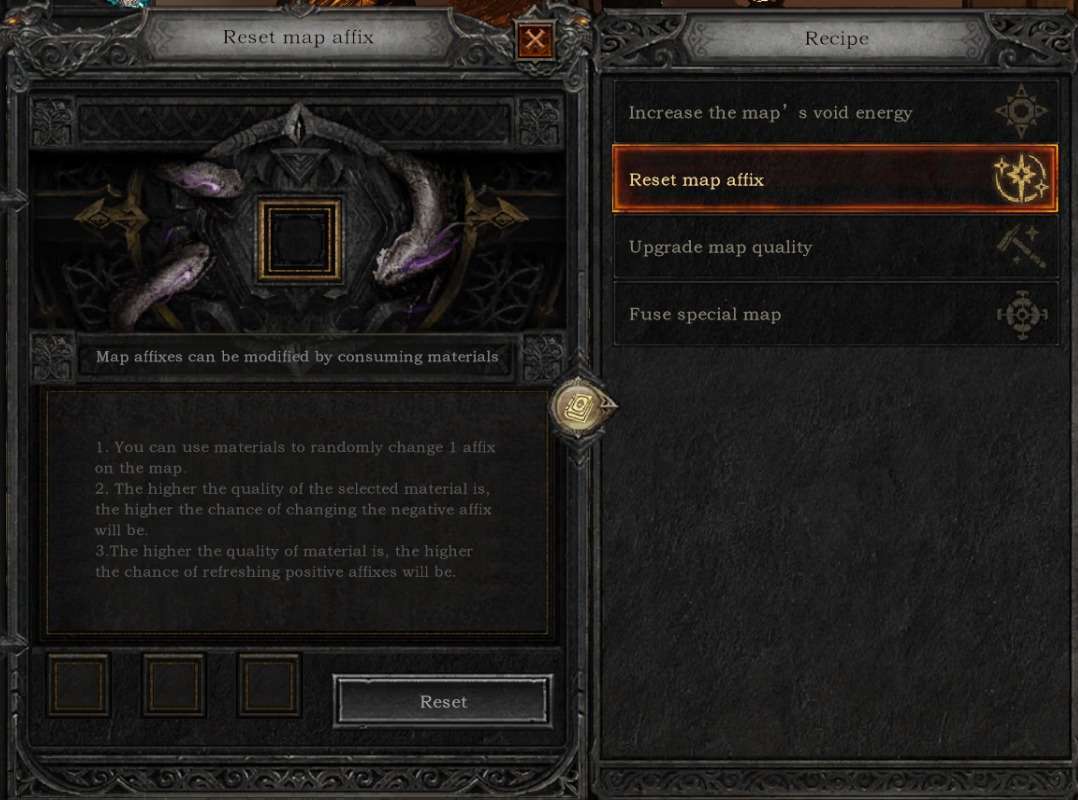
Each map ticket comes with different affixes. Many negative affixes, like immunity, can make the map unplayable, so it’s crucial to reset affixes before opening a map to replace them with beneficial ones. Resetting consumes Void Feathers, mainly obtained from alternate realm drops.
- Upgrading Map Quality.
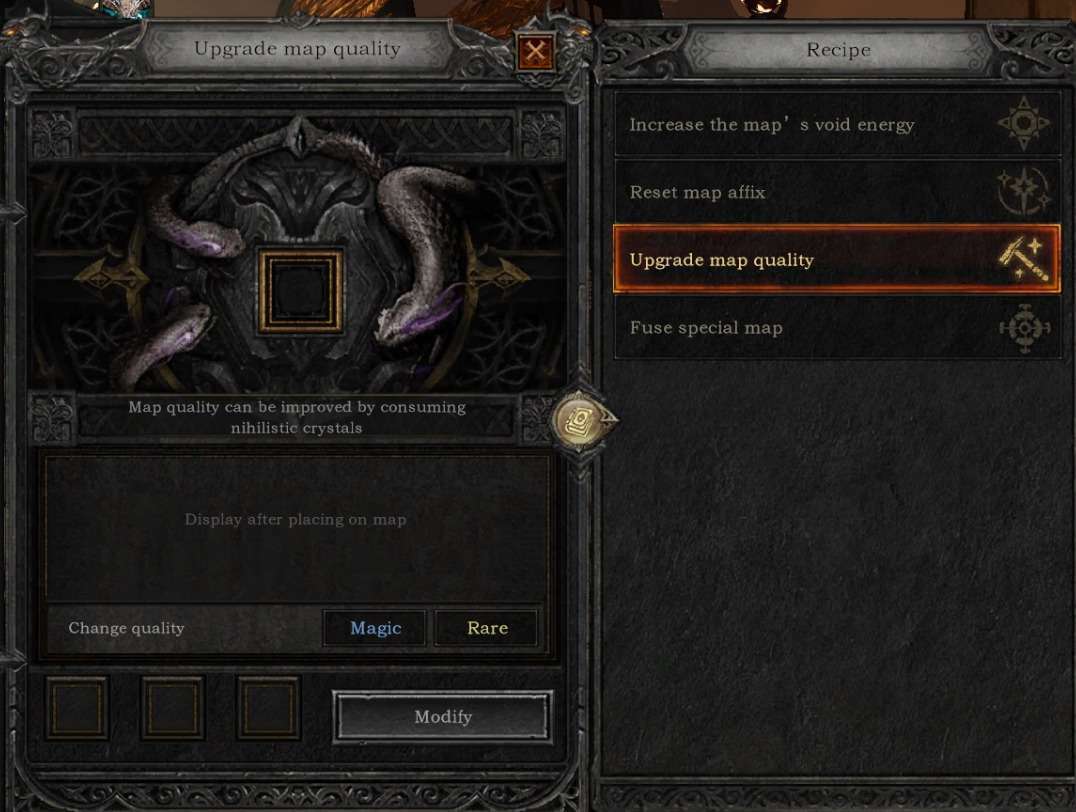
Consuming crystal cores and Soul Crystals to upgrade map quality. Higher quality maps yield better drops.
- Special Map Synthesis.
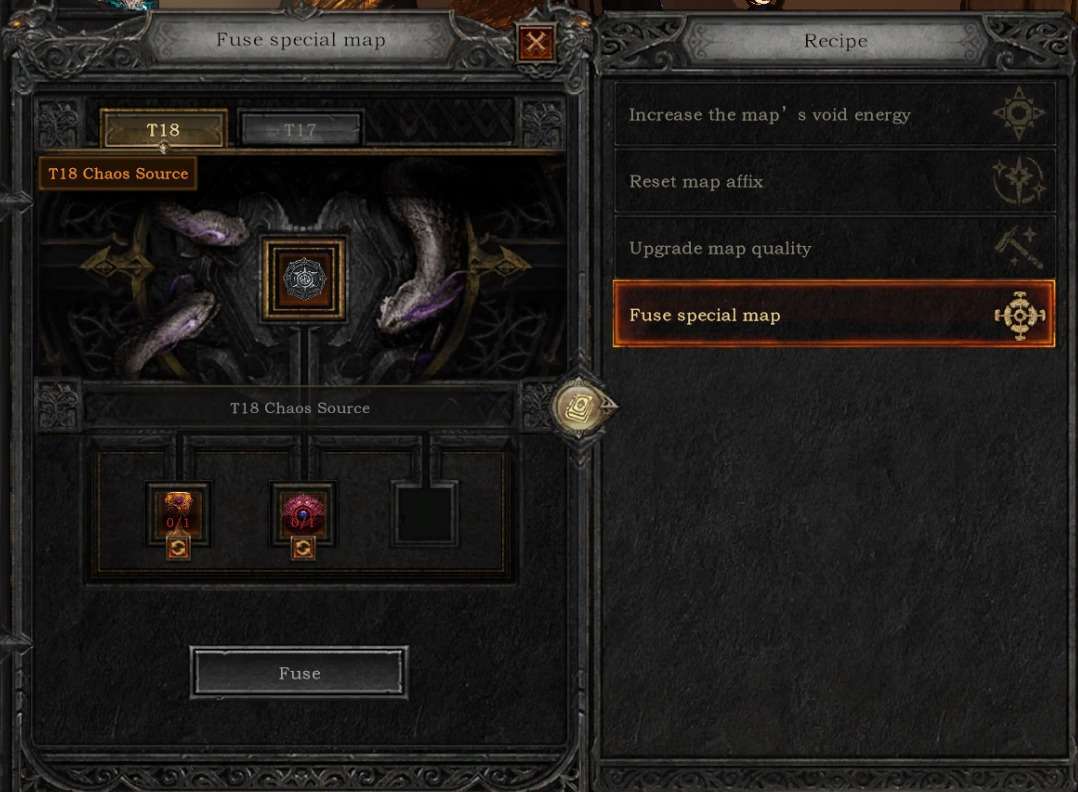
Void Realm T17 and T18 maps can’t be obtained through drops and are synthesized using special materials. T17 map synthesis materials are obtained from T16 drops, and T18 from T17 drops.
Void Realm Energy (Berserk Mode)
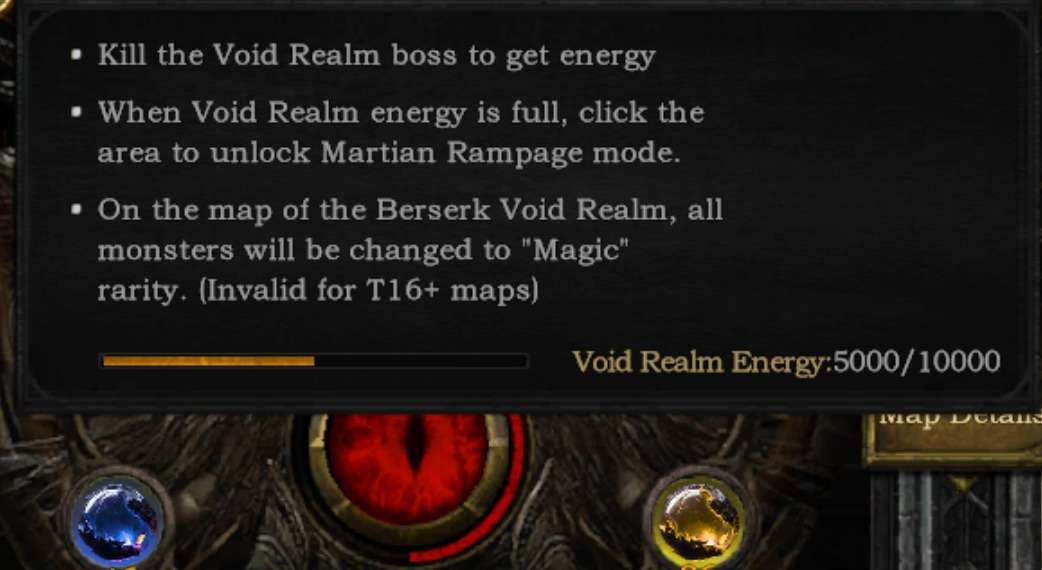
Killing a Void Realm boss grants Void Realm energy. When the energy bar is full, Berserk Mode can be activated. Once activated and a map ticket is inserted, all monsters in the map upgrade to magic quality.
Gold Farming Tips
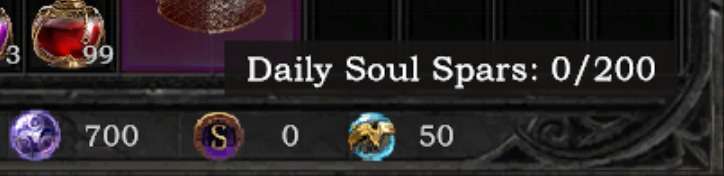
The game’s currency, Soul Crystals, are dropped in the Void Realm but only in the first 20 daily instances.
Daily Soul Crystal drops have a cap influenced by the number of NFT equipment worn. Higher levels and quantities of NFT equipment increase the cap.
| NFT Level | NFT Equipped | Soul Crystal Drop Limit |
|---|---|---|
| 30 | 1 | 1,000 |
| 30 | 3 | 3,700 |
| 30 | 5 | 8,000 |
| 30 | 7 | 15,000 |
| 30 | 9 | 30,000 |
| 40 | 1 | 3,000 |
| 40 | 3 | 11,100 |
| 40 | 5 | 24,000 |
| 40 | 7 | 45,000 |
| 40 | 9 | 90,000 |
Soul Crystals mainly drop from elite monsters and bosses in the alternate realm, with fewer drops from smaller monsters. Typically, players accumulate Berserk energy, choose a map with many easy-to-defeat monsters, maximize void energy, refine affixes, and farm crystals in Berserk Mode for maximum profit.
Note! NFT equipment has a chance to drop directly in the Void Realm instances!
Trial of Heaven
The Trial of Heaven is a seasonal ladder competition gameplay in the game, with the difficulty increasing with each completed level. Different tiered Trial Tokens, needed to attempt the challenge, drop with a certain probability when defeating corresponding tier bosses in the Void Realm.
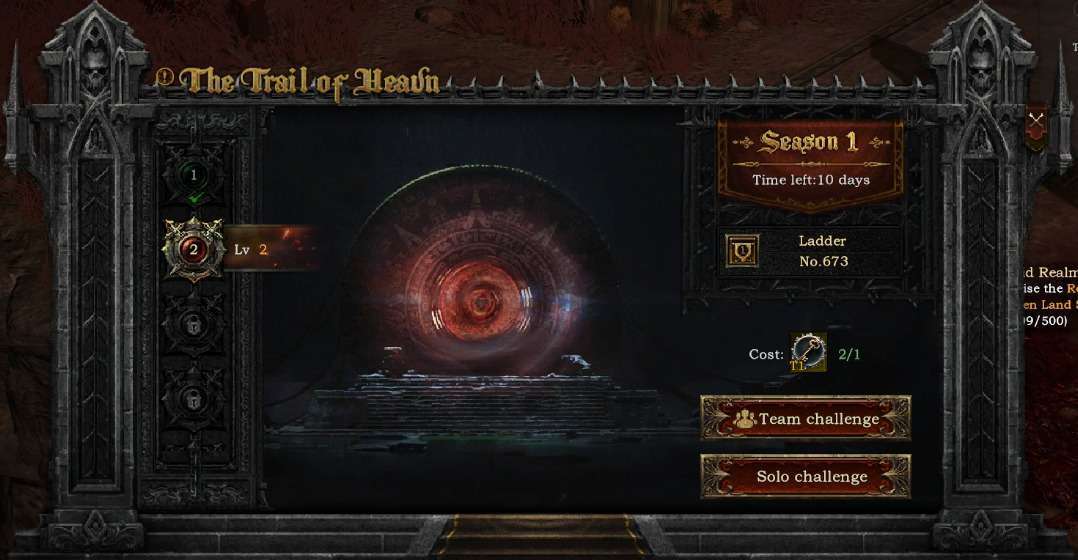
Solo Challenge
Upon entering the trial, players need to defeat enemies to progress. When the progress bar is filled, the Trial Guardian appears. Defeat the Guardian within the time limit to win the layer’s drop rewards.
After defeating the Guardian, a mysterious NPC merchant appears, offering precious items for sale in exchange for Holy Light Shards dropped by the Guardian.
Multiplayer Challenge
Players can also choose to challenge with others. In a room, all members must have unlocked the solo challenge qualification for that layer to select multiplayer challenge.
For a 2-player room, the classes of the two characters must be different; for a 3-4 player room, at least three different classes are required.
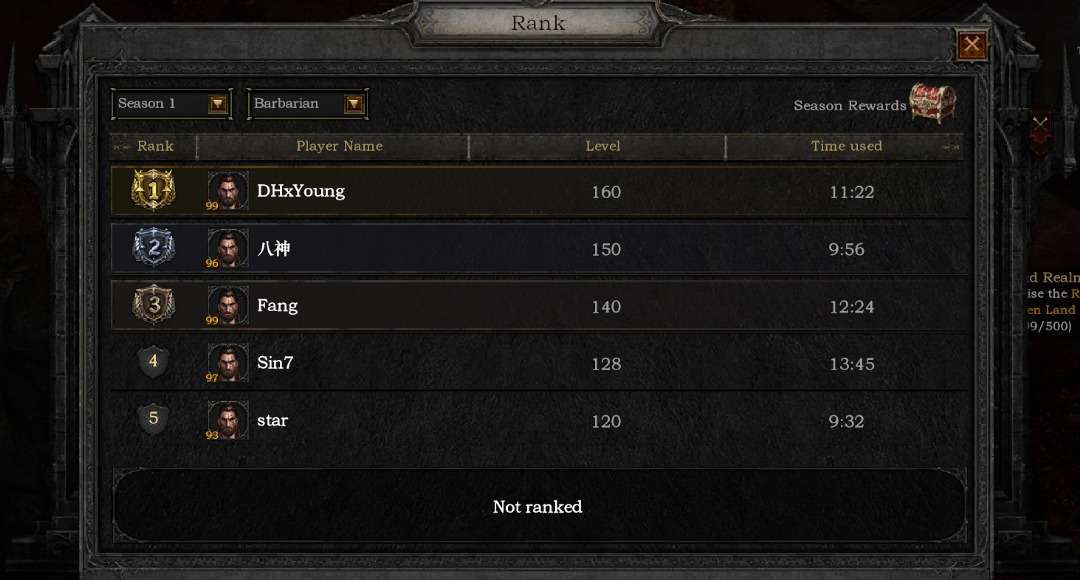
Ladder Rankings
- Whether solo or multiplayer, completing the highest trial layer in the shortest time records your rank on the ladder.
- Each class has its solo ladder ranking, while multiplayer challenges have a separate ladder ranking.
- Each ladder ranking has its seasonal rewards, distributed at the end of the season based on current rankings.
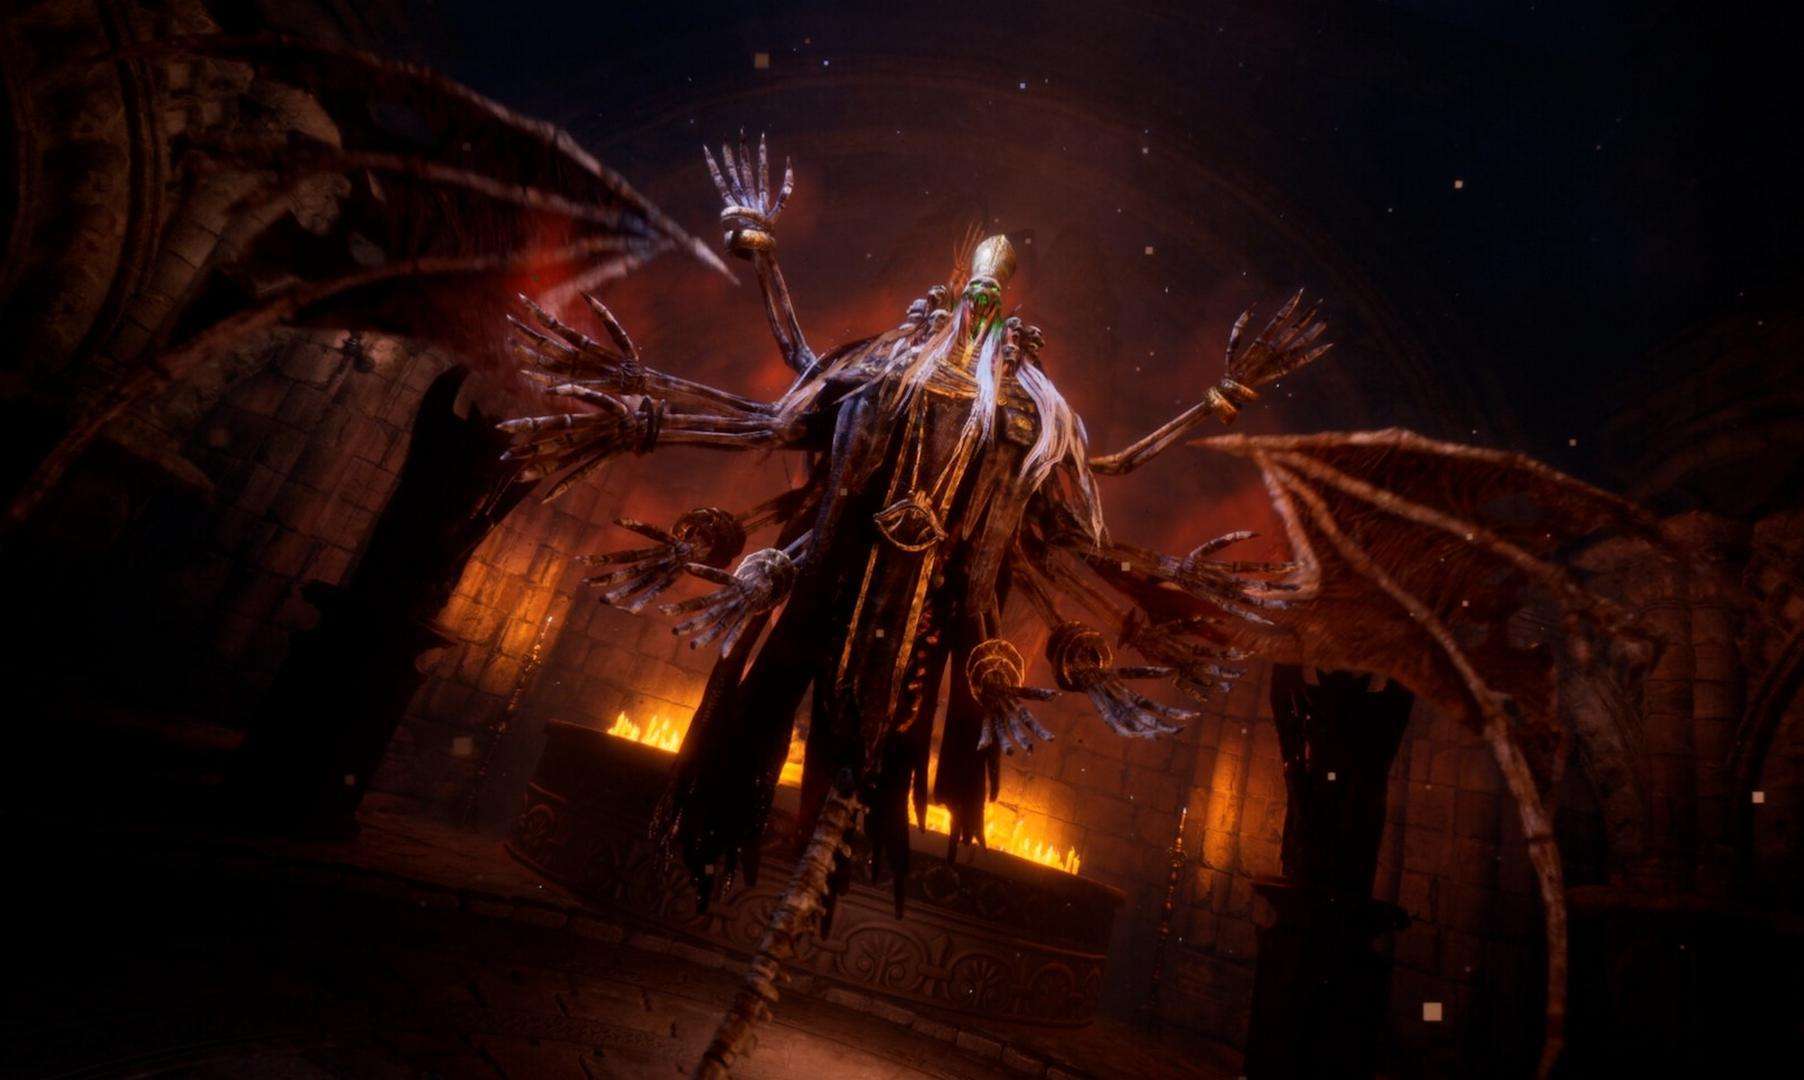
Mystery of Chaos
The Mystery of Chaos is the main way to obtain NFT equipment and other NFT items (like fashion effects). Entry requires equipped NFT equipment and Soul Crystals. In the Mystery of Chaos, only the stats of NFT equipment are calculated; other types of equipment stats do not apply. Each entry into the instance consumes the Chaos Energy of your NFT, an inherent attribute of each NFT piece, which can also be increased by sacrificing other NFT equipment.
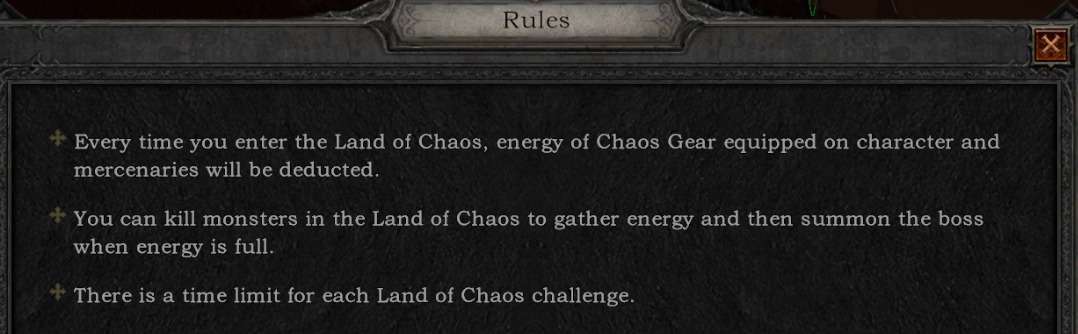
Note the time limit for entering the Mystery of Chaos; exceeding the time limit without clearing will only yield the minimum rewards.
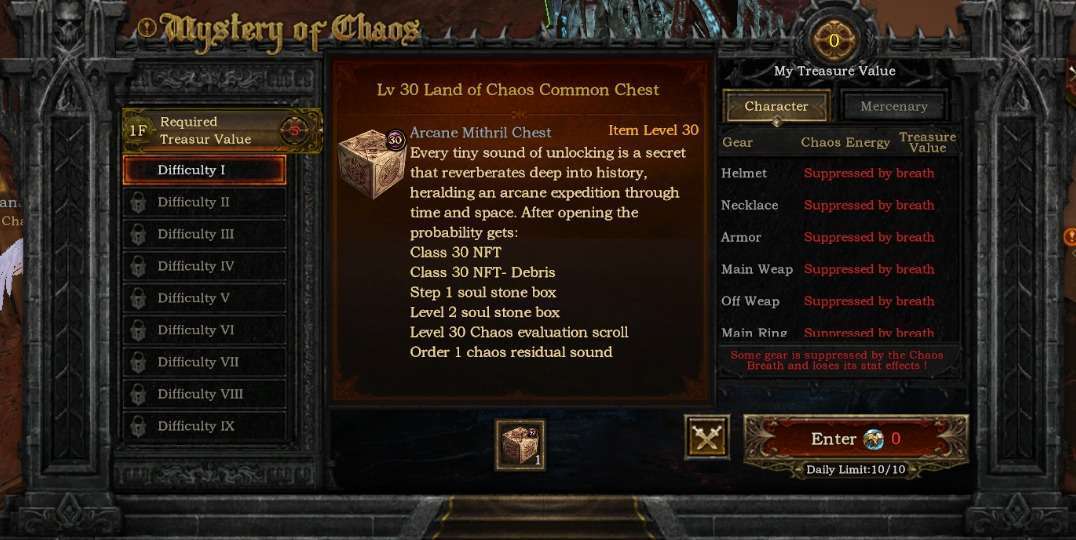
Mystery of Chaos chests yield NFT shards, exchangeable with the Mystery of Chaos merchant for NFT treasure boxes, starting your journey to riches.

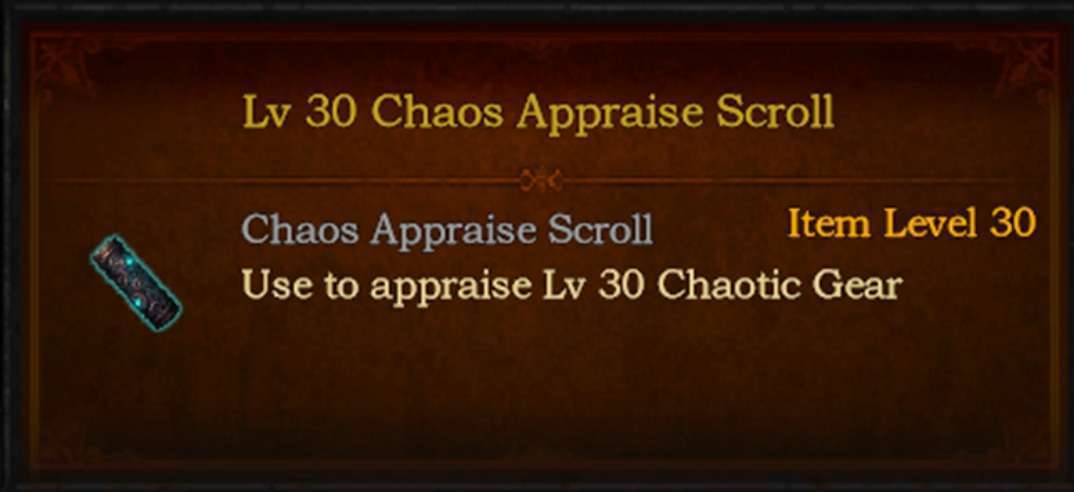
Chaos Identification
Identifying an NFT item requires 10 identification scrolls and takes about 2 hours.

Chaos Energy Recharging
Low Chaos Energy affects the number of entry tickets to the Sanctuary. Recharging requires ‘identified’ NFT equipment.
Recharging involves sacrificing 50% of the Chaos Energy of a full-energy ‘identified’ NFT as an offering to the main equipment, followed by the destruction of the offering.
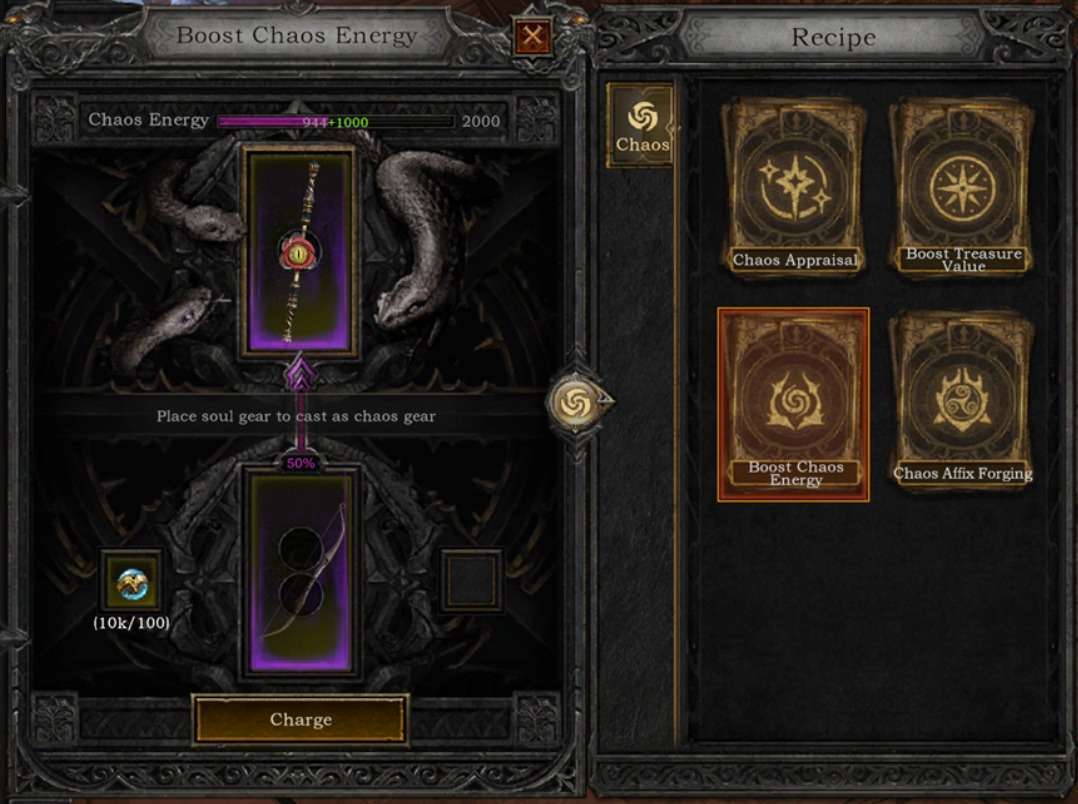
Players should note that Chaos equipment must have over 40% Chaos value to be placed back into the Chaos backpack.

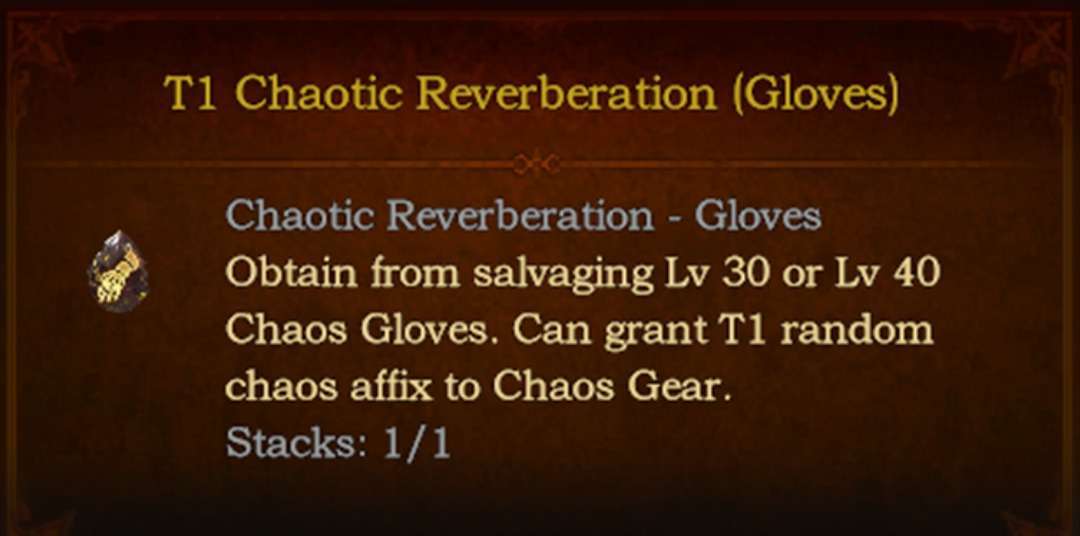
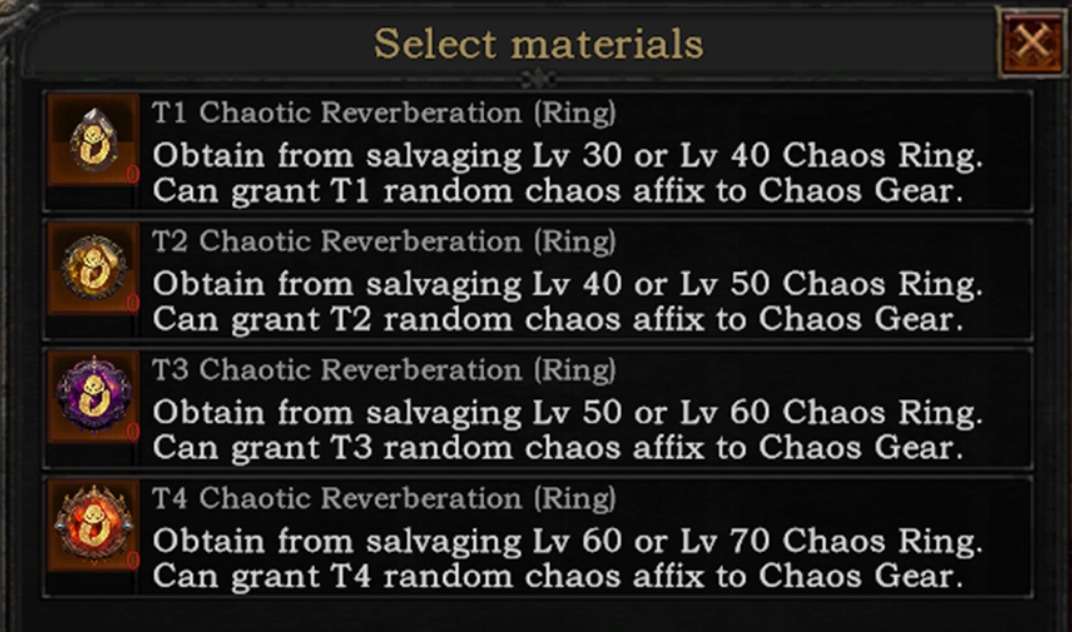
Chaos Affix Crafting
Mystery of Chaos chests may drop Chaos Echoes, materials for adjusting Chaos affixes. Chaos Echo materials are categorized as weapons, necklaces, rings, helmets, clothes, belts, gloves, shoes, etc.
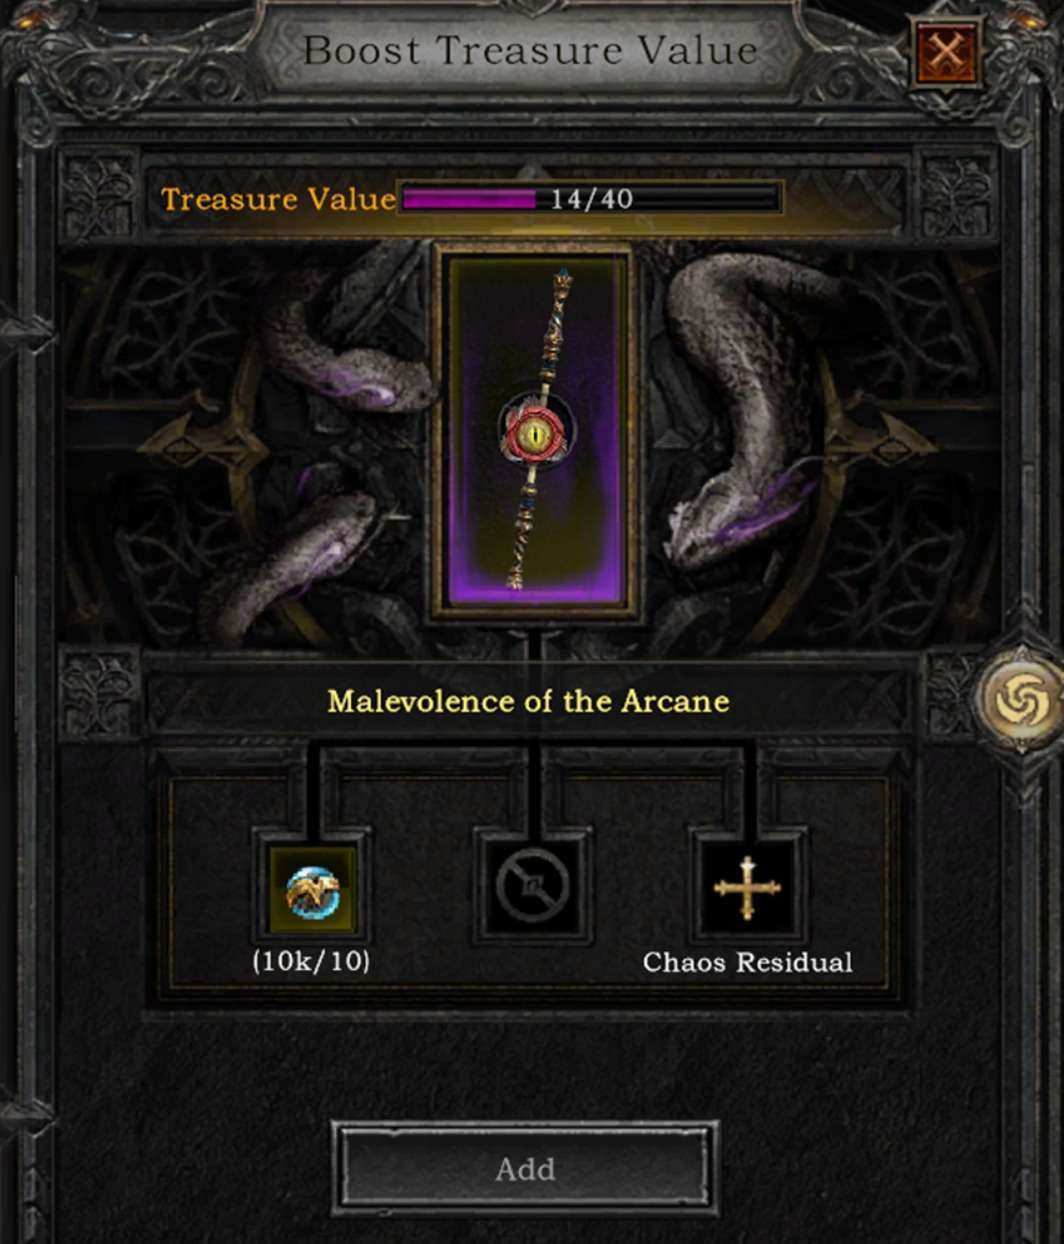
Treasure Value Increase
Dismantling NFT equipment yields Chaos Ashes, a Treasure Value item that can be added to other NFT equipment, stacking with the existing Treasure Value up to the limit.